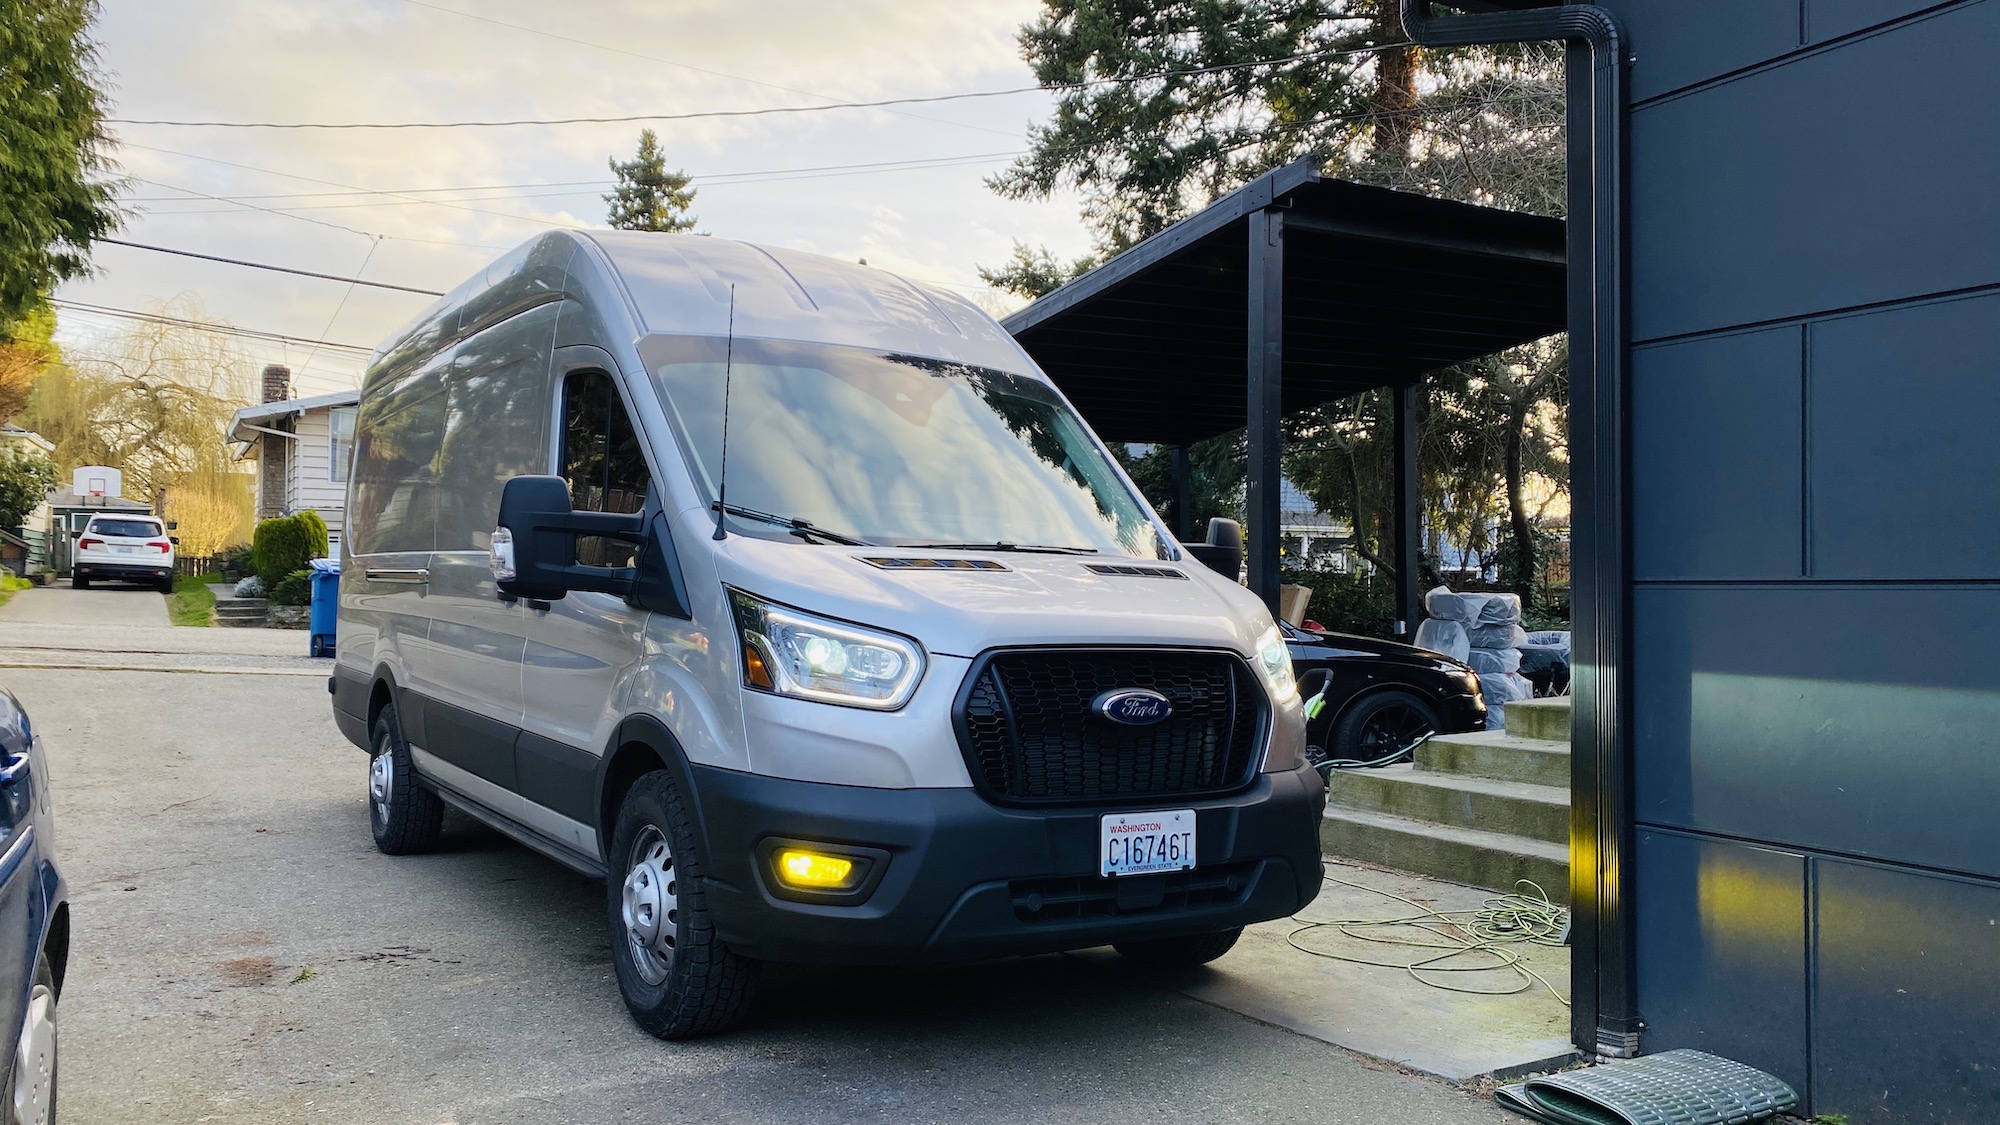
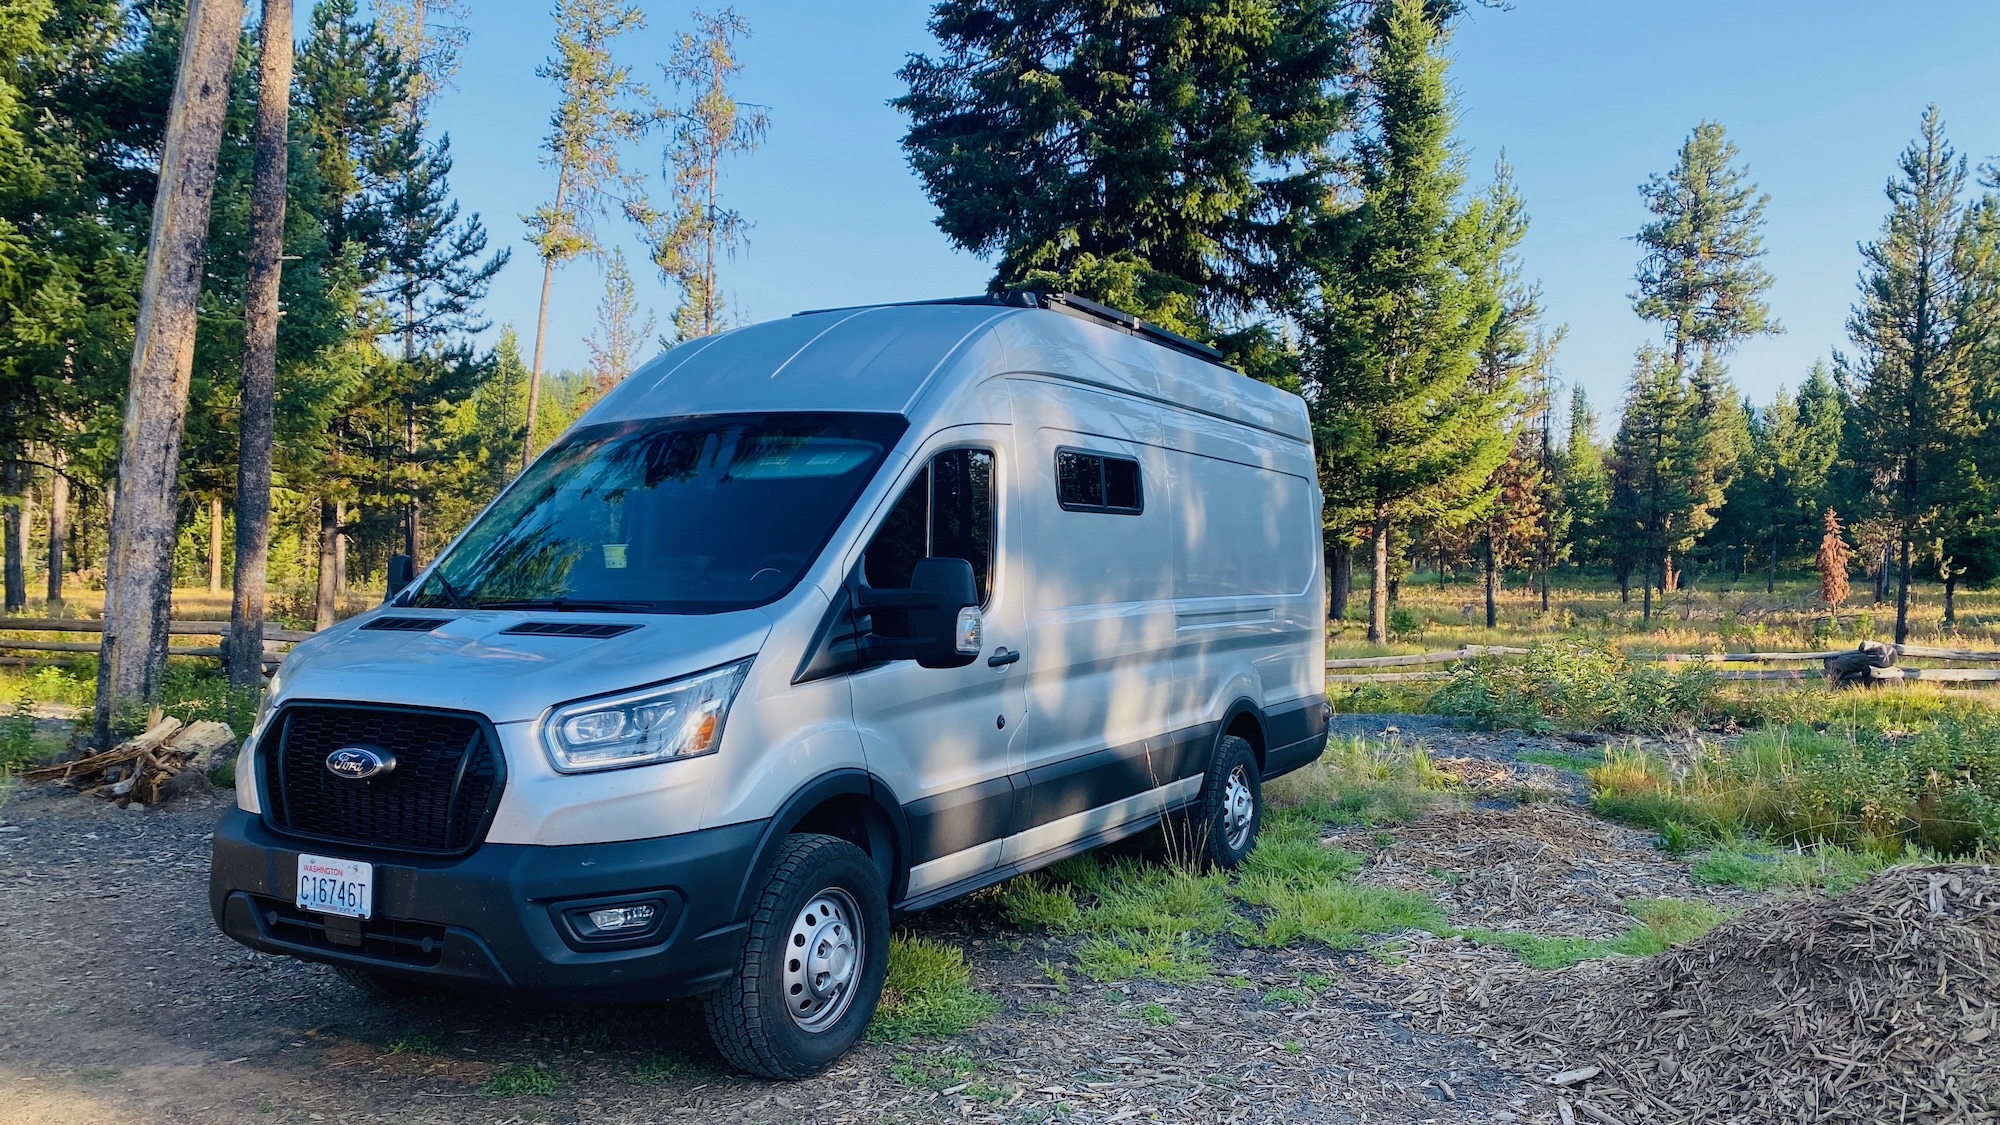
My Build - 2020 Ford Transit AWD HR Extended Ecoboost
Picking the right van & where to order?
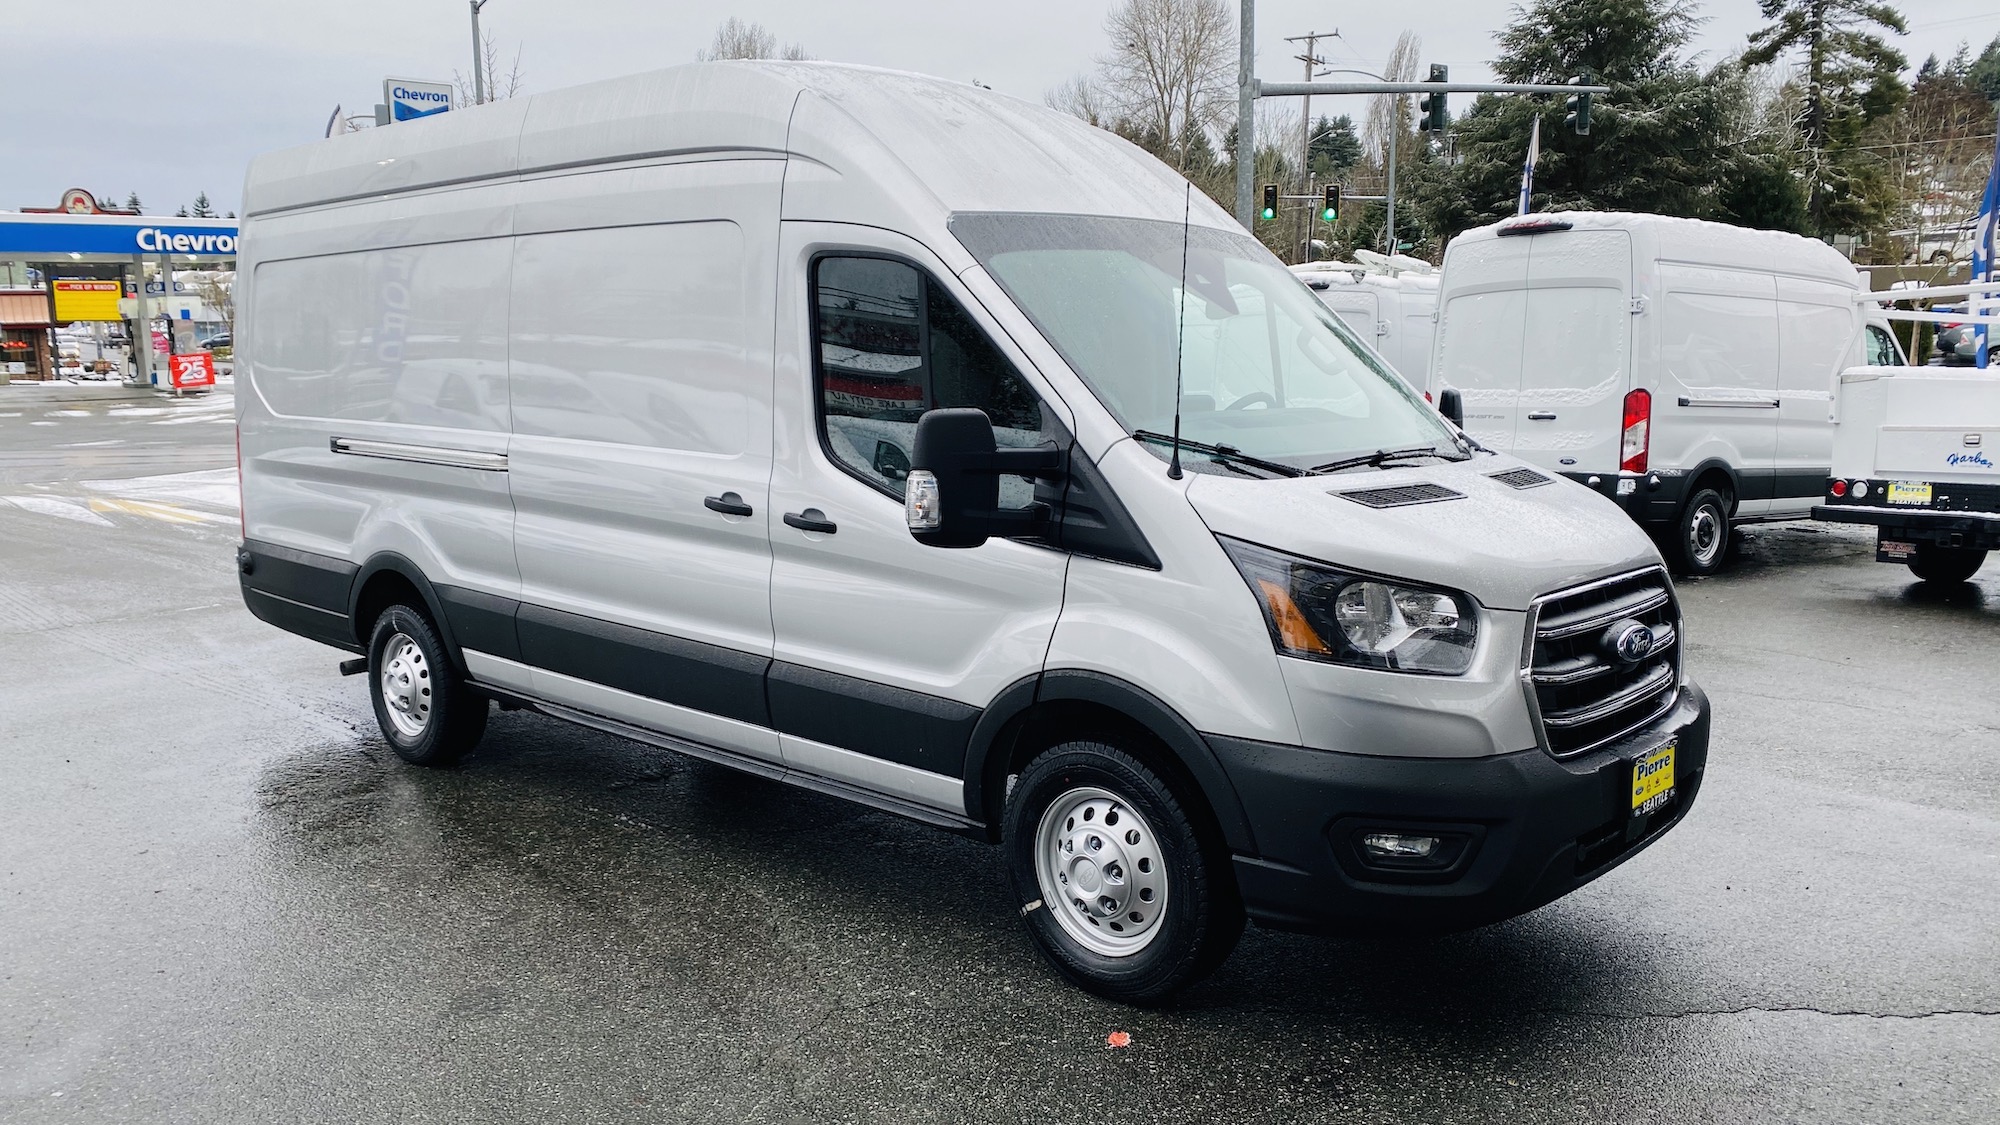
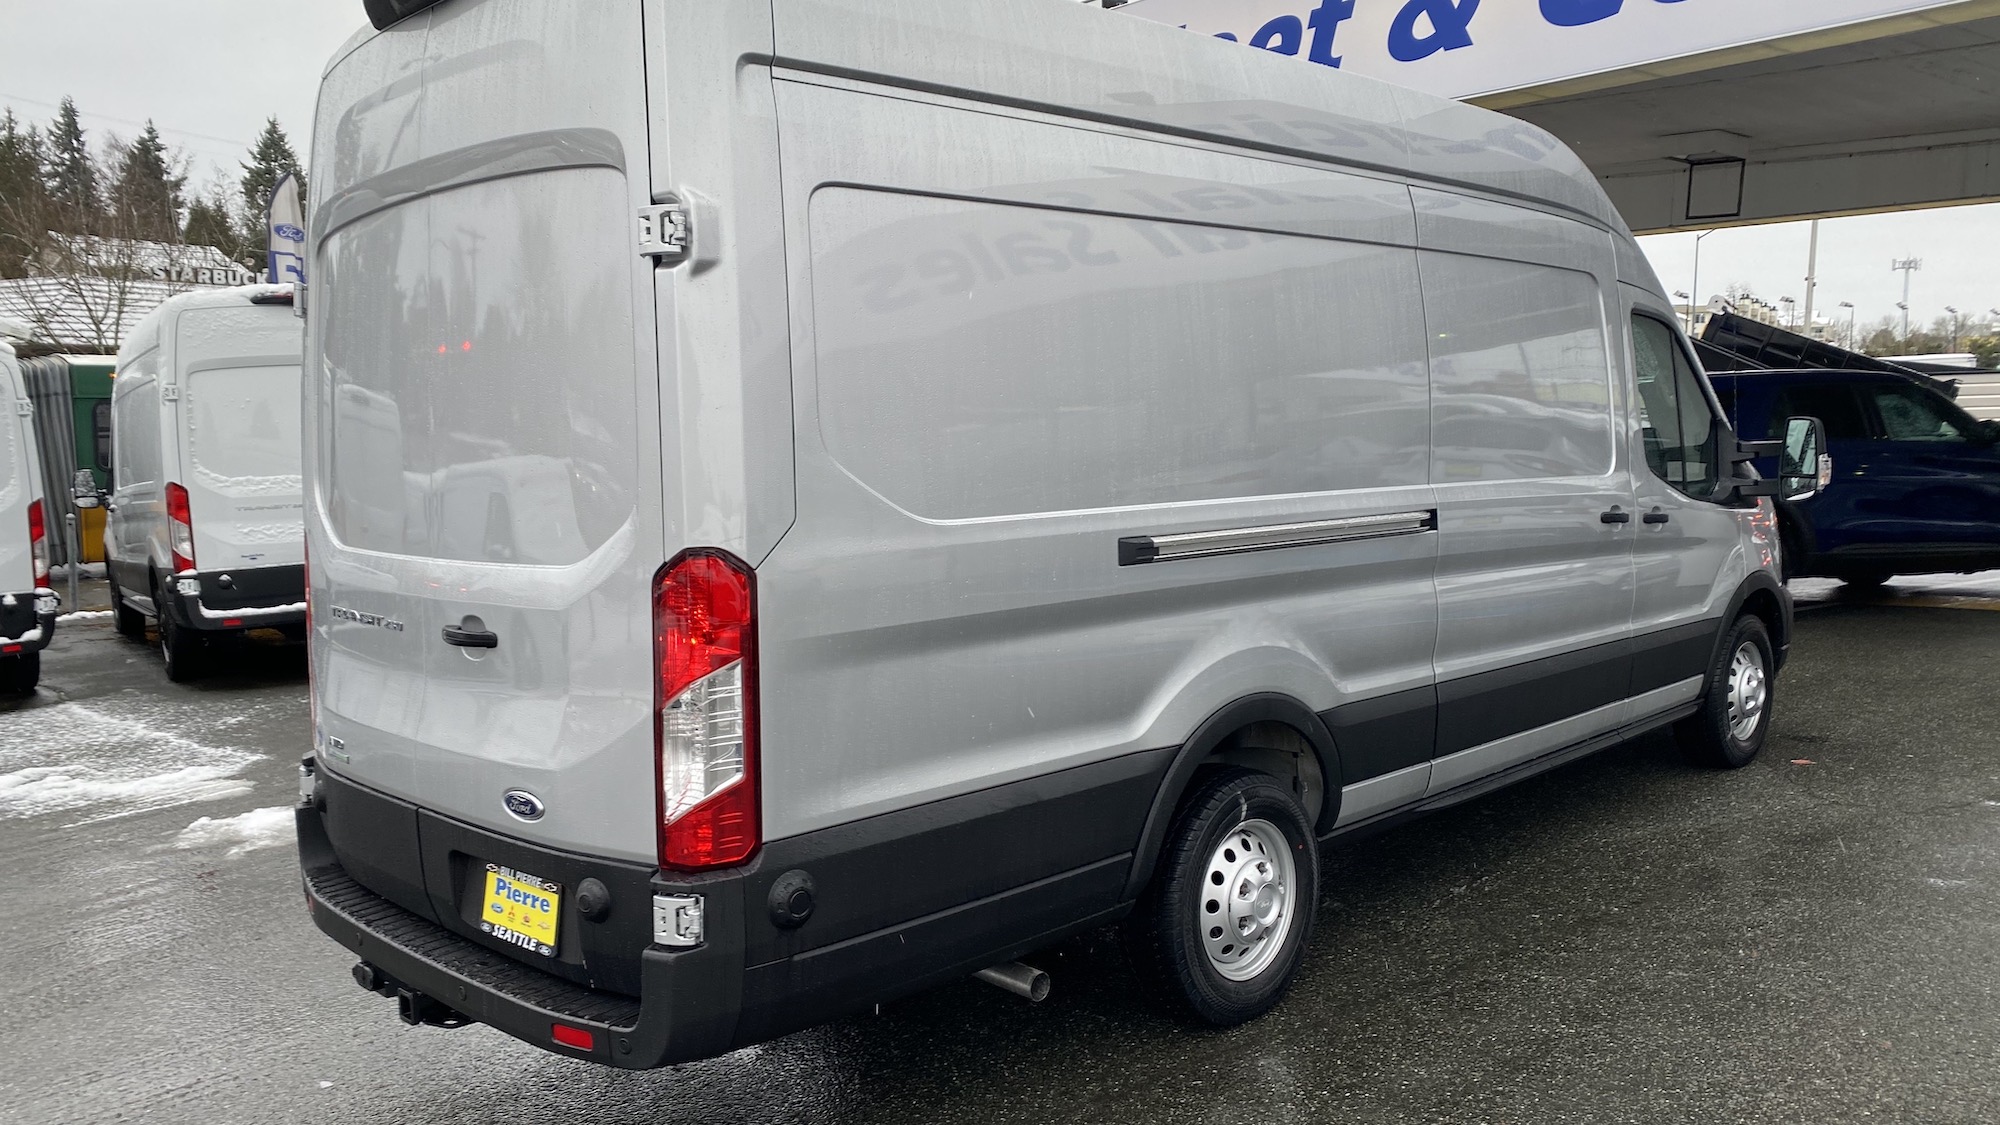
I weighed the different cargo van options and was impressed with the improvements Ford made to the 2020 Transit model. I visited my dealer to special order in August of 2019. I settled on a High Roof Extended Length with All Wheel Drive and the EcoBoost motor. I opted for a pretty well equipped model with Radar Cruise, Blindspot Monitoring, Rear Parking Assist, Sync 3 Audio w/ 8 inch Screen, and 31 gallon extended fuel tank. I decided the single alternator and AGM battery was plenty. All alternators on the 2020+ Transit are 250HD Smart Alternators and capable of a high output at idle. After ordering it took about 6 months and was delivered in Janurary of 2020. When you are ordering from a dealer be sure they are a high volume dealer and have an available allocation to put your order in. Many dealers will accept your deposit and have you wait until they get an allocation before submitting your order to Ford which can take a long time and is avoidable. I purchased from Bill Pierre Ford in Seattle, WA. They provide fleet orders to the City of Seattle and have a high allocation due to that volume.
Starting the build
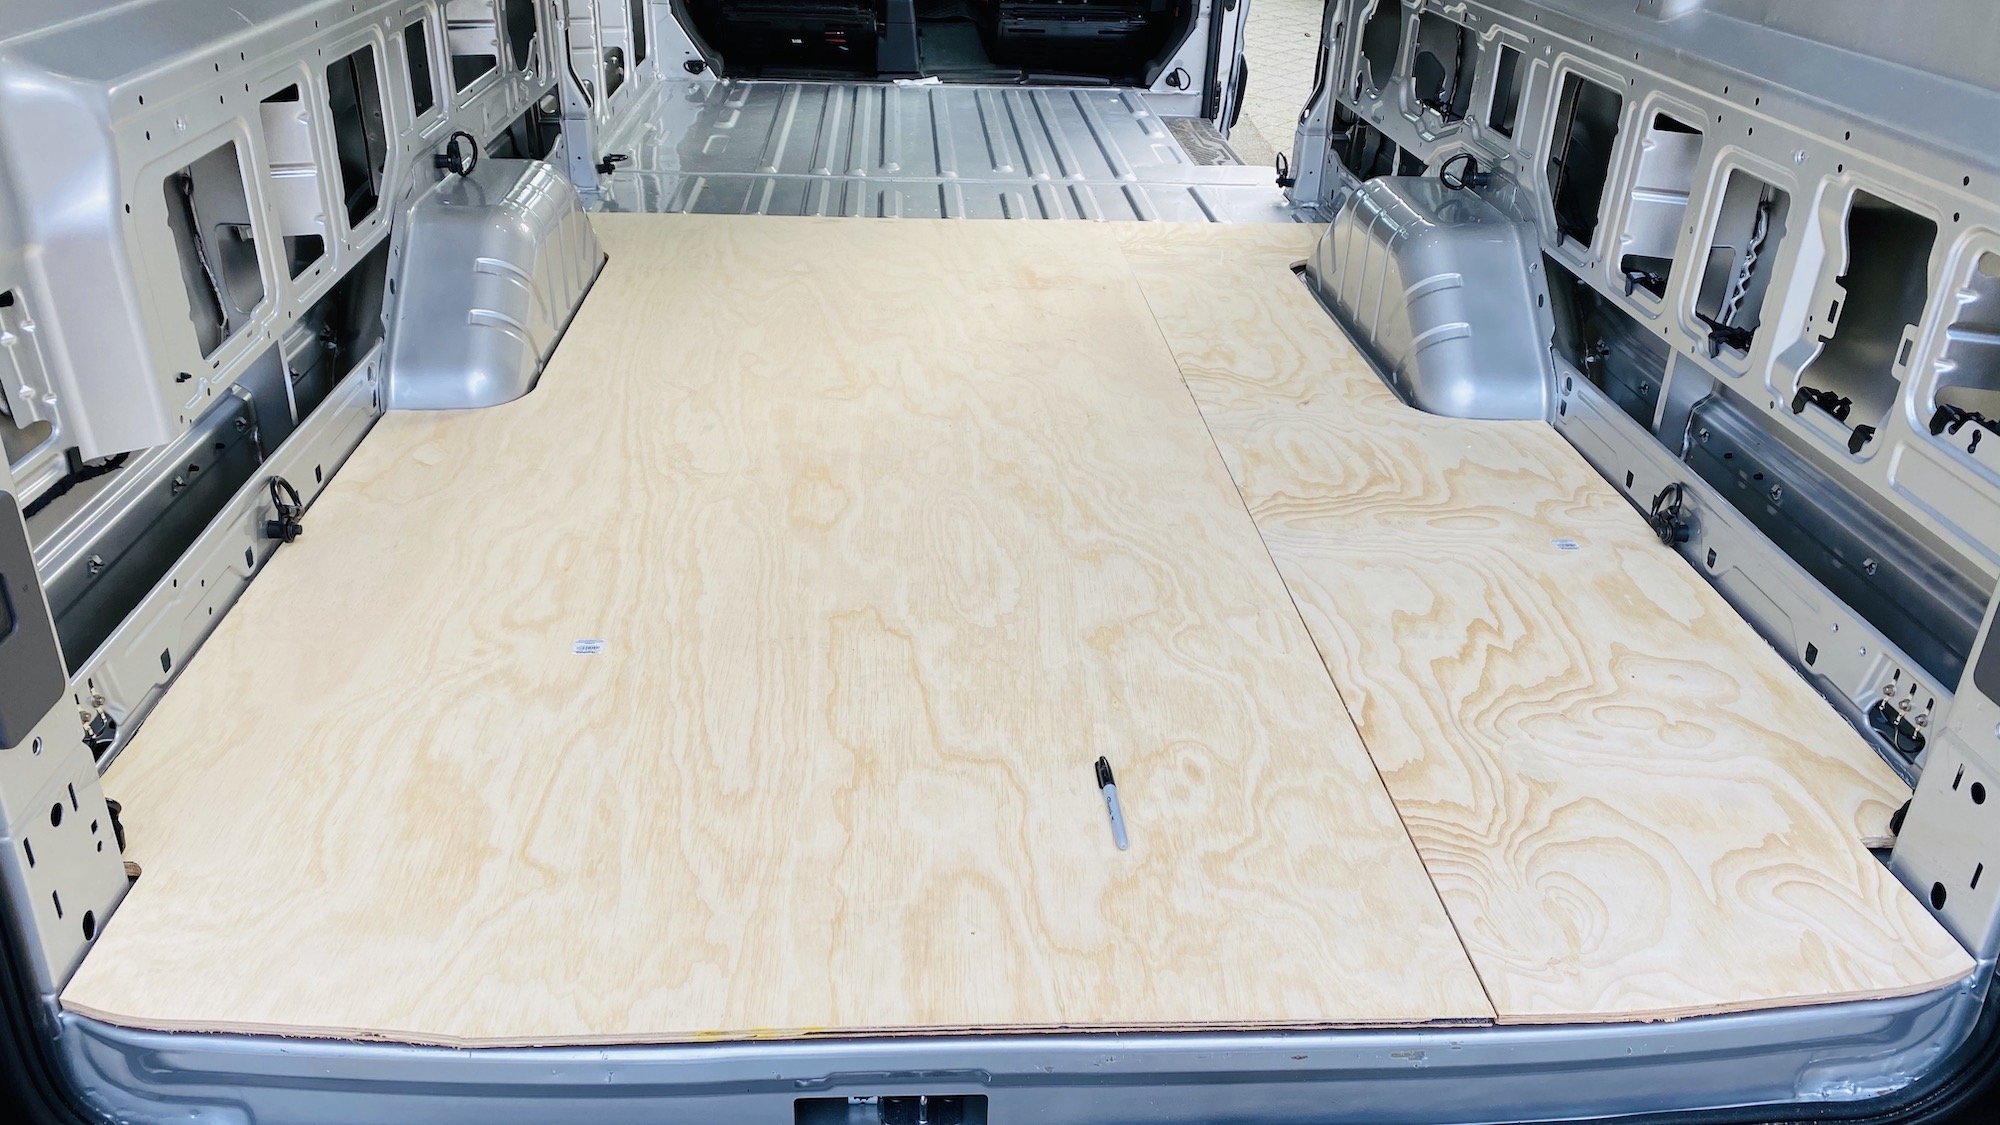
I started at the bottom on the flooring. To fill the gaps in-between the floor ribs and add more insulation I used a BedRug VanTred which is a mat you can buy that is perfectly cut to fit the floor of your van and evens out the ribs in the floor. With that down I put a piece of 1” PolyIso Foam insulation ontop of it and 15/32 Underlayment Plywood on top of that I used foam board construction adhesive to adhere the plywood to the foam to avoid any movement between them. I didn’t screw or bolt these layers down to the van so it is floating and secured with the items sitting ontop of it.
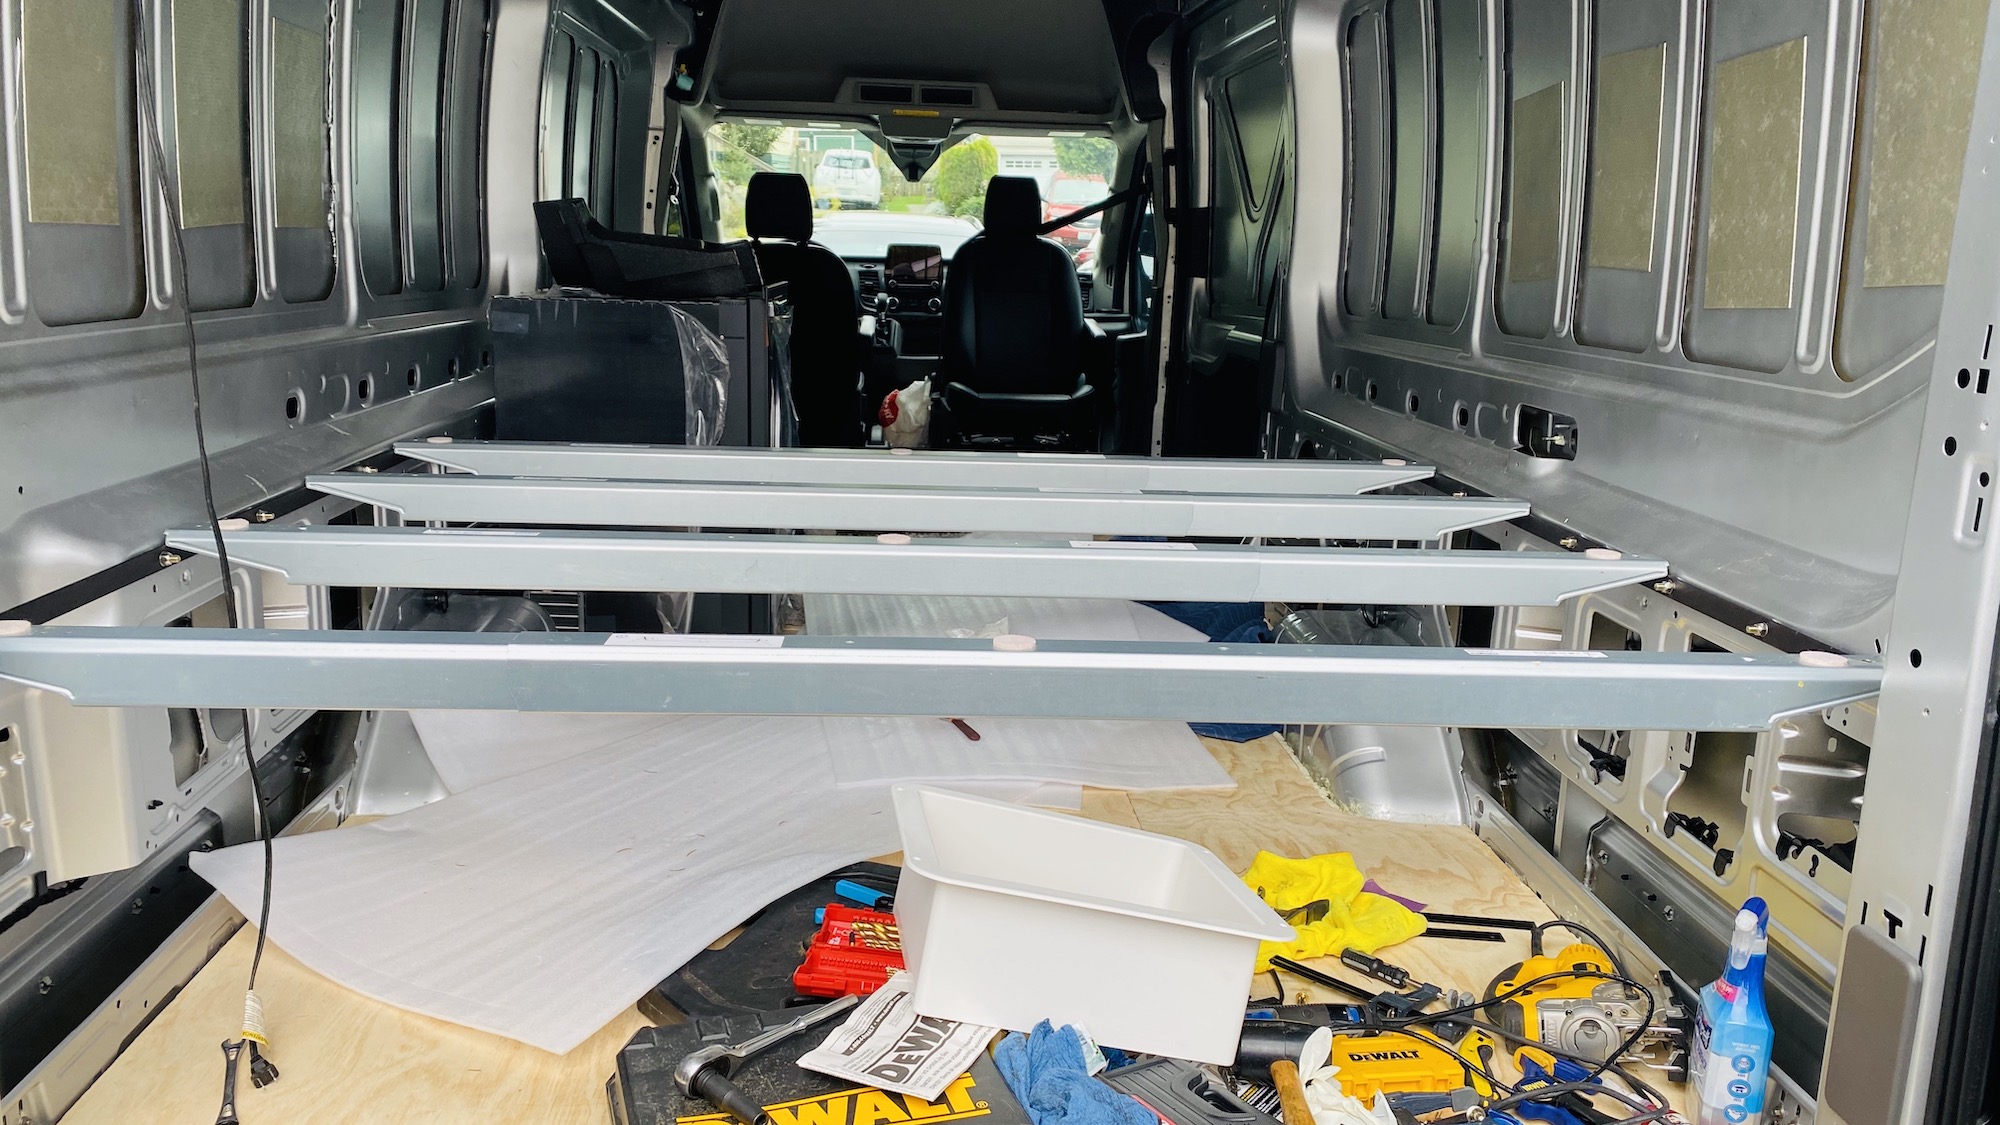
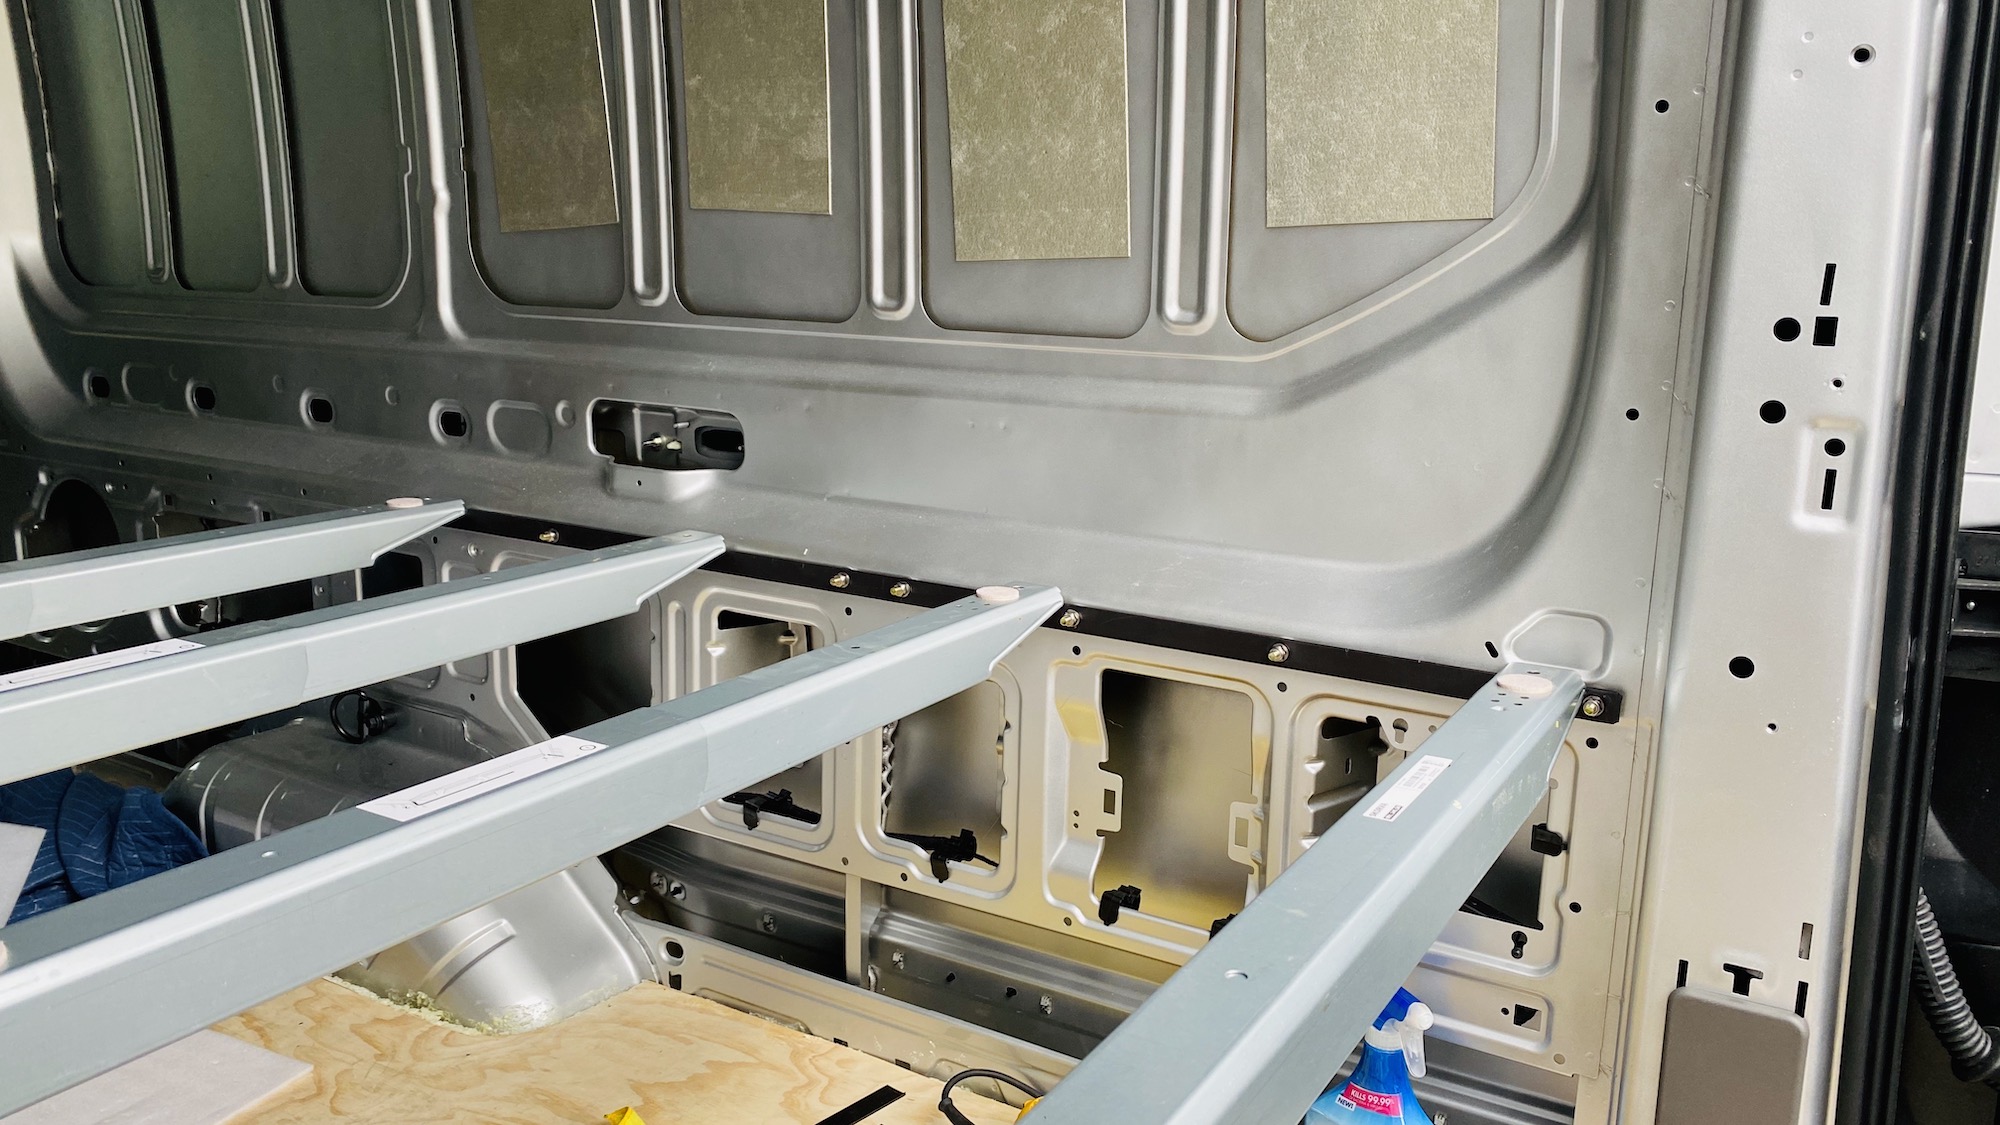
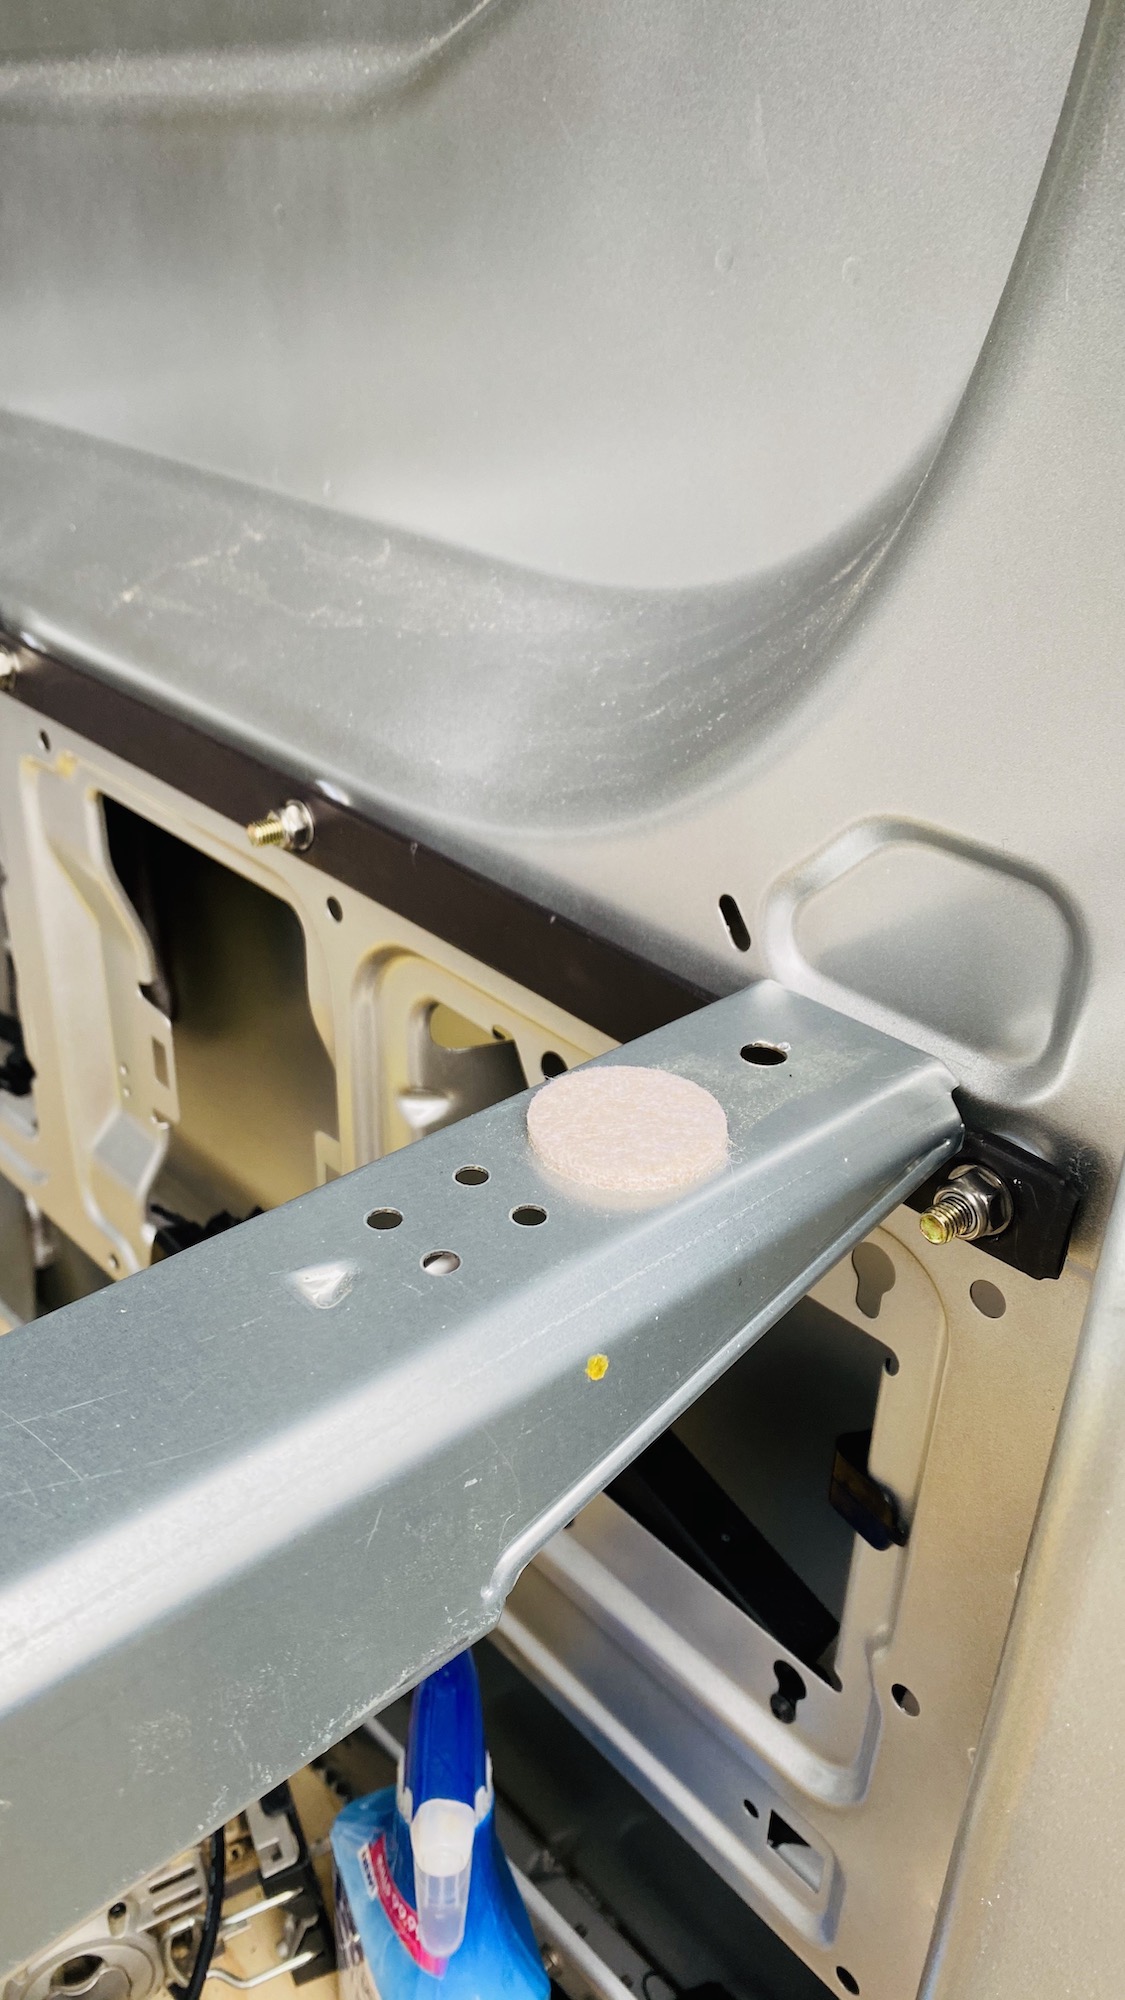
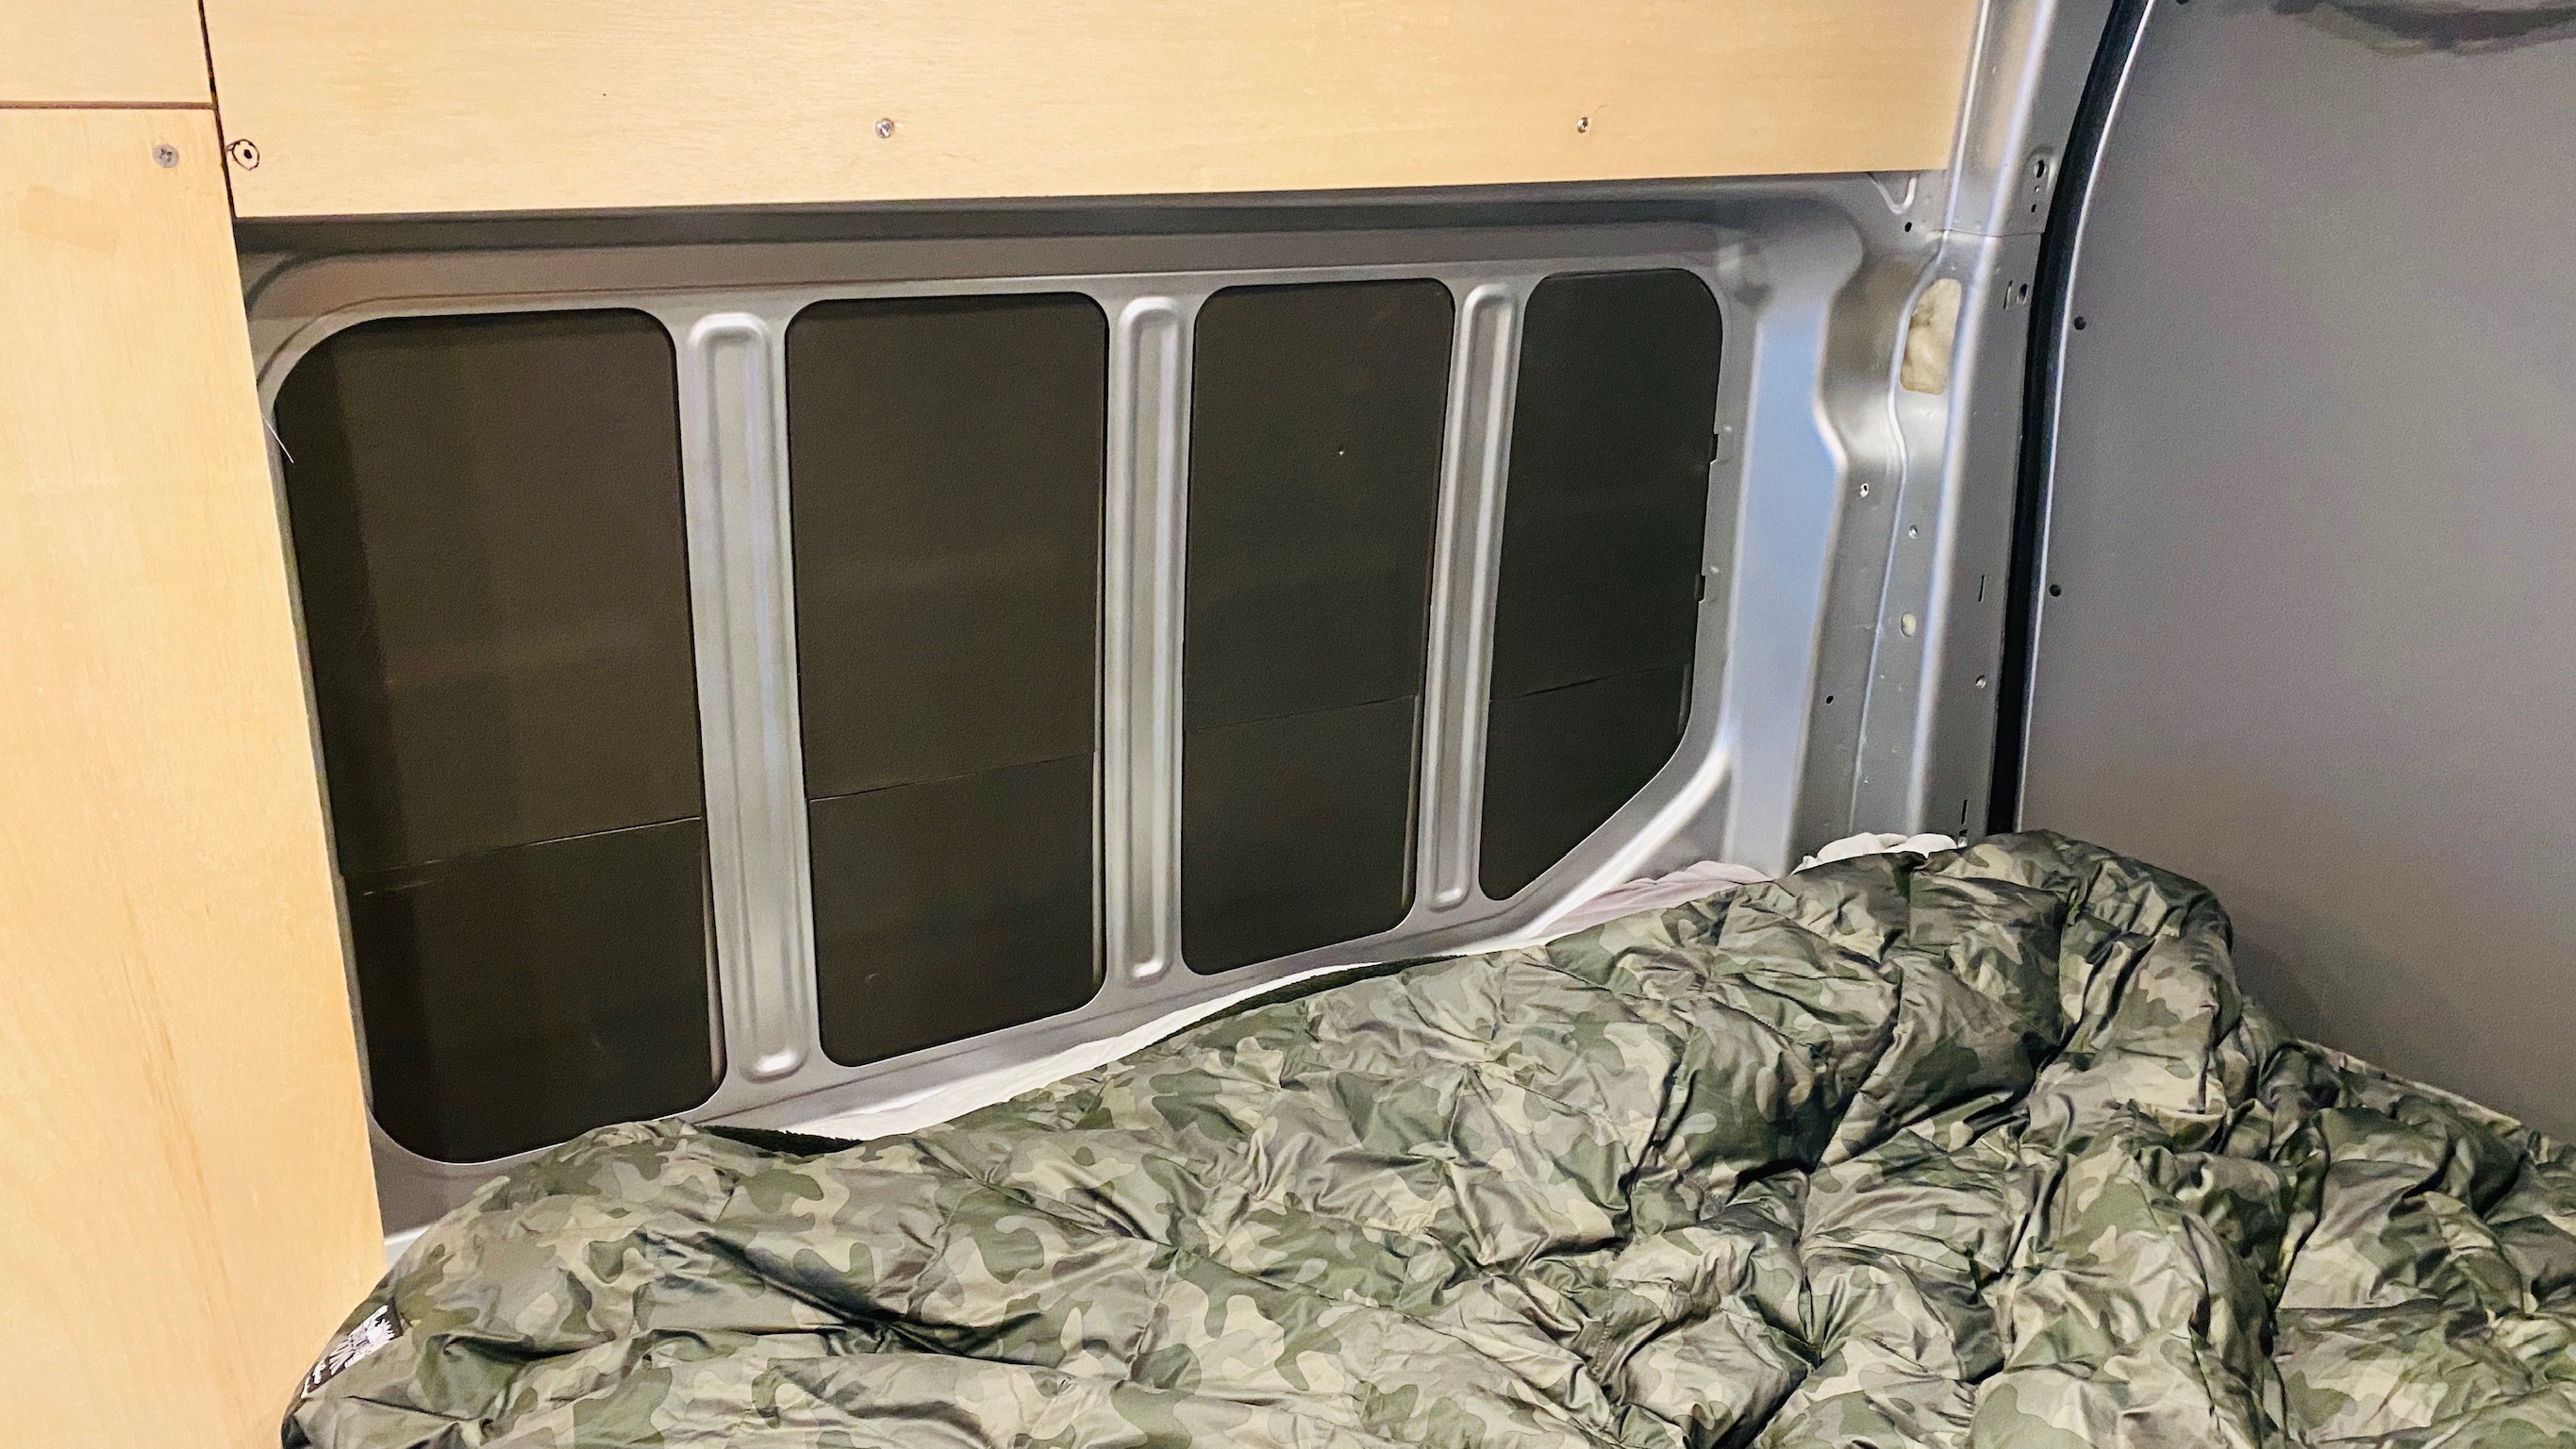
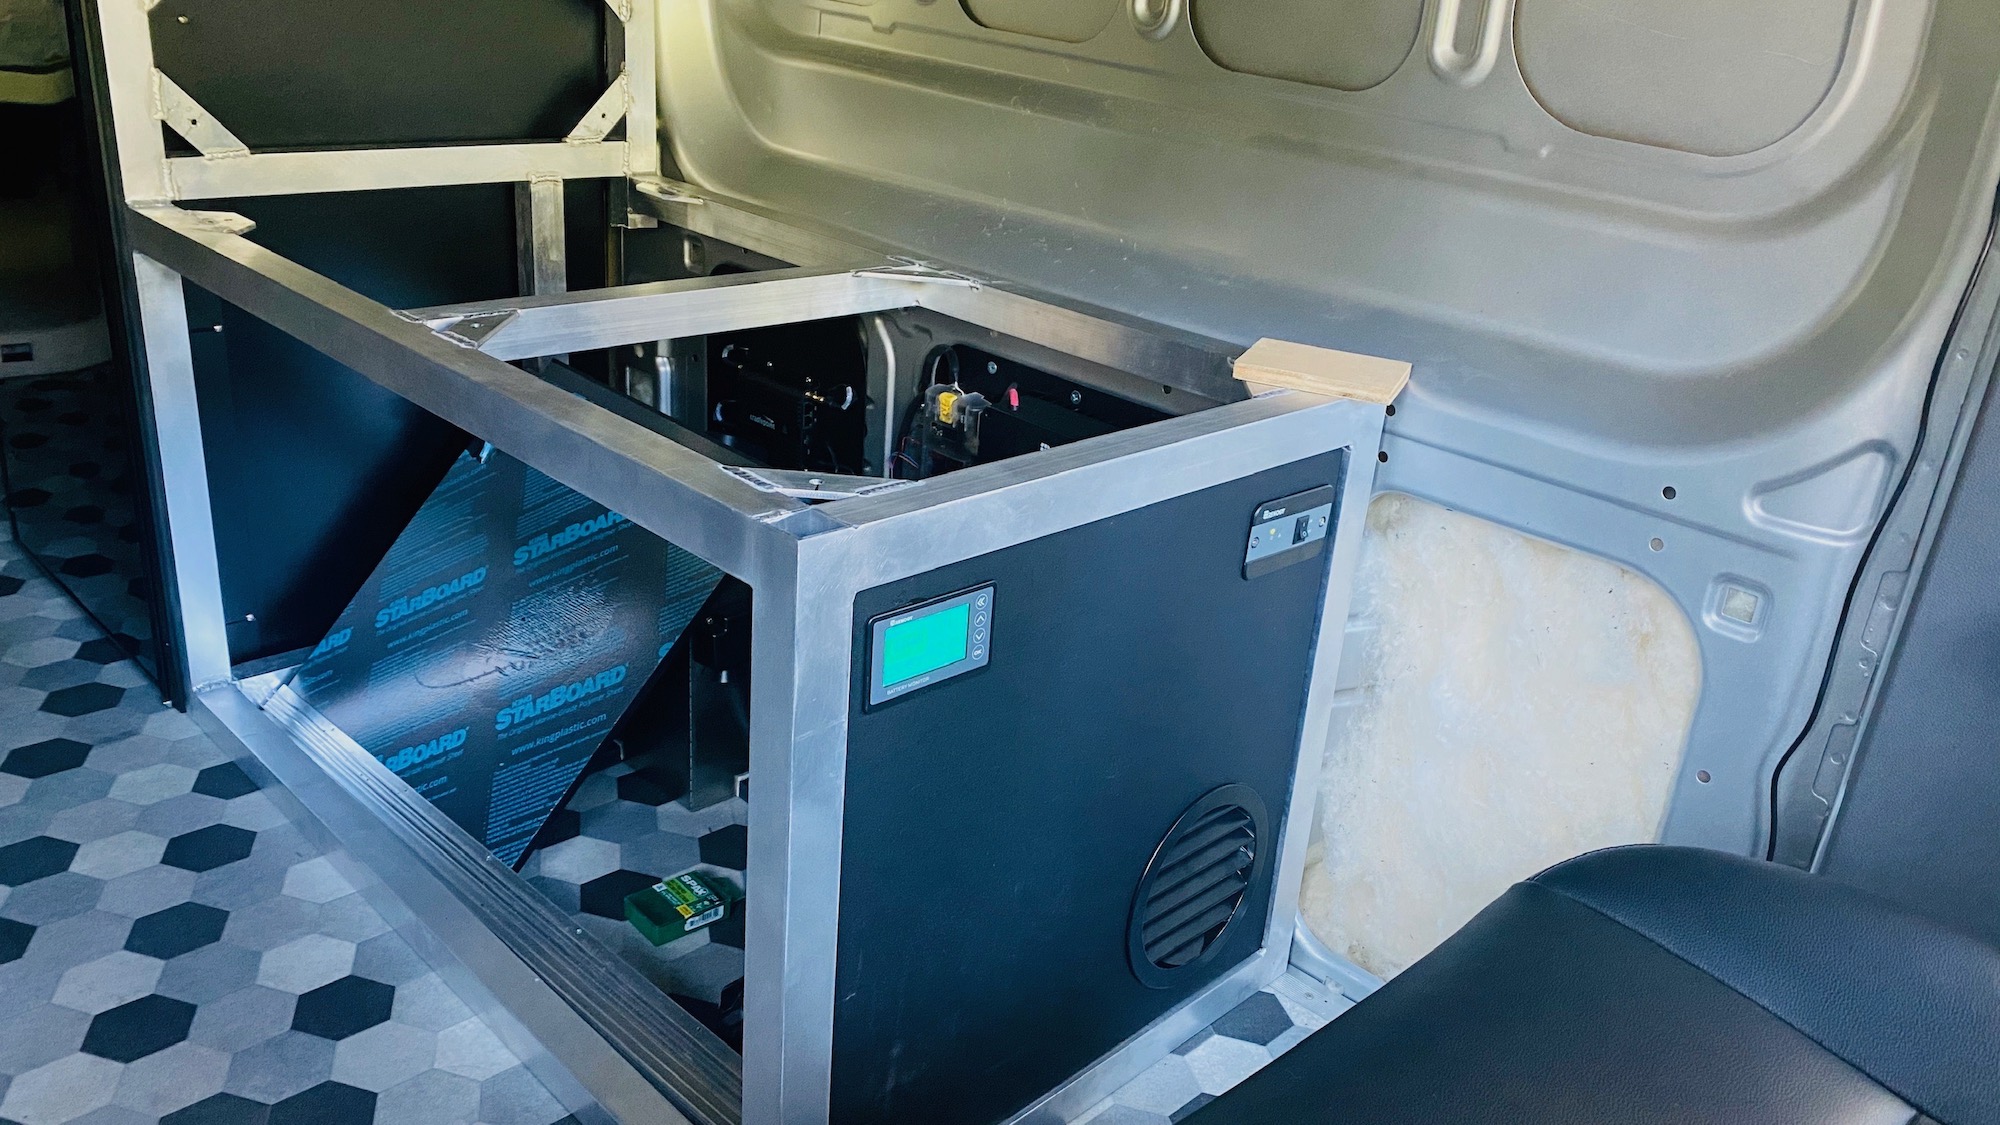
Next I built a removable platform for the bed out of Ikea Skorva rails. The Transit has existing holes in the rear just below the window area as pictured. This may be too low for some but I was happy with the height. I put some masking tape along the holes to mark the locations then stuck it to a piece of 1" wide and 1/4" thick steel flatbar and drilled the holes out. Then I cut the steel bar to length after confirming the holes lined up properly and painted it so it doesn’t rust. I also added some heatshrink tubing over the entire thing so the paint doesn’t chip and to avoid any rattle. I inserted the bolts inside the wall cavity, added a couple washers on the outside to allow a gap so the rails can grab and tightened them down with nyloc nuts. The Ikea rails hang perfectly on them and I drilled holes in them to attach to some plywood for a bed base. I used 1/2” plywood attached to the rails with button head stainless bolts and wing nuts on the underside so they can be removed easily. At some point I will add some material on the plywood to prevent any molding due to condensation on the underside of the mattress. This setup allows you to pull the bed, unbolt the platform and pull the rails pretty quickly to have the entire rear of the van open for use hauling something or requiring more space.
A word about the mattress. I purchased and used a pretty thick 8 inch memory foam mattress I thought this would be super comfortable but realized after sleeping on it a few nights as a side sleeper I bottom out and my hips start to hurt like crazy feeling like I am sleeping directly on plywood. I am 200 pounds so maybe it has something to do with my weight and someone lighter might not have the same problem. I switched to a 6 inch latex mattress instead and it has been a world of difference. It is heavier and harder to manage if you are moving it but 100% worth it.
Seat Swivels
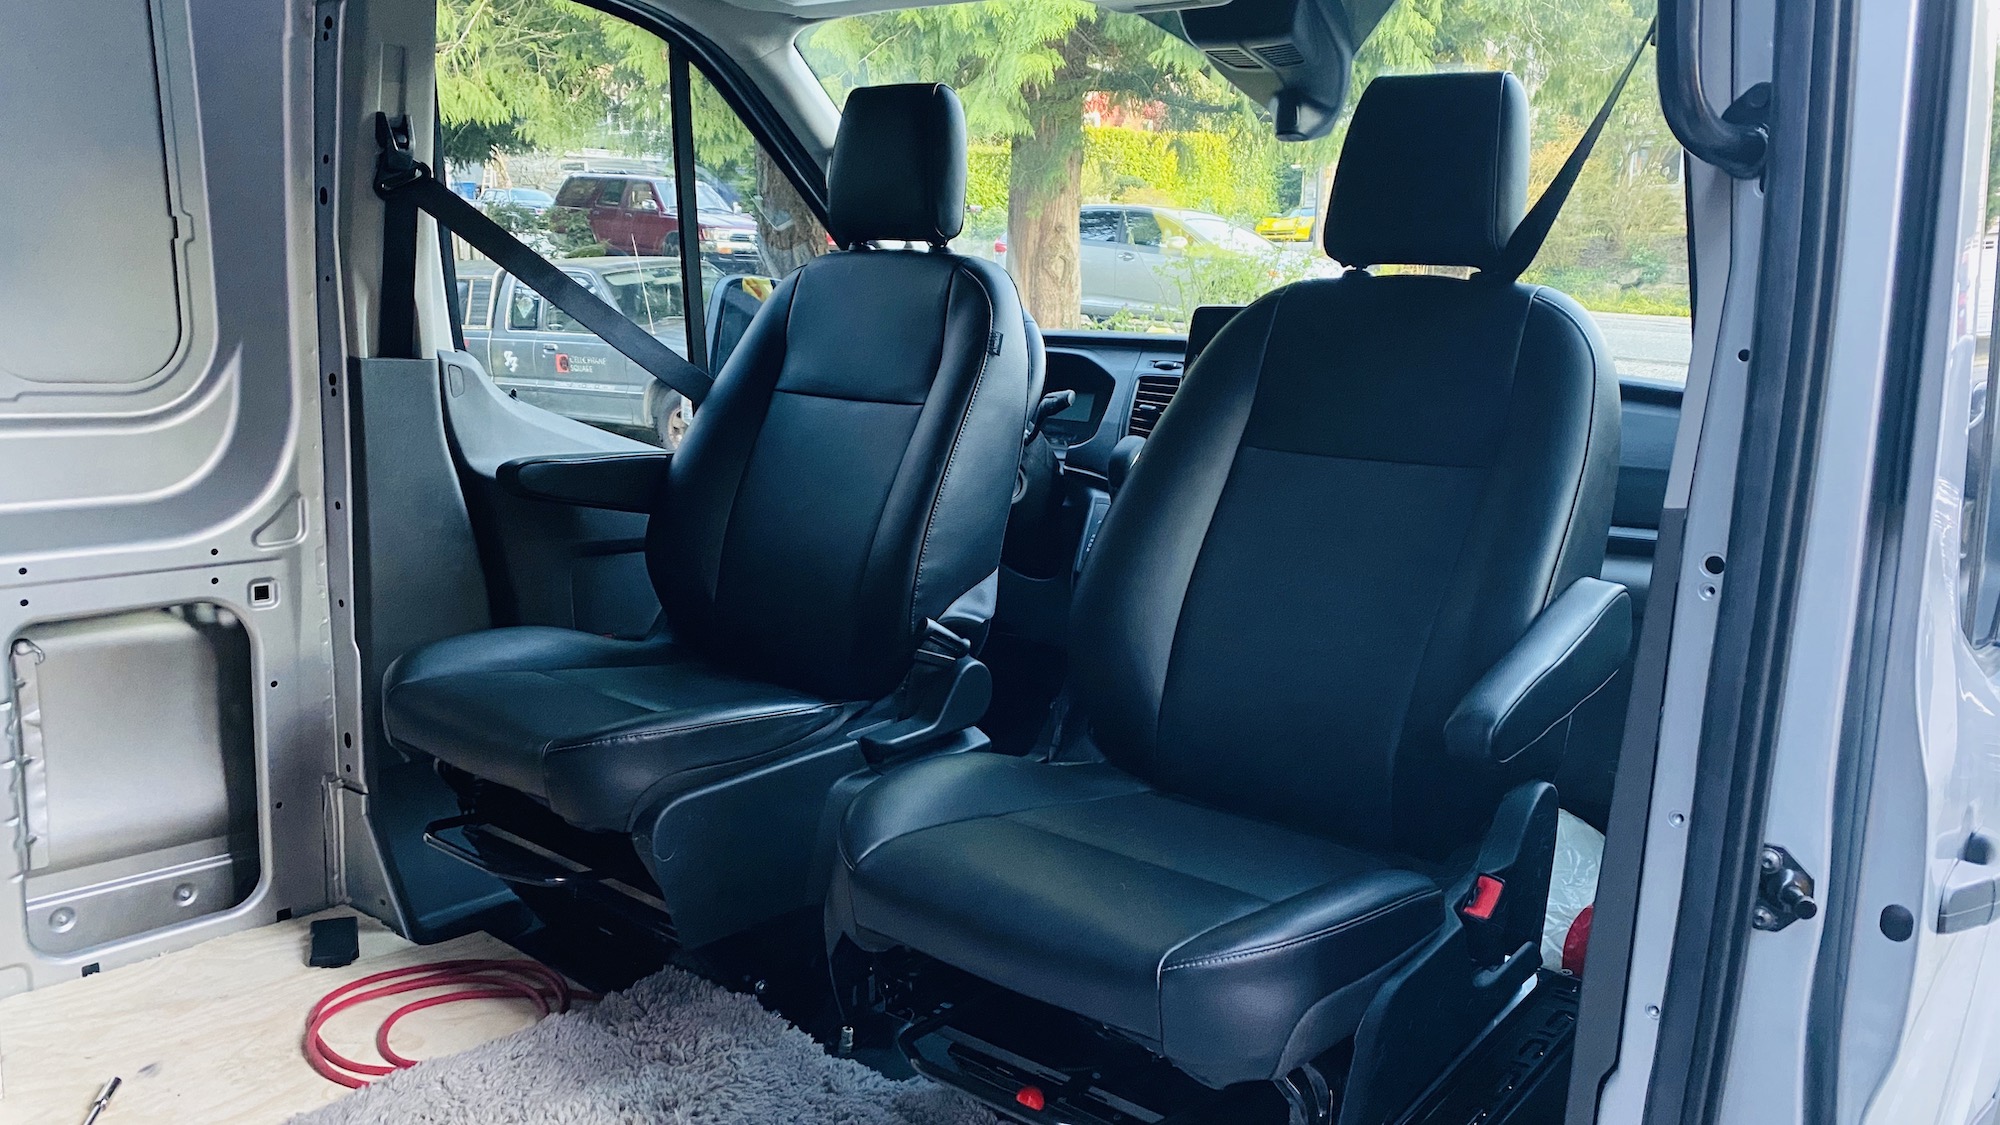
I did a swivel seat on both driver and passenger side. I sourced them from a local business Amazing Auto and i’m impressed with the quality. No rattle because they have a thick teflon block in between the top and bottom and add very little height when installed.

Fan & Roof Rails
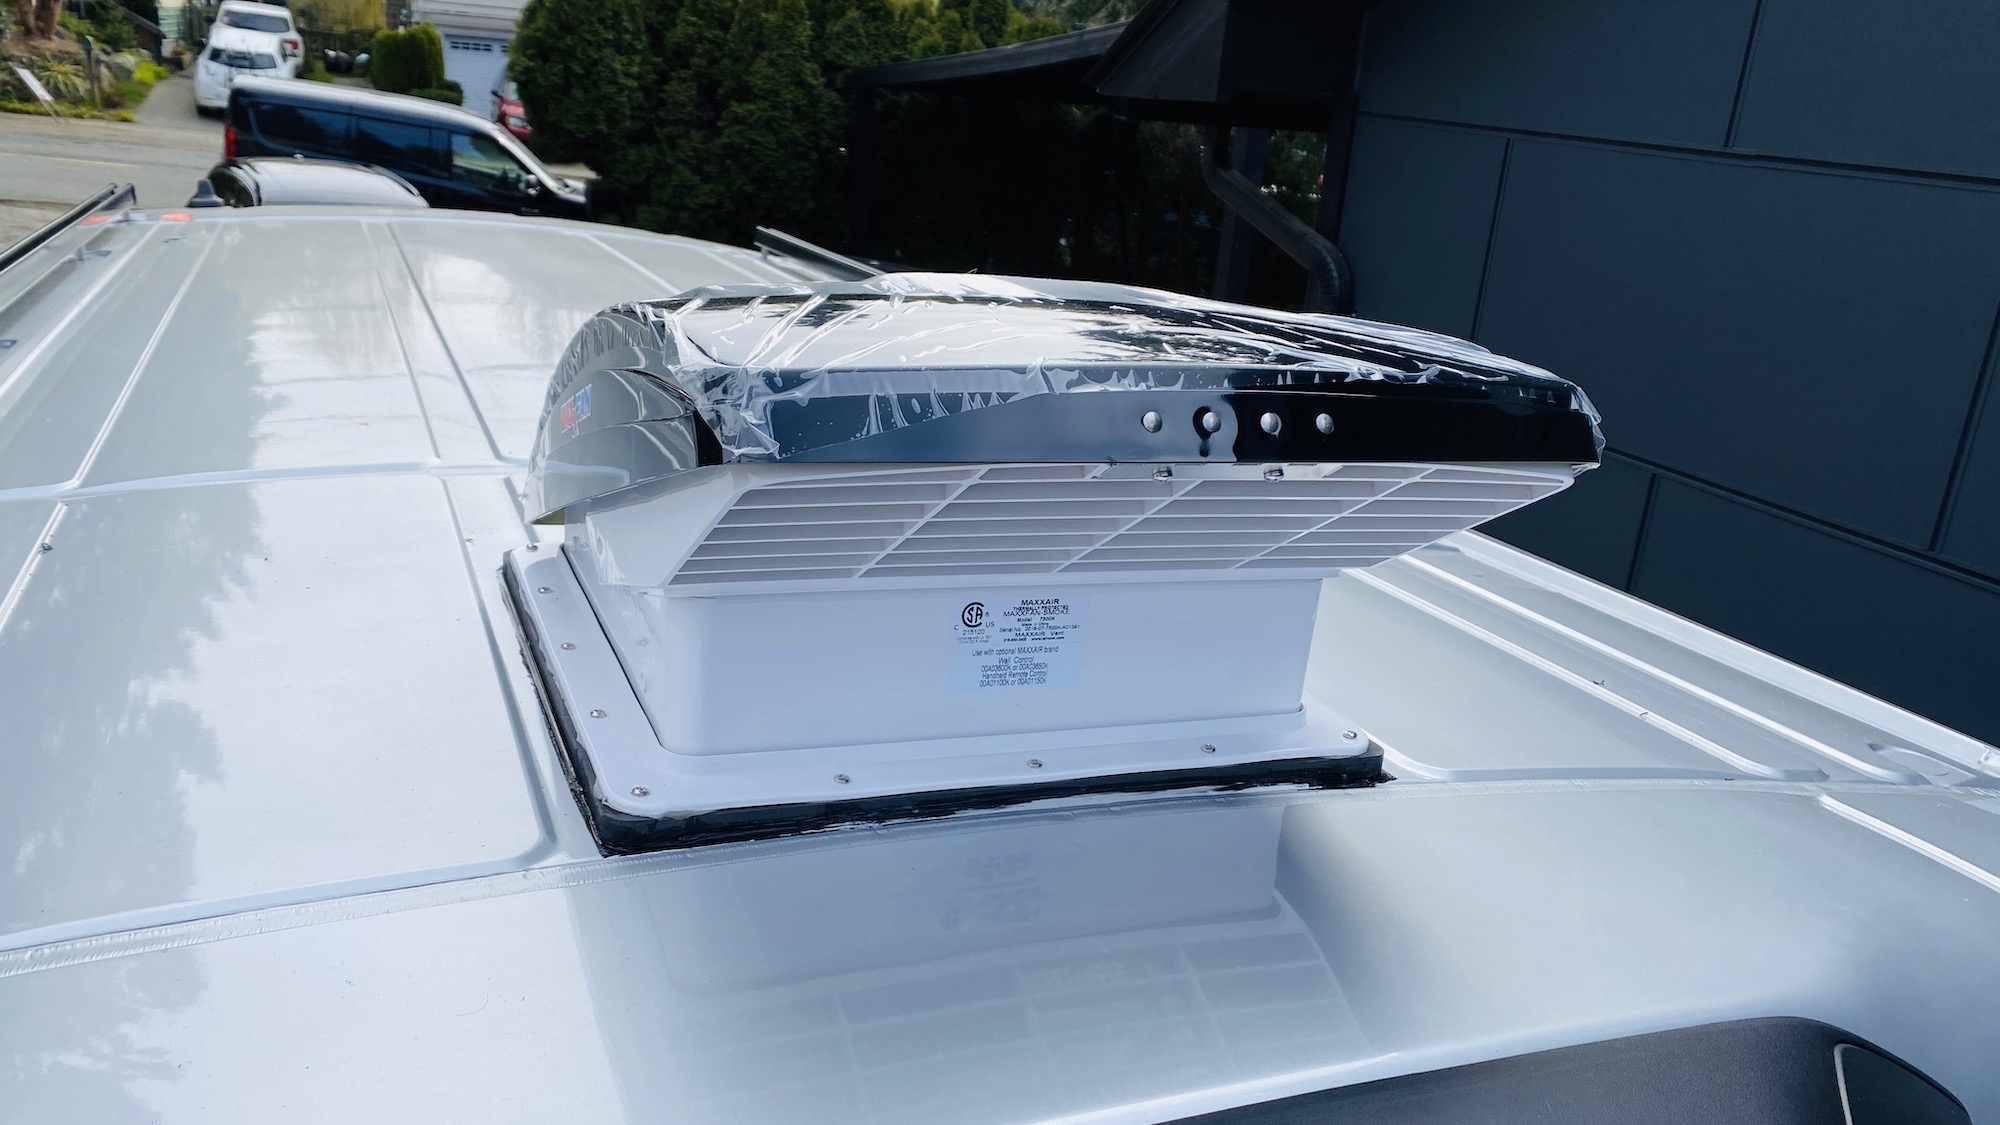
For the Roof Vent Fan I used an Airxcel MaxxAir 7500k. This is the fan to get and can operate in the rain and reverse for in or out flow on a range of speeds. It can also be manually popped open for natural airflow and venting without the fan. Install is pretty straight forward but I highly recommend using a roof adapter from DIYVan. It matches the roof contour and creates a flat surface for your fan to mount up to properly avoiding possible leaks. They sell a interior backing frame as well which helps so you have something to screw into while installing the frame for the fan. For installing the outer roof adapter you’ll need to use a urethane adhesive like 3M Window Weld. Optionally I think DIY van provides butyl tape you’ll want to install on the outside before the fan mounting shround goes ontop of the adapter. All of this will create a water tight seal. I went back after everything cured and covered the entire outer frame setup with dicor lap sealant just for added peace of mind.
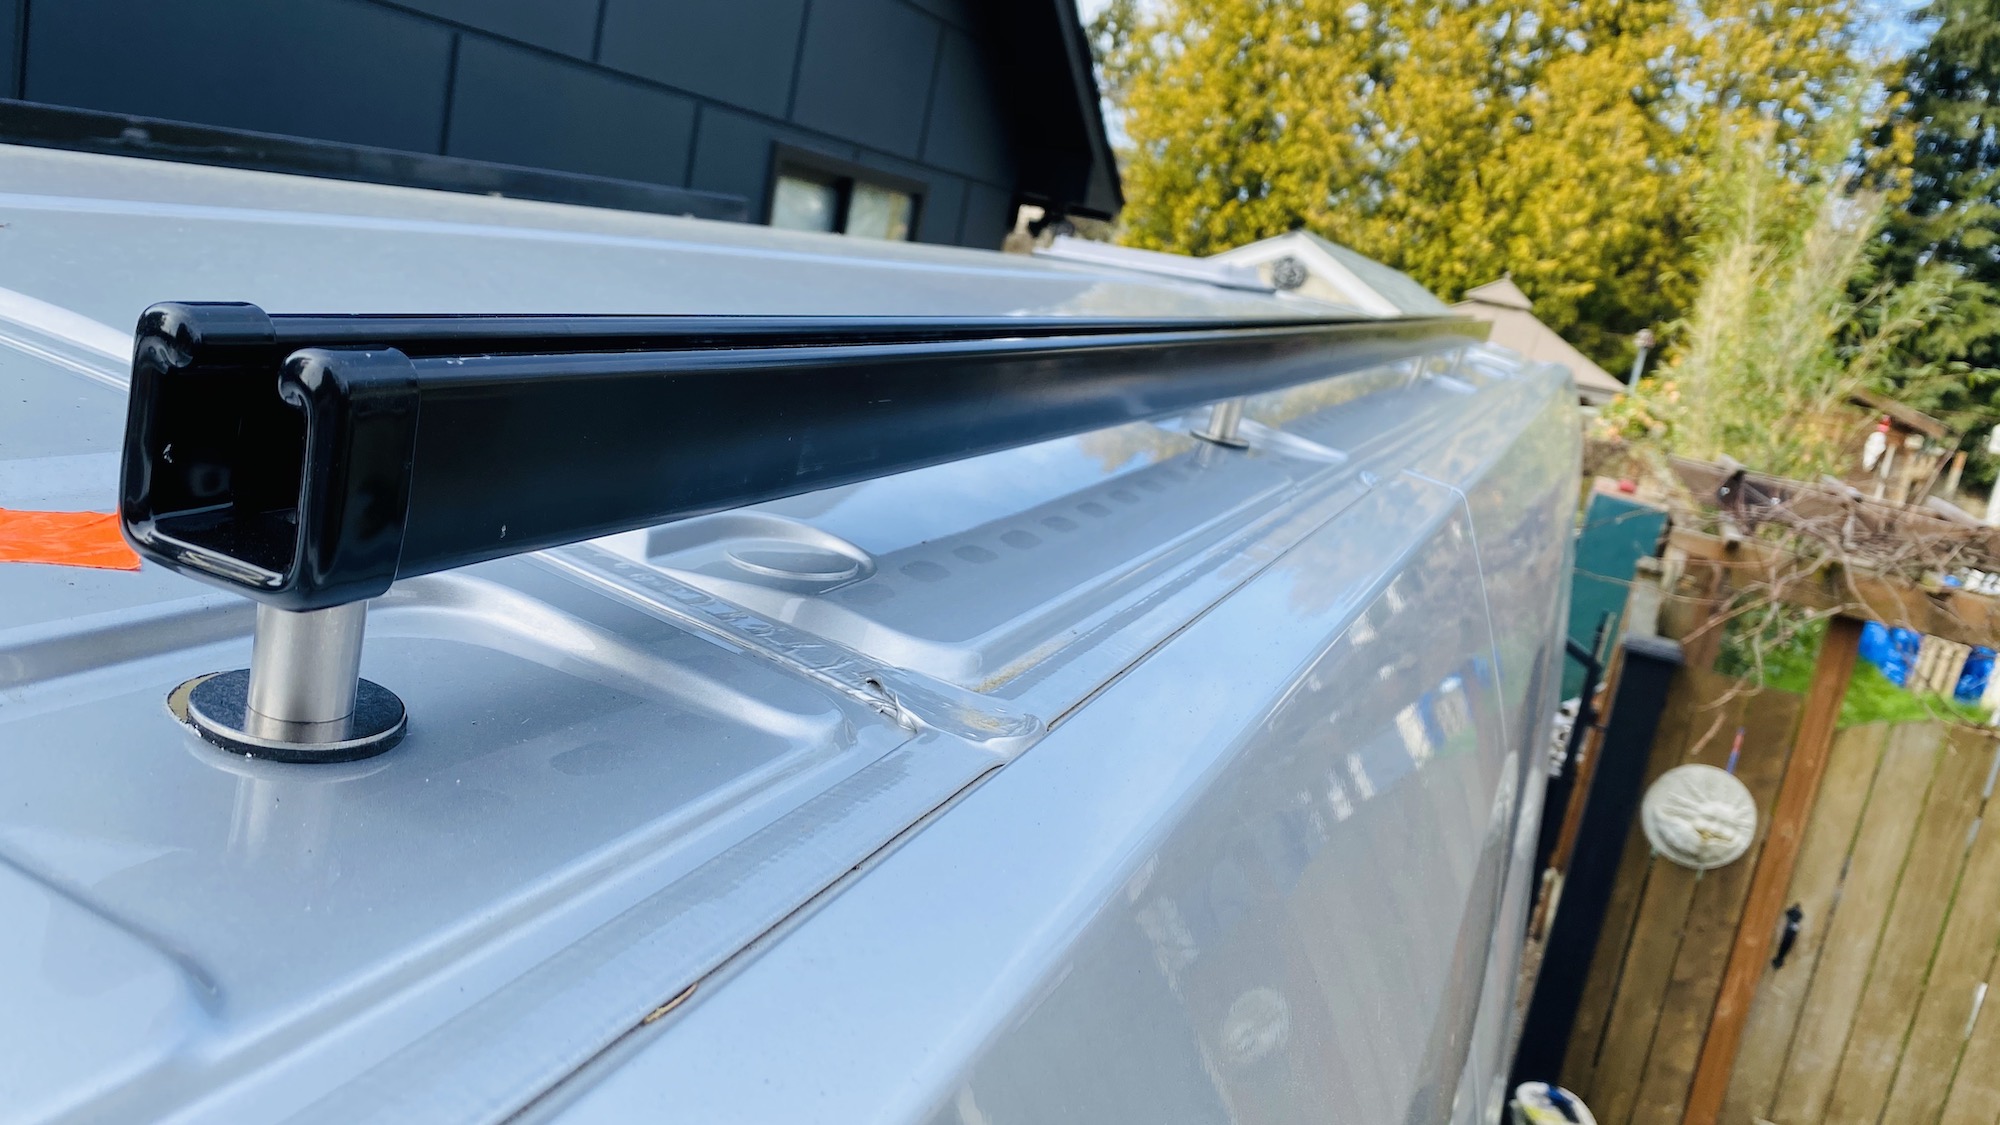
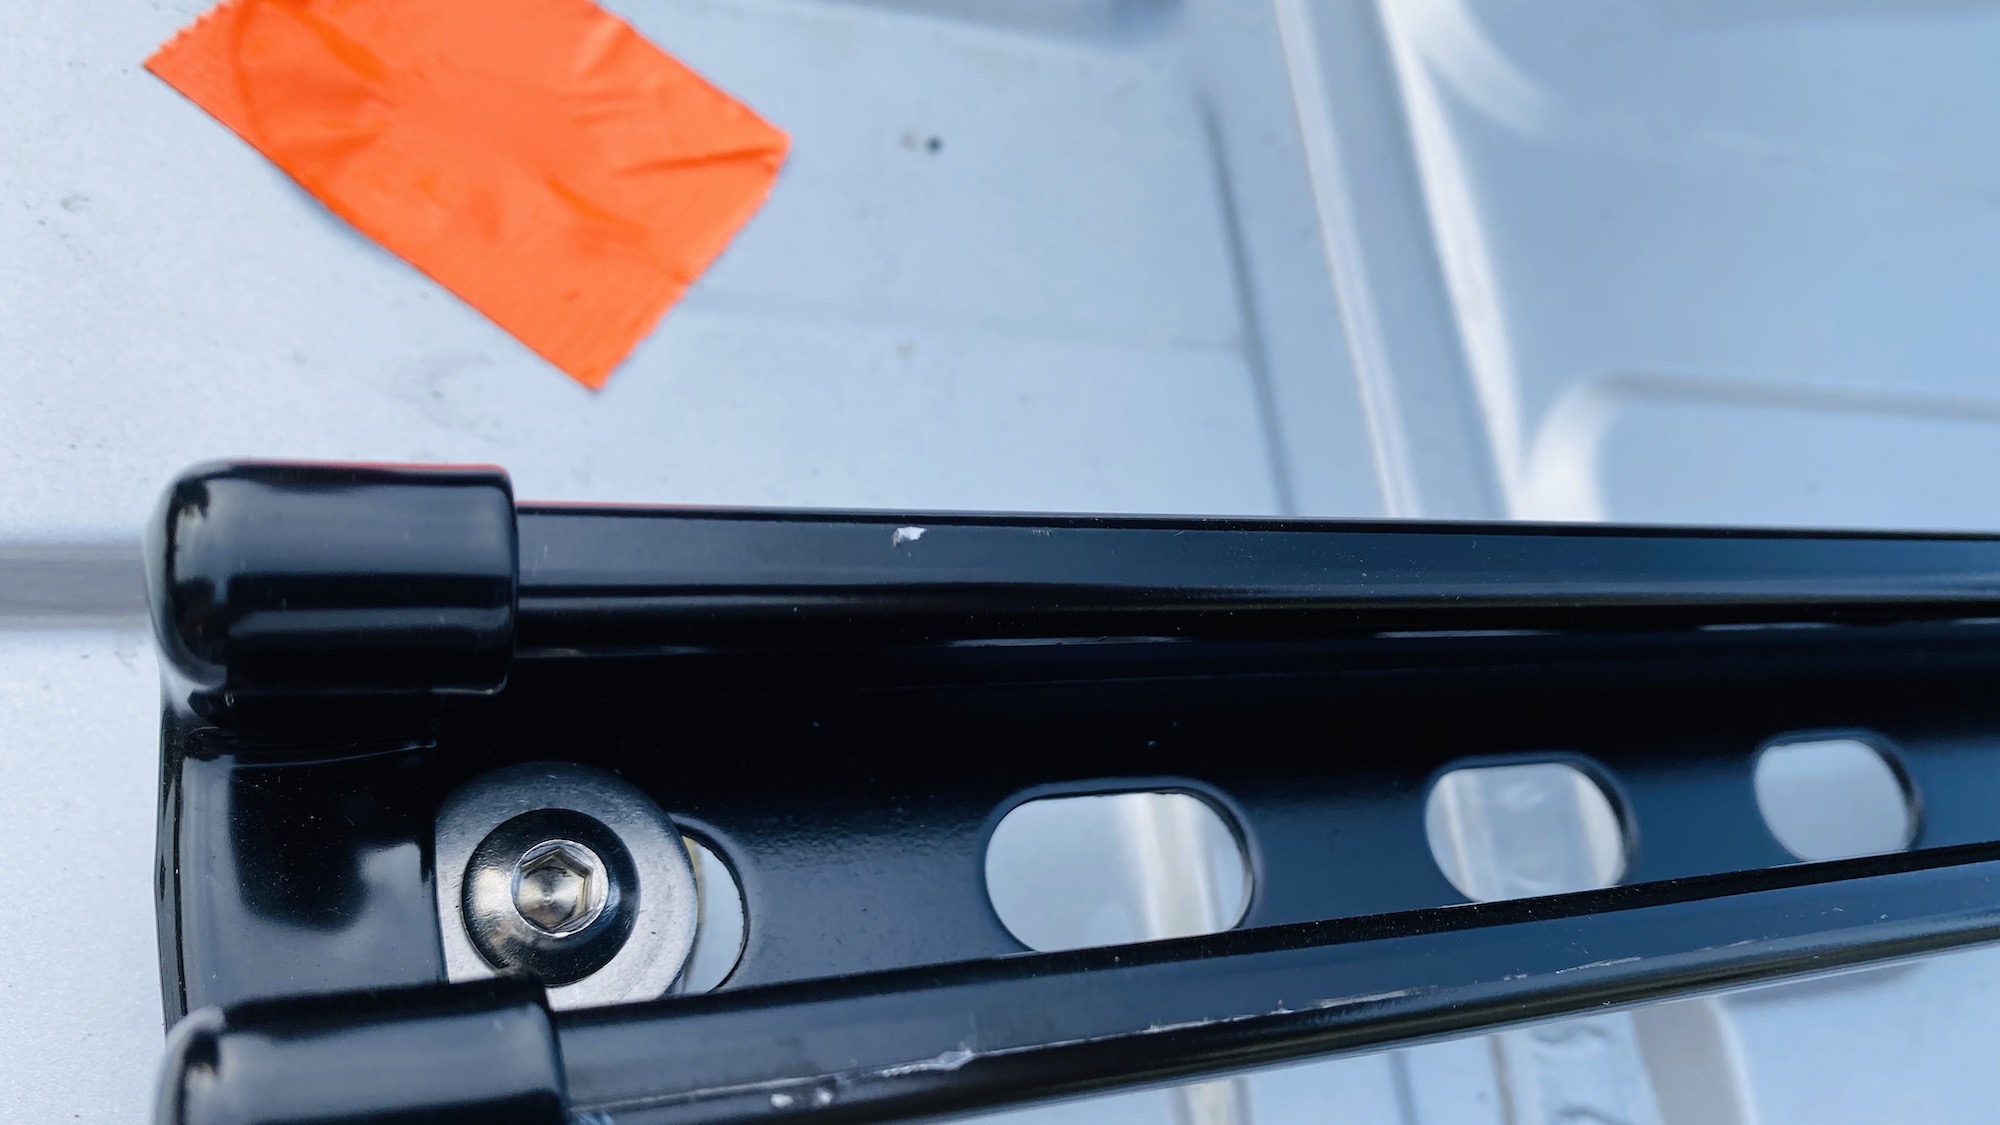
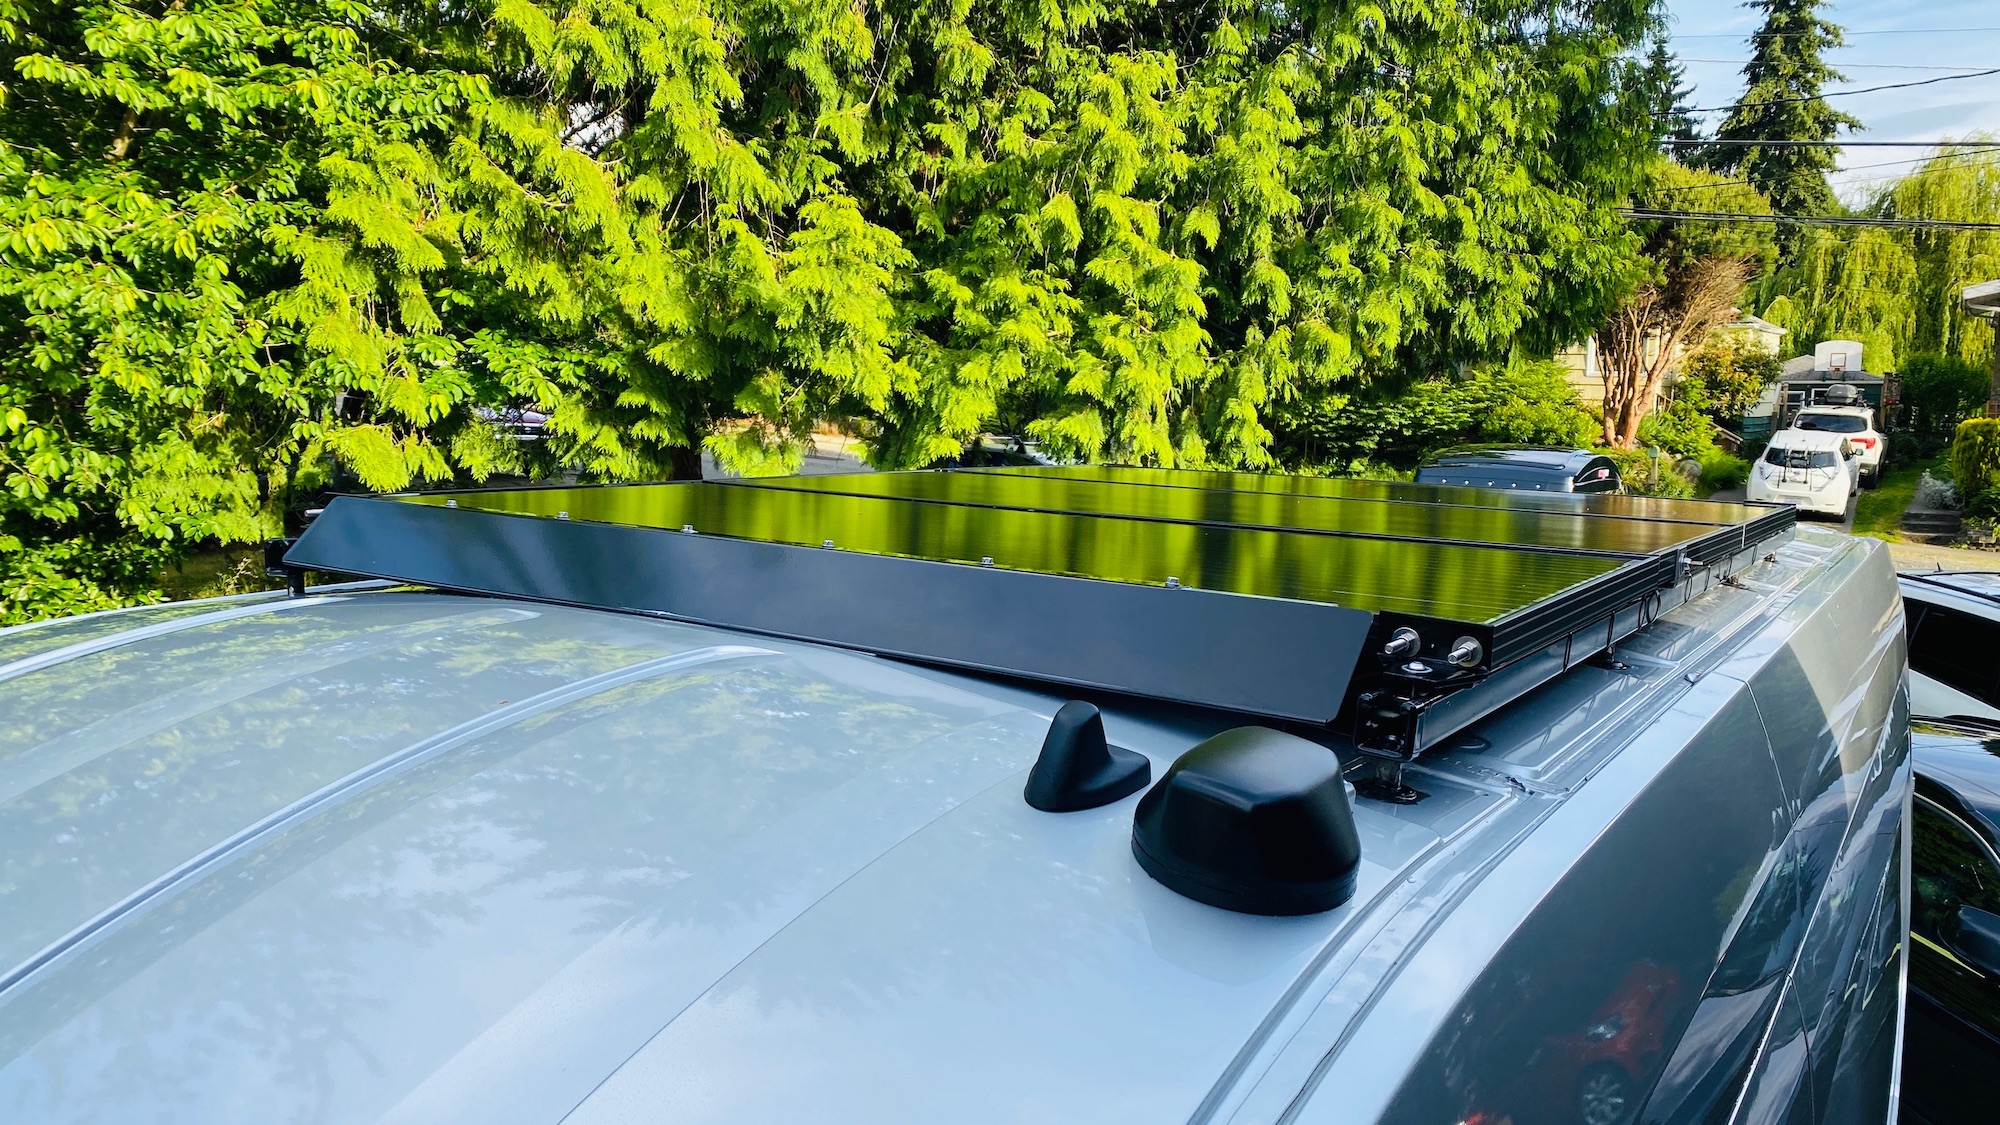
For the roof rails I simply wanted to mount solar panels and used slotted powder coated black steel unistrut with washers and stainless spacers bolted to the existing threaded holes on the roof. The slotted holes line up all but one place so you do need to drill one hole in that location. You’ll want to apply dicor lap sealant or similar around the washers and sealant where the washers meet the rail because water intrusion could and probably will happen otherwise. In fact I did have a leak in a couple locations after that I couldn’t figure out and realized it was from in between the gap left by the washers on the rail. The sealant did the trick stopping that. I purchased all the materials for the roof rails and most of all the hardware I used at McMaster-Carr. Making the rails with this material made a great solution for a super affordable price. You could go with longer rails, build a platform on top for storing things, bolt a crossbar on to mount things etc..
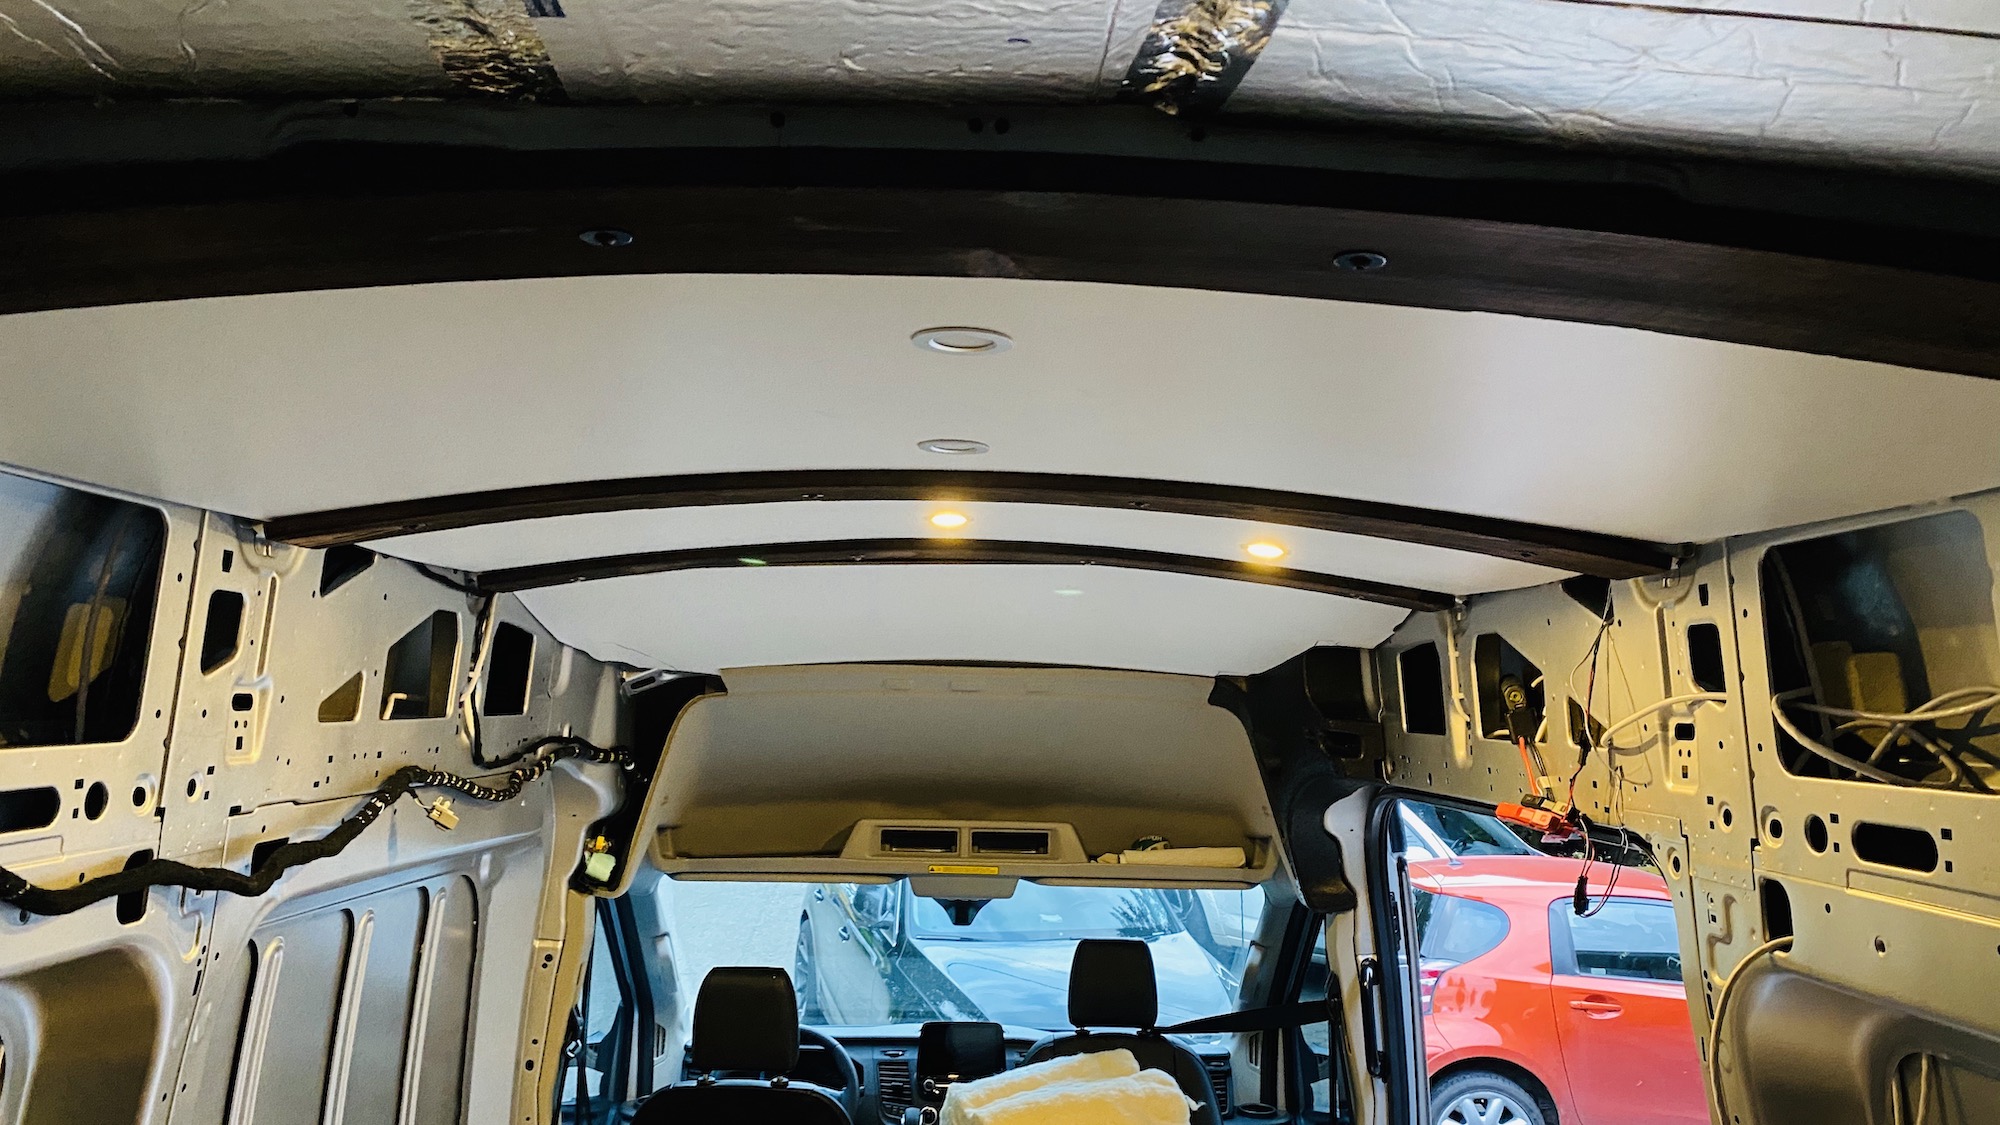
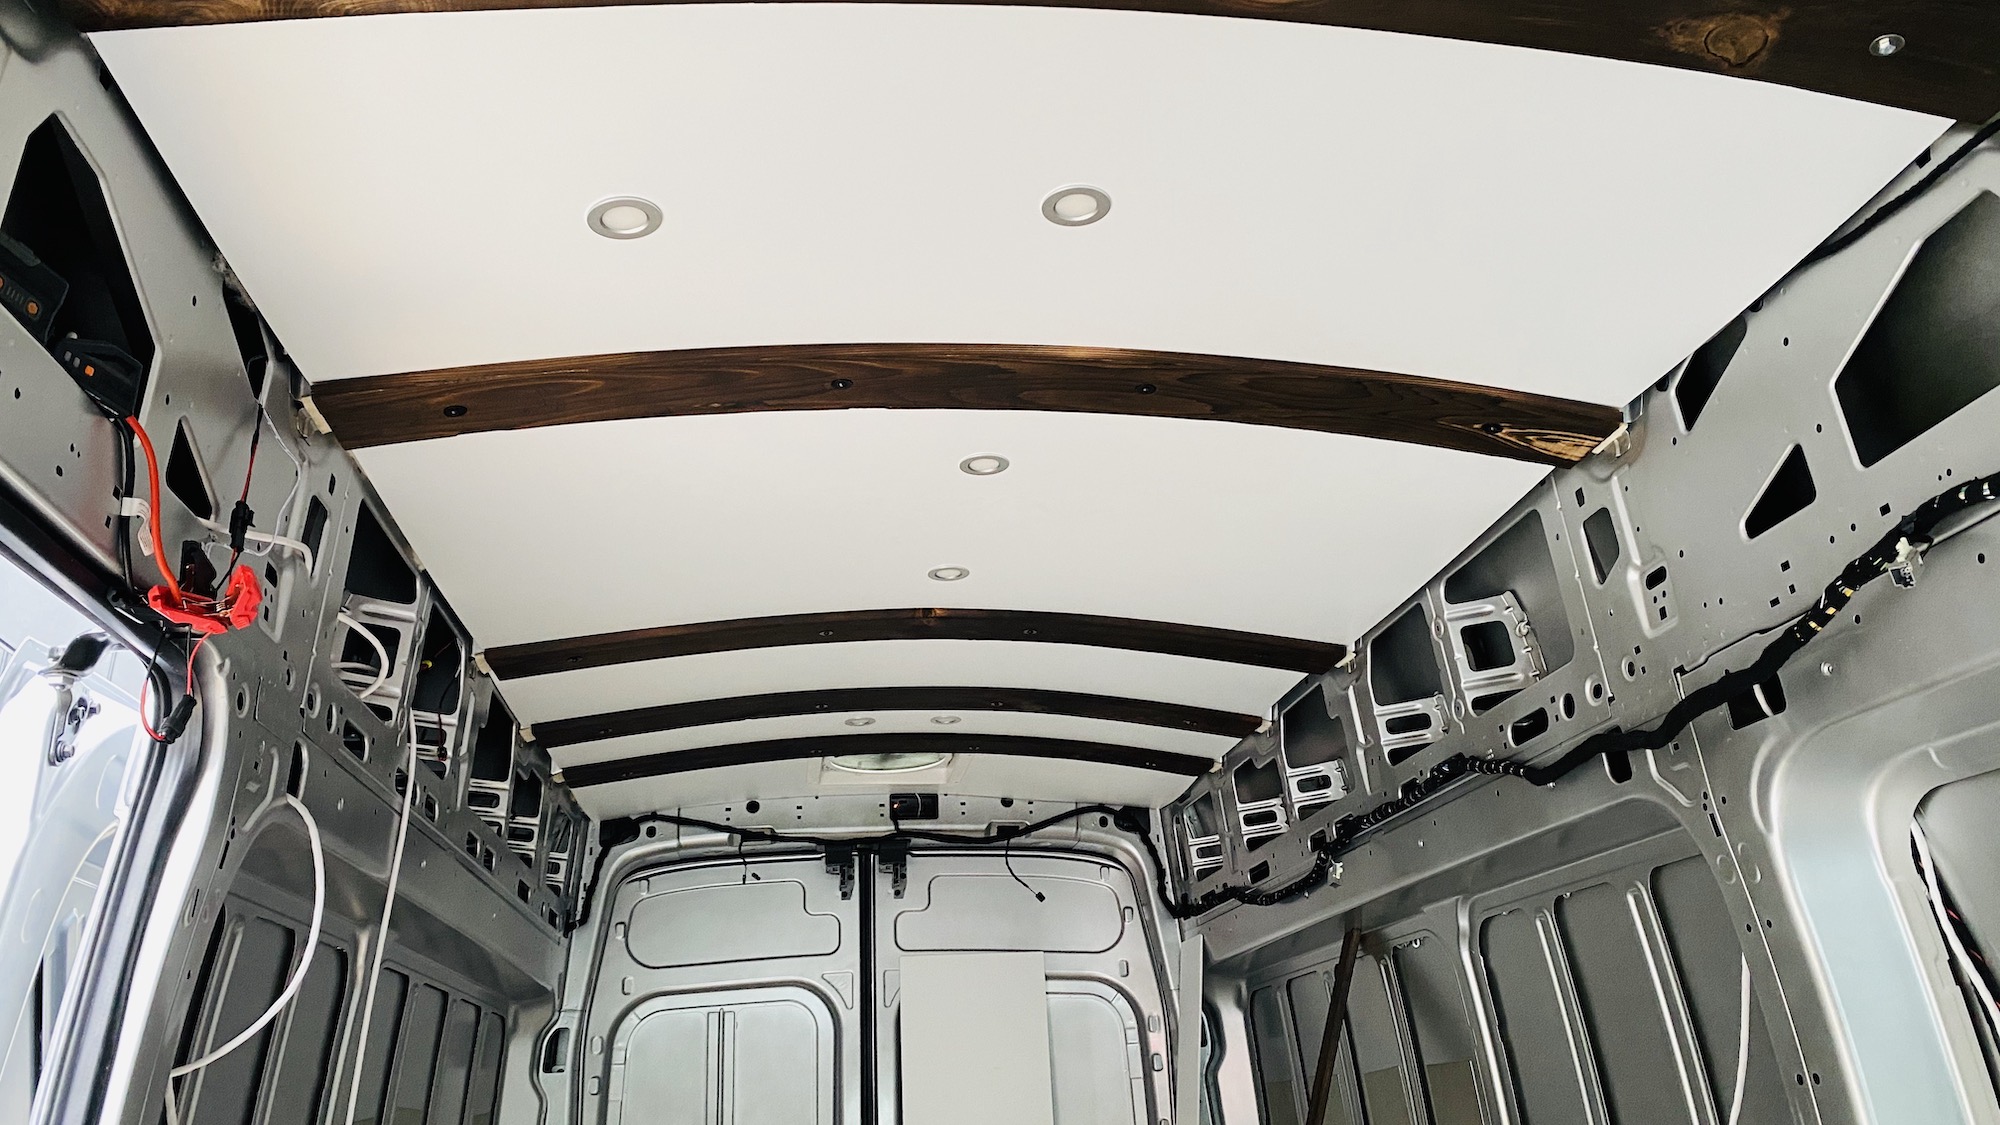
Ceiling
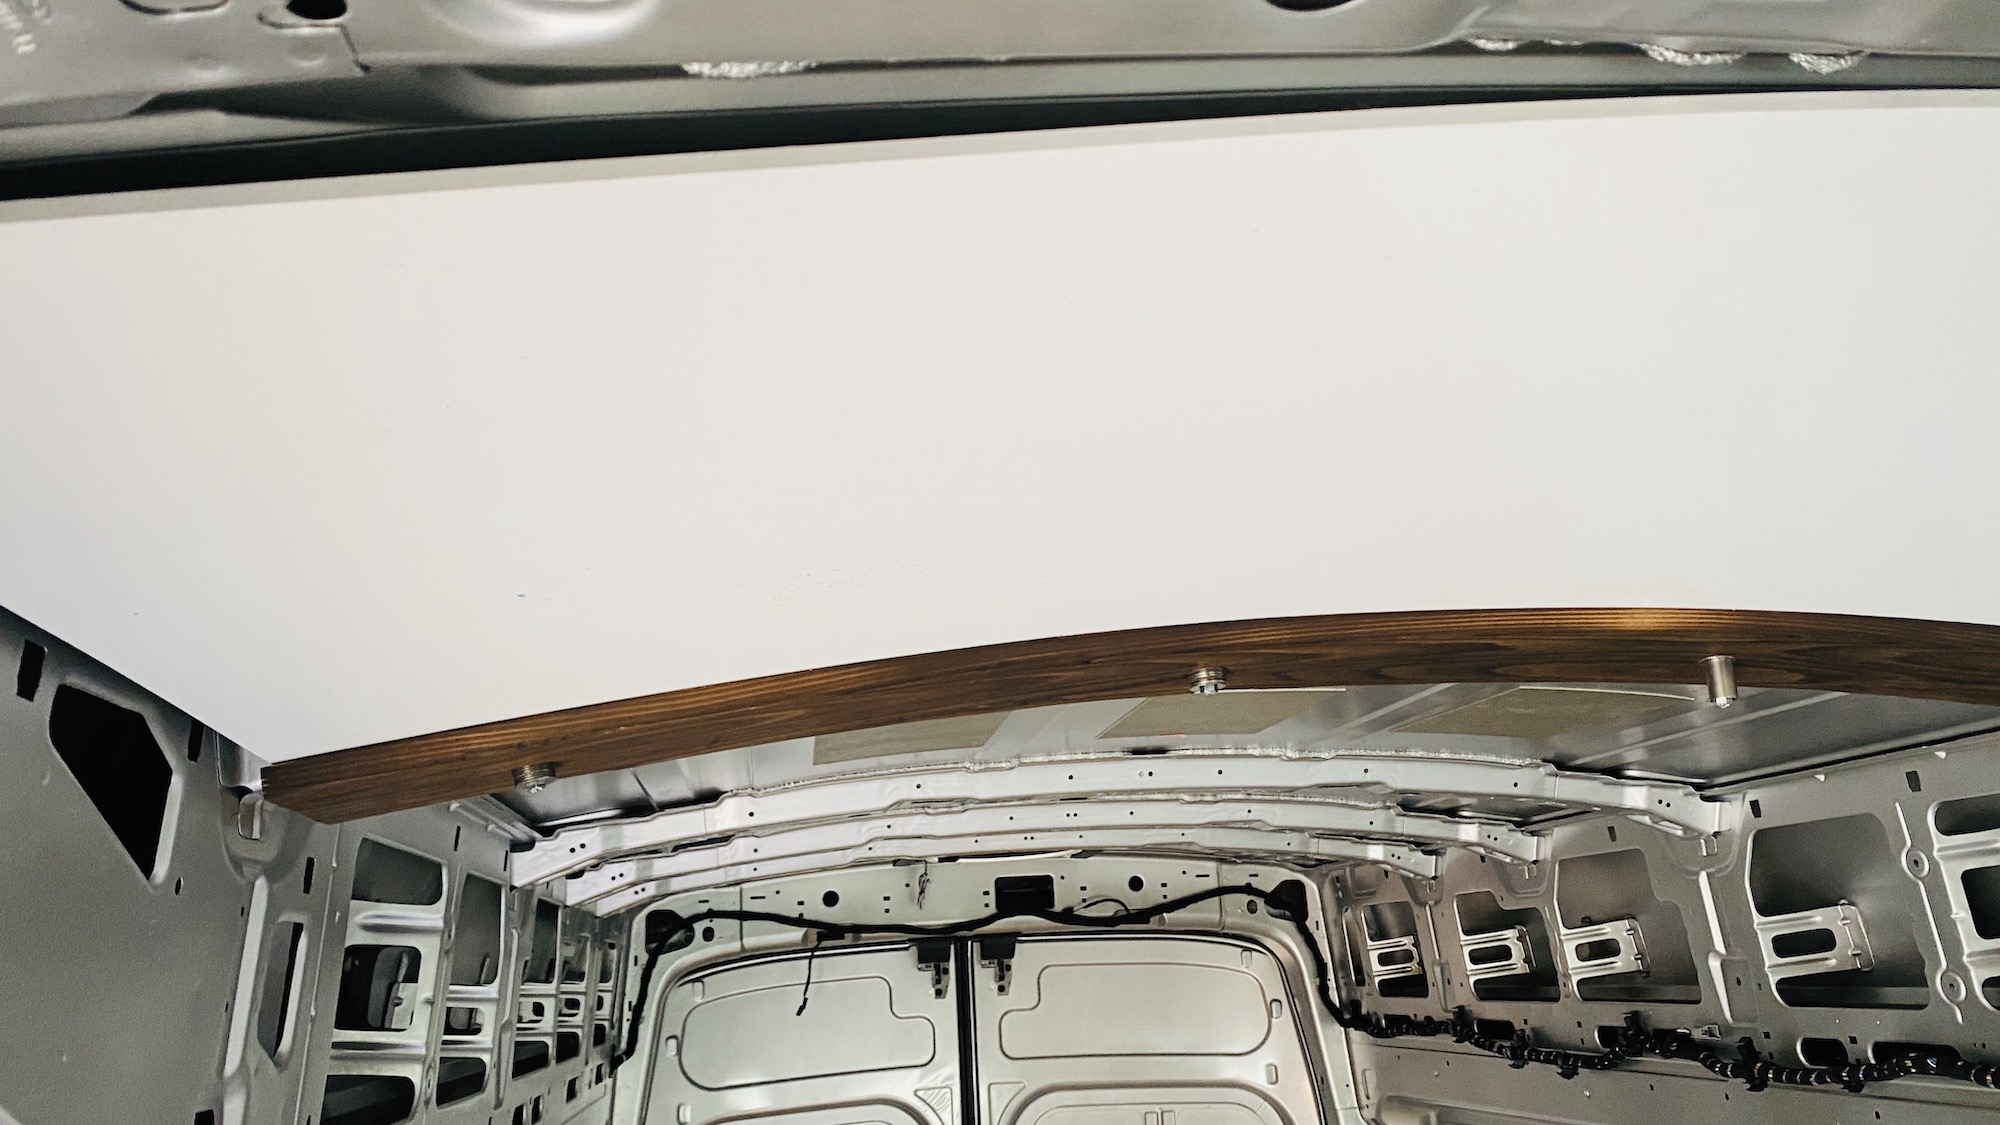
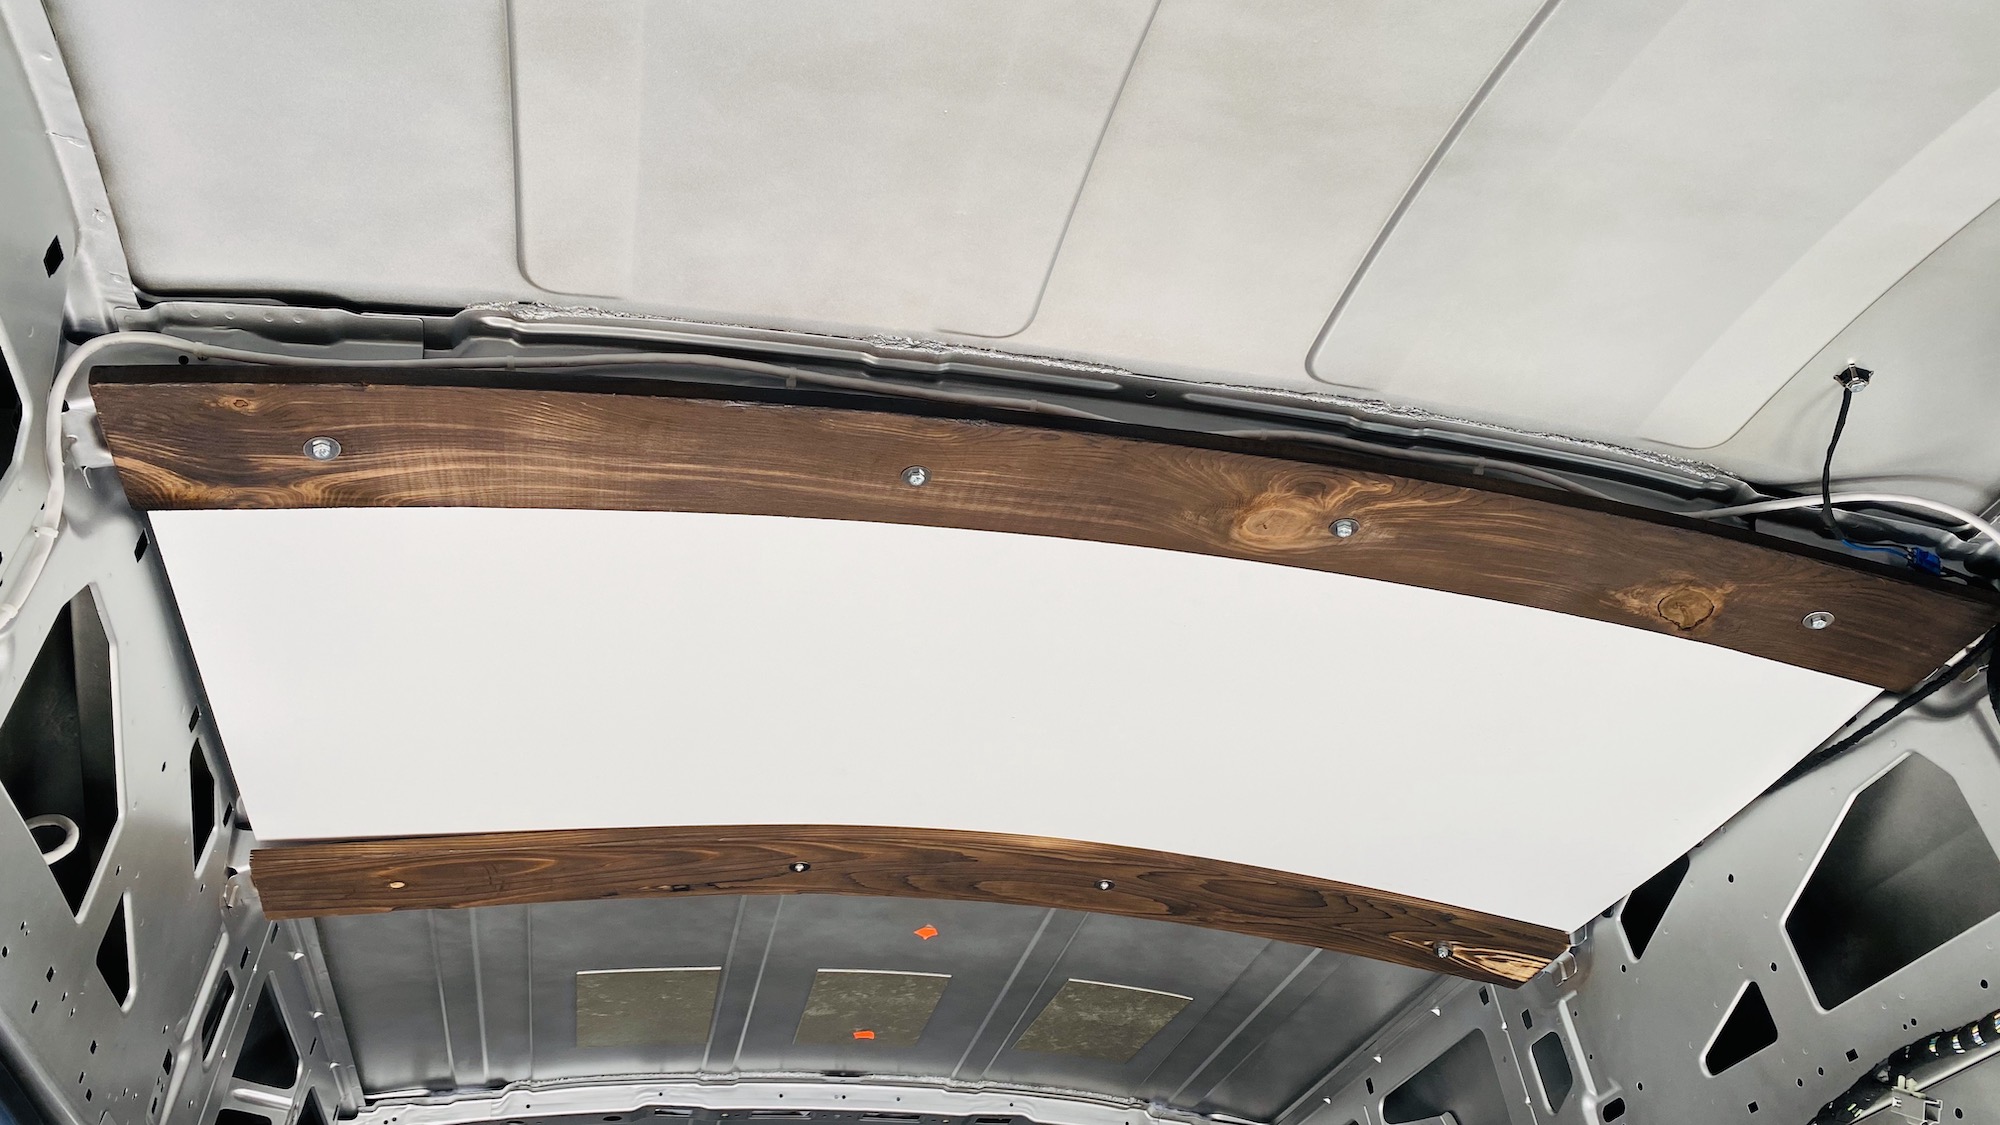
For the ceiling I wanted to retain as much height in the van as possible so instead of building down from the roof ribs and trying to create a flat surface I decided to bend a piece of wood and slot in material between it. I used 3/4in thick 6in wide cedar boards from Home Depot for the ribs. For the look I burnt them with a propane torch using the shou sugi ban method. I Installed PlusNuts in the roof ribs measured the holes and drilled them into my cedar board. I used a heat gun with longer bolts and stacks of washers to help shape the board as I tightened it into place. In between the panels I used 1/4” Sign White Foamed PVC panel from a local plastic reseller Tap Plastic. They will cut them to size for you as well. For insulation I attached 1” Polyiso to the ceiling and stuffed havelock wool ontop of the panels as I installed them. For lightning I used round LED lights. To control them I used a 12v dual zone dimmer. For drilling the holes in the panels I used a 60mm holesaw.
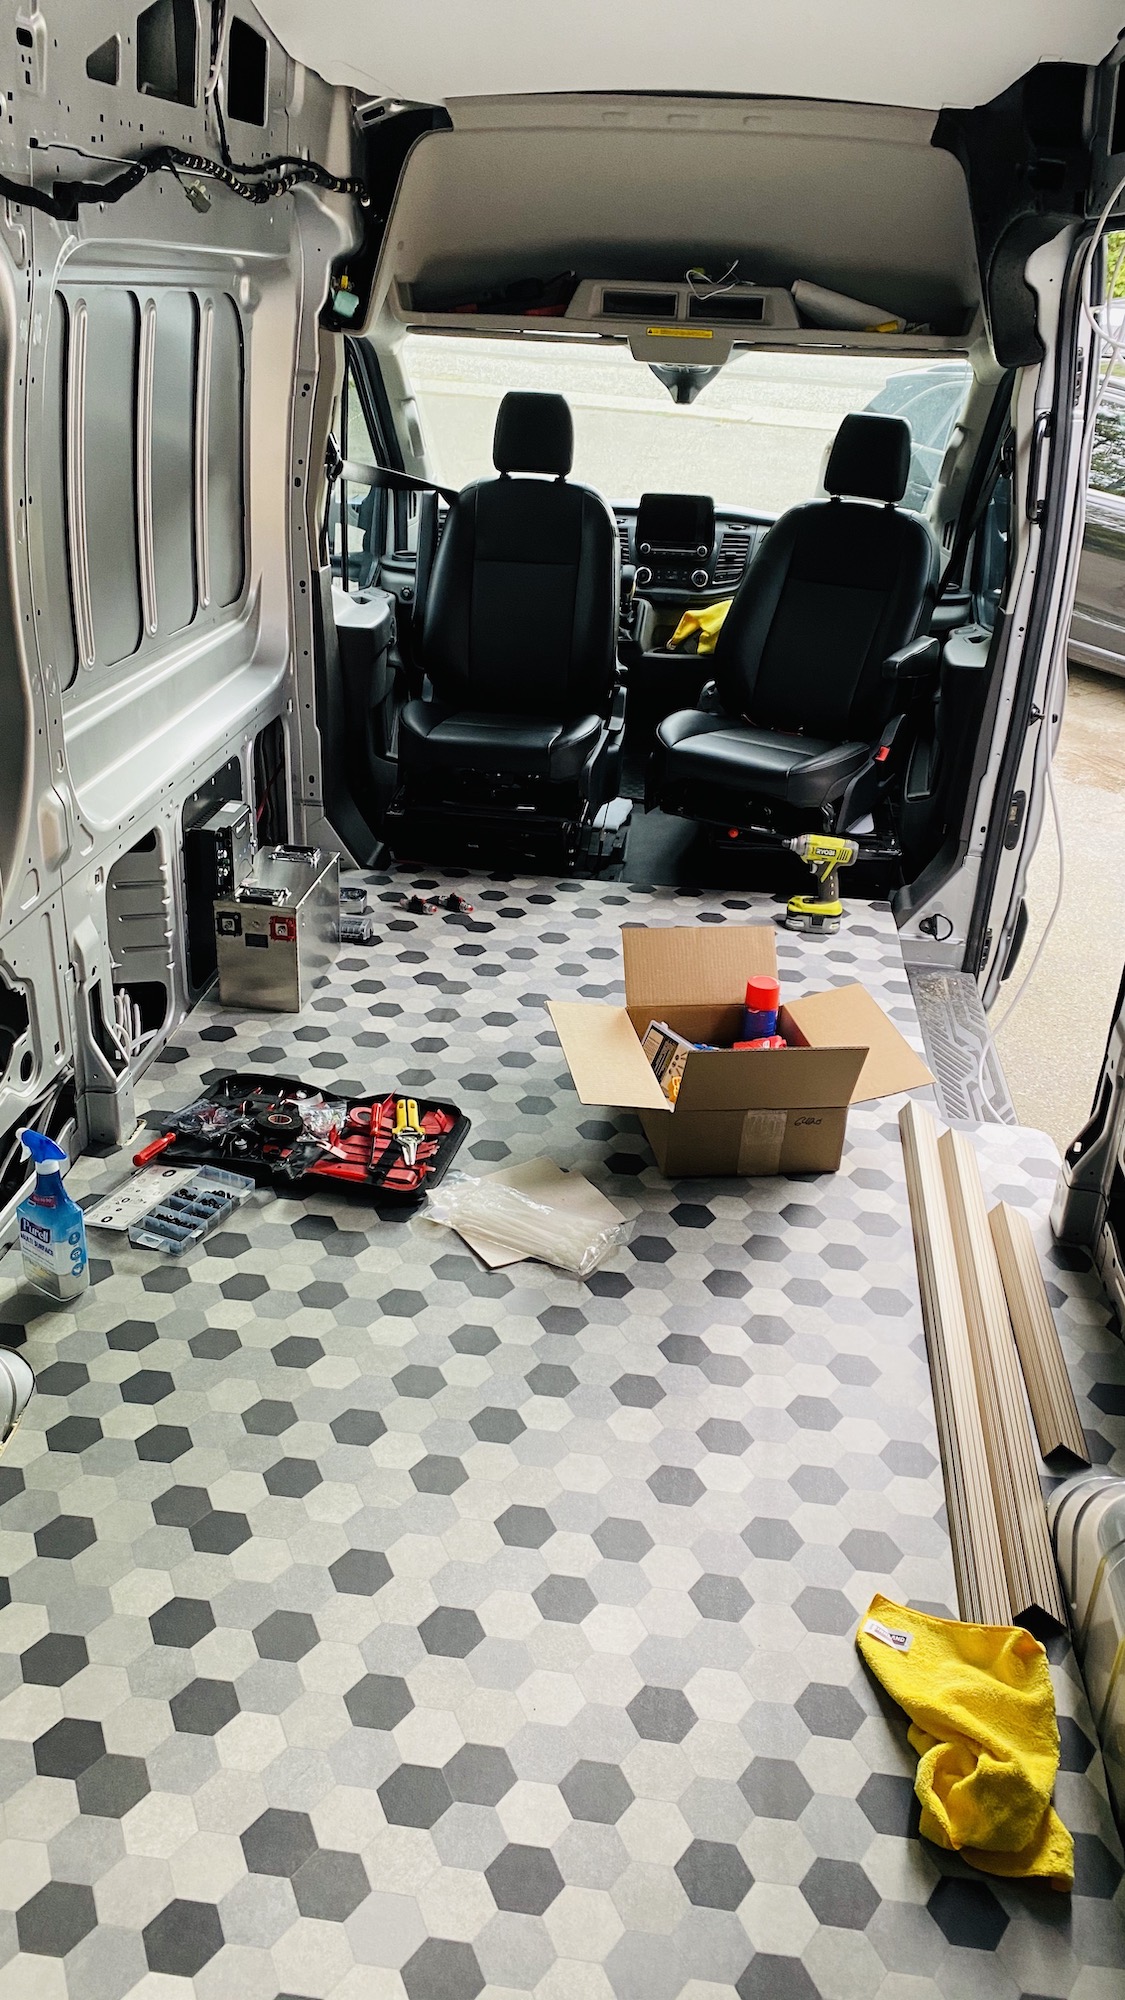
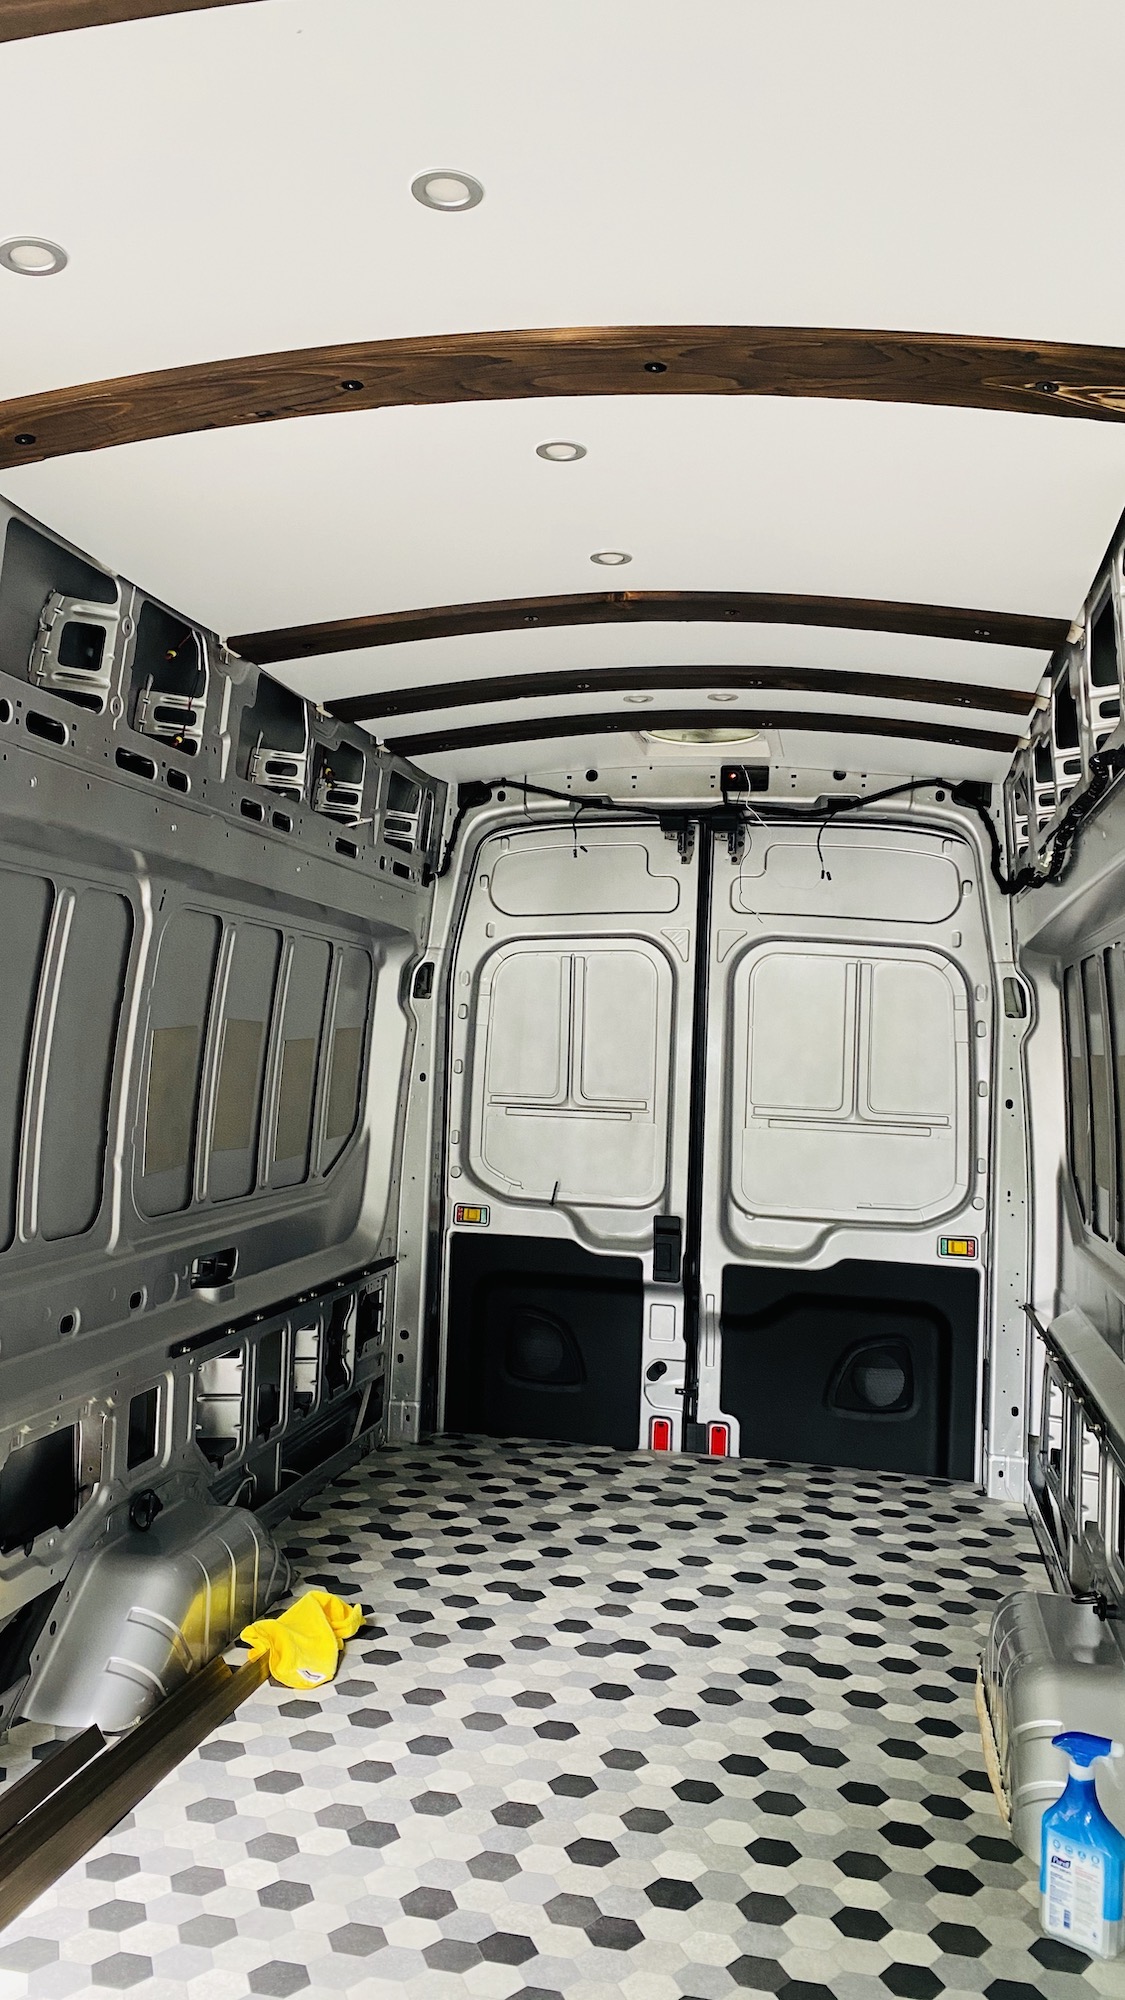
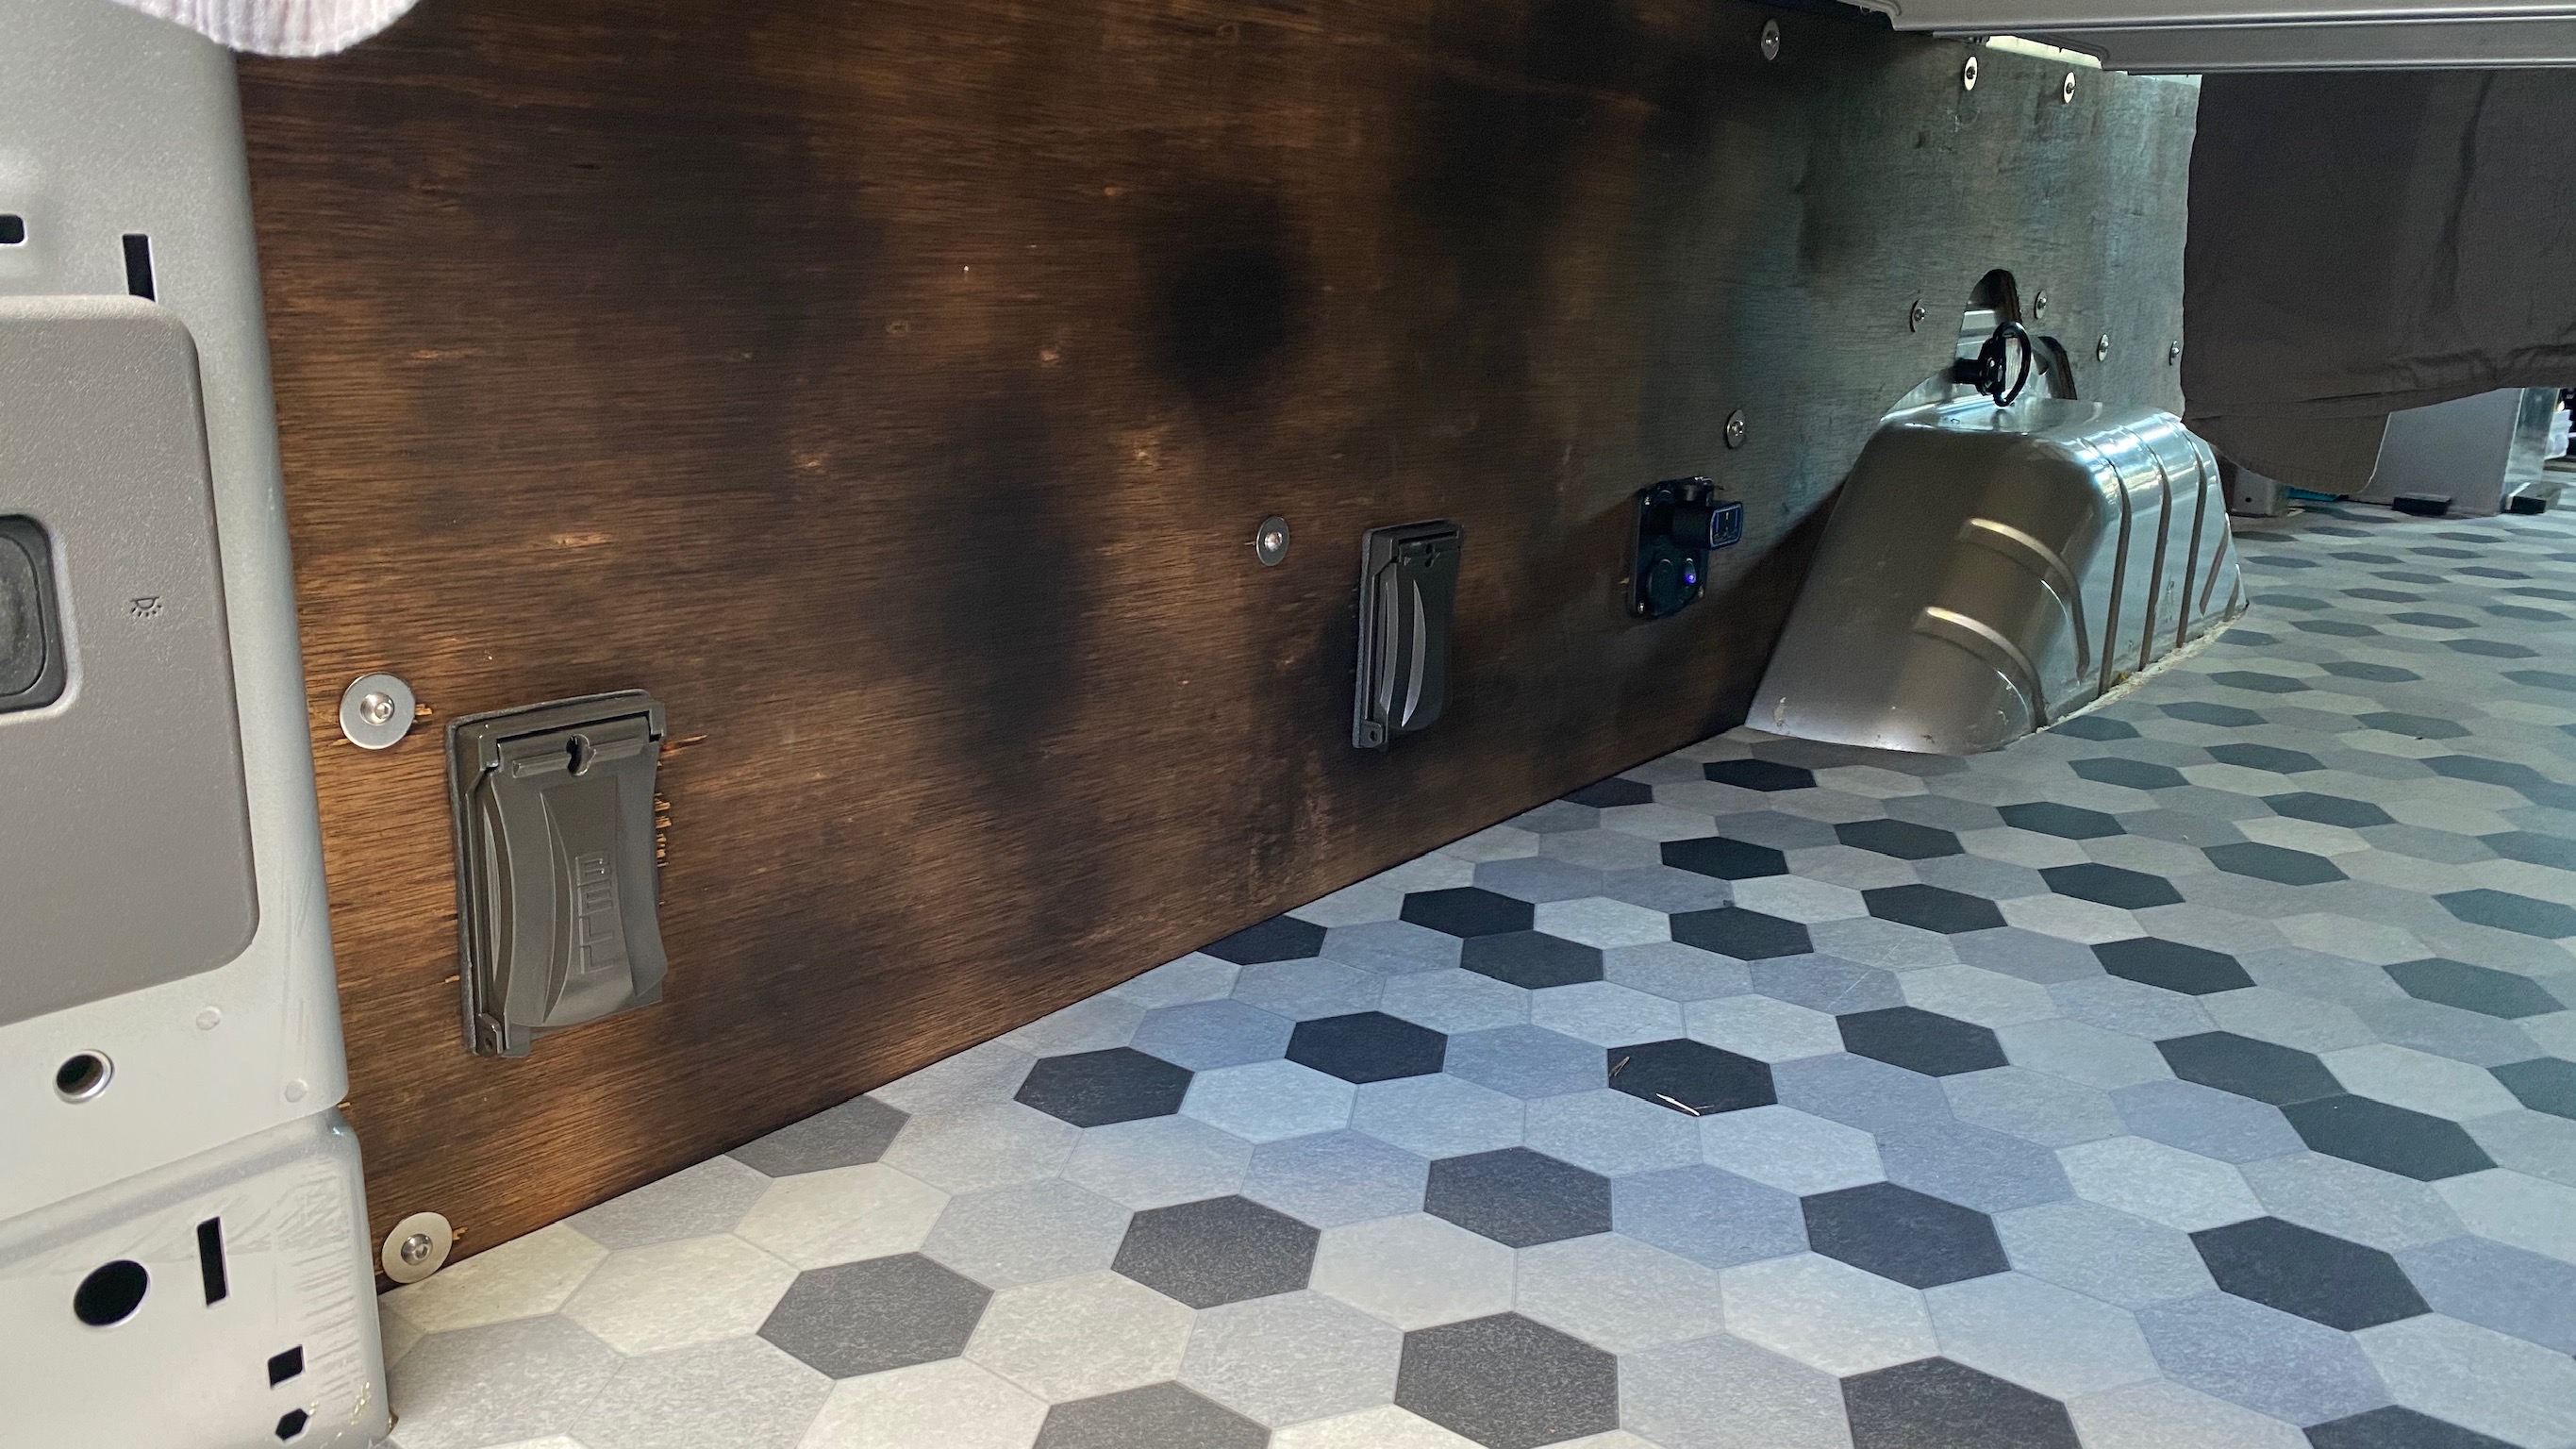
Flooring
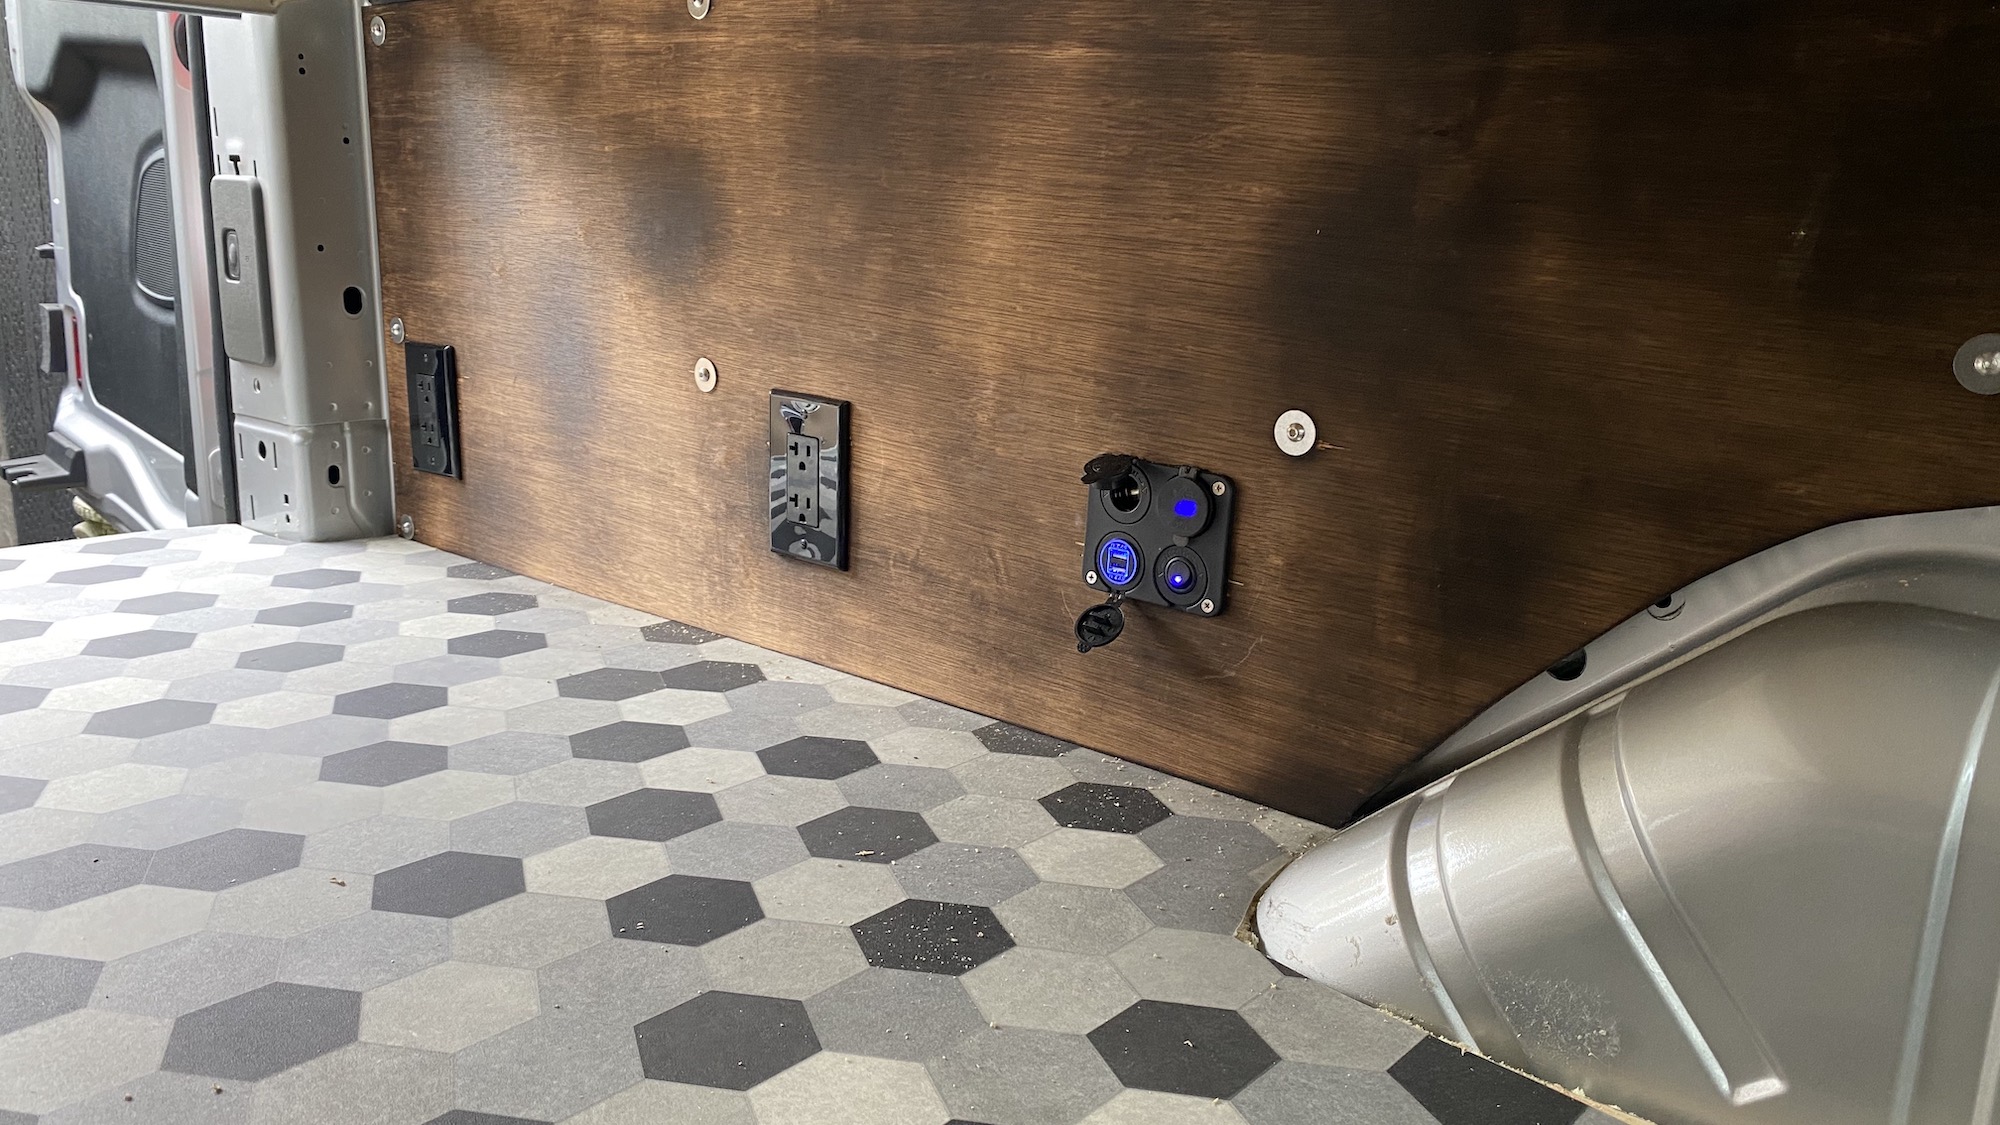
Ontop of the plywood I laid down for the floor I used a sheet vinyl from Lowes. It’s quite affordable and I liked the hexagons. My thought was an easy install and creates a waterproof seal. I applied it with a pressure sensitive adhesive according to the instructions. To finish and cover the edges I used Pemko Stair Nosing. This was the only one I could find at the proper dimensions.
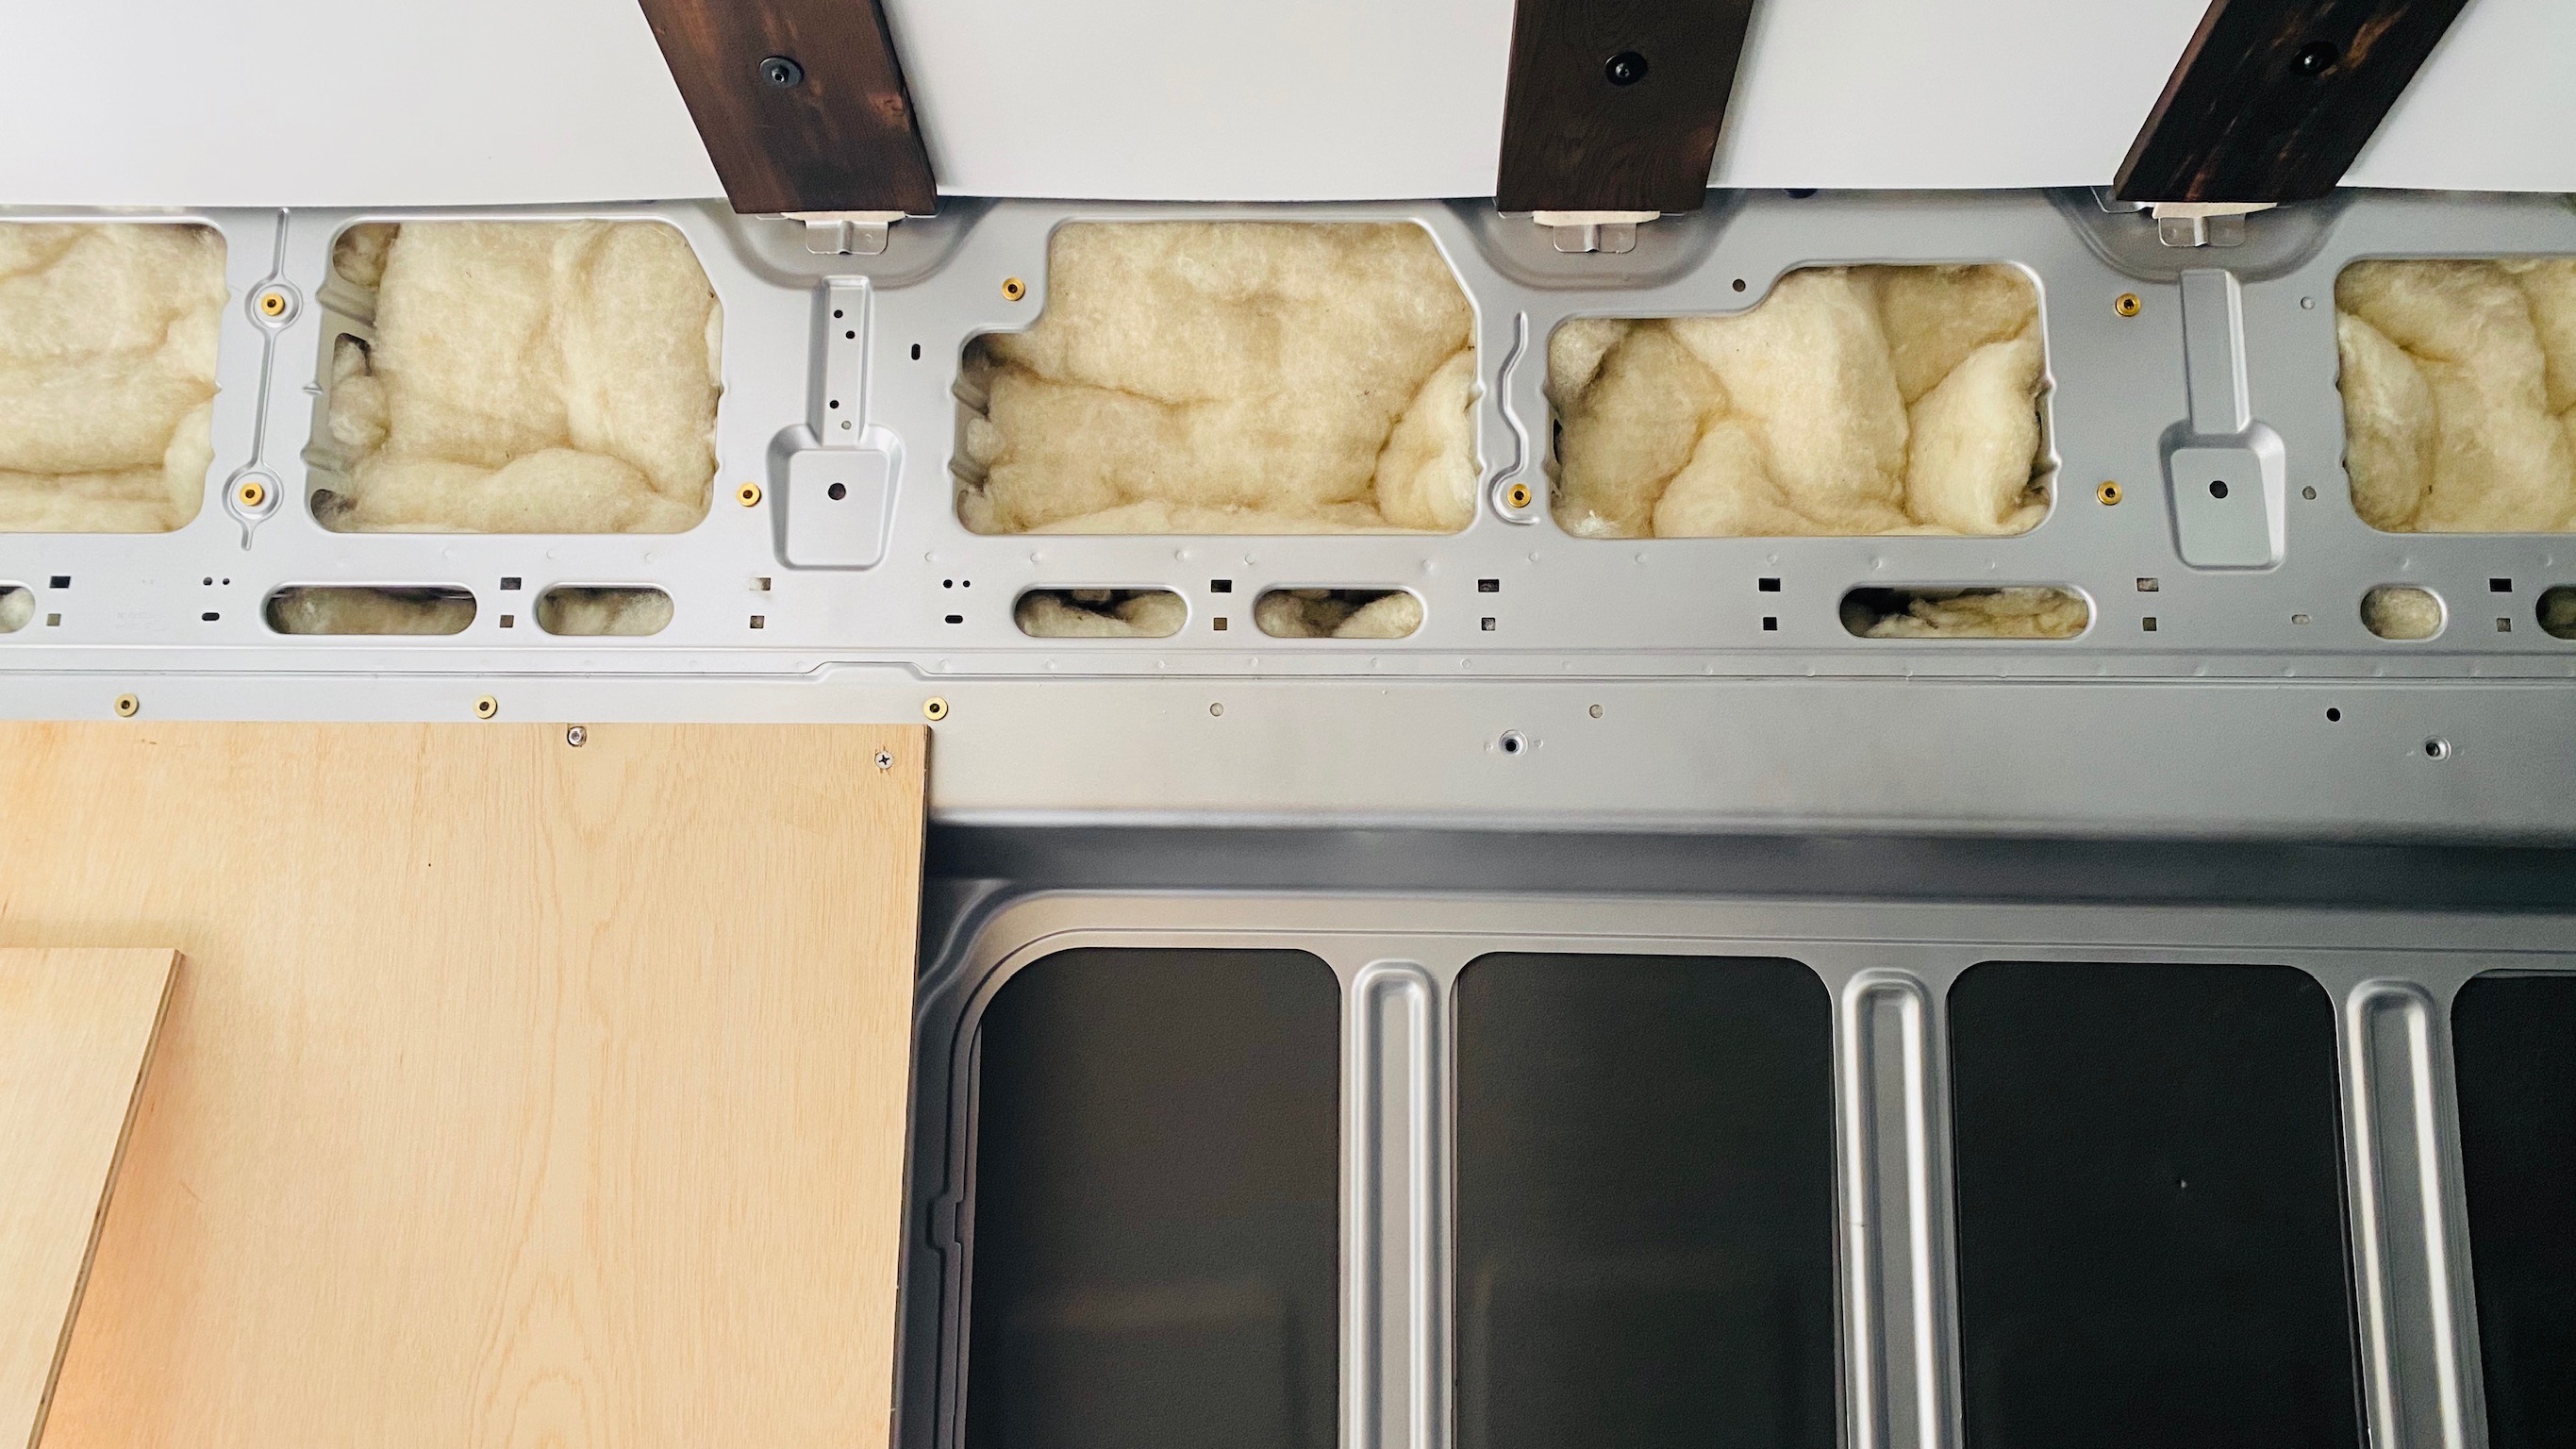
Insulation & Sound Deadening
I have mentioned some of the insulation I used already. For inside the walls I stuffed as much Havelock wool as I was able. To add some sound deadening on the sheet metal of the walls and around the wheel wells I used Noico Butyl Mat you’ll also want a roller to help apply this and so you get it stuck to the surfaces properly. I also added some Noico RED Closed Cell Foam for more sound deadening and insulating. Within the door cavities I used 3M Thisulate SM600L as I felt it was better suited for that job and had purchased it prior to deciding to use the wool.

Finishing the walls
For the walls I primarily used 1/2” plywood fastened directly to the wall with Plusnuts. For installing the Plusnuts I highly recommend using the proper tool for the job an Astro Pneumatic 1450. Trust me this will make your life much easier than trying home-made methods of setting these. To seal and make the plywood look interested I burnt it with a propane torch similar to how I did my ceiling ribs. When attaching it directly to the wall keep in mind you’ll end up with some curvature which maximizes room but can make attaching things along the curve trickier or leave a bit of a gap.
To finish the plywood above the galley and refrigerator I used a sheet of stainless steel cut to size adhered to the plywood with 3M 90 Spray Adhesive and screws around the perimeter.
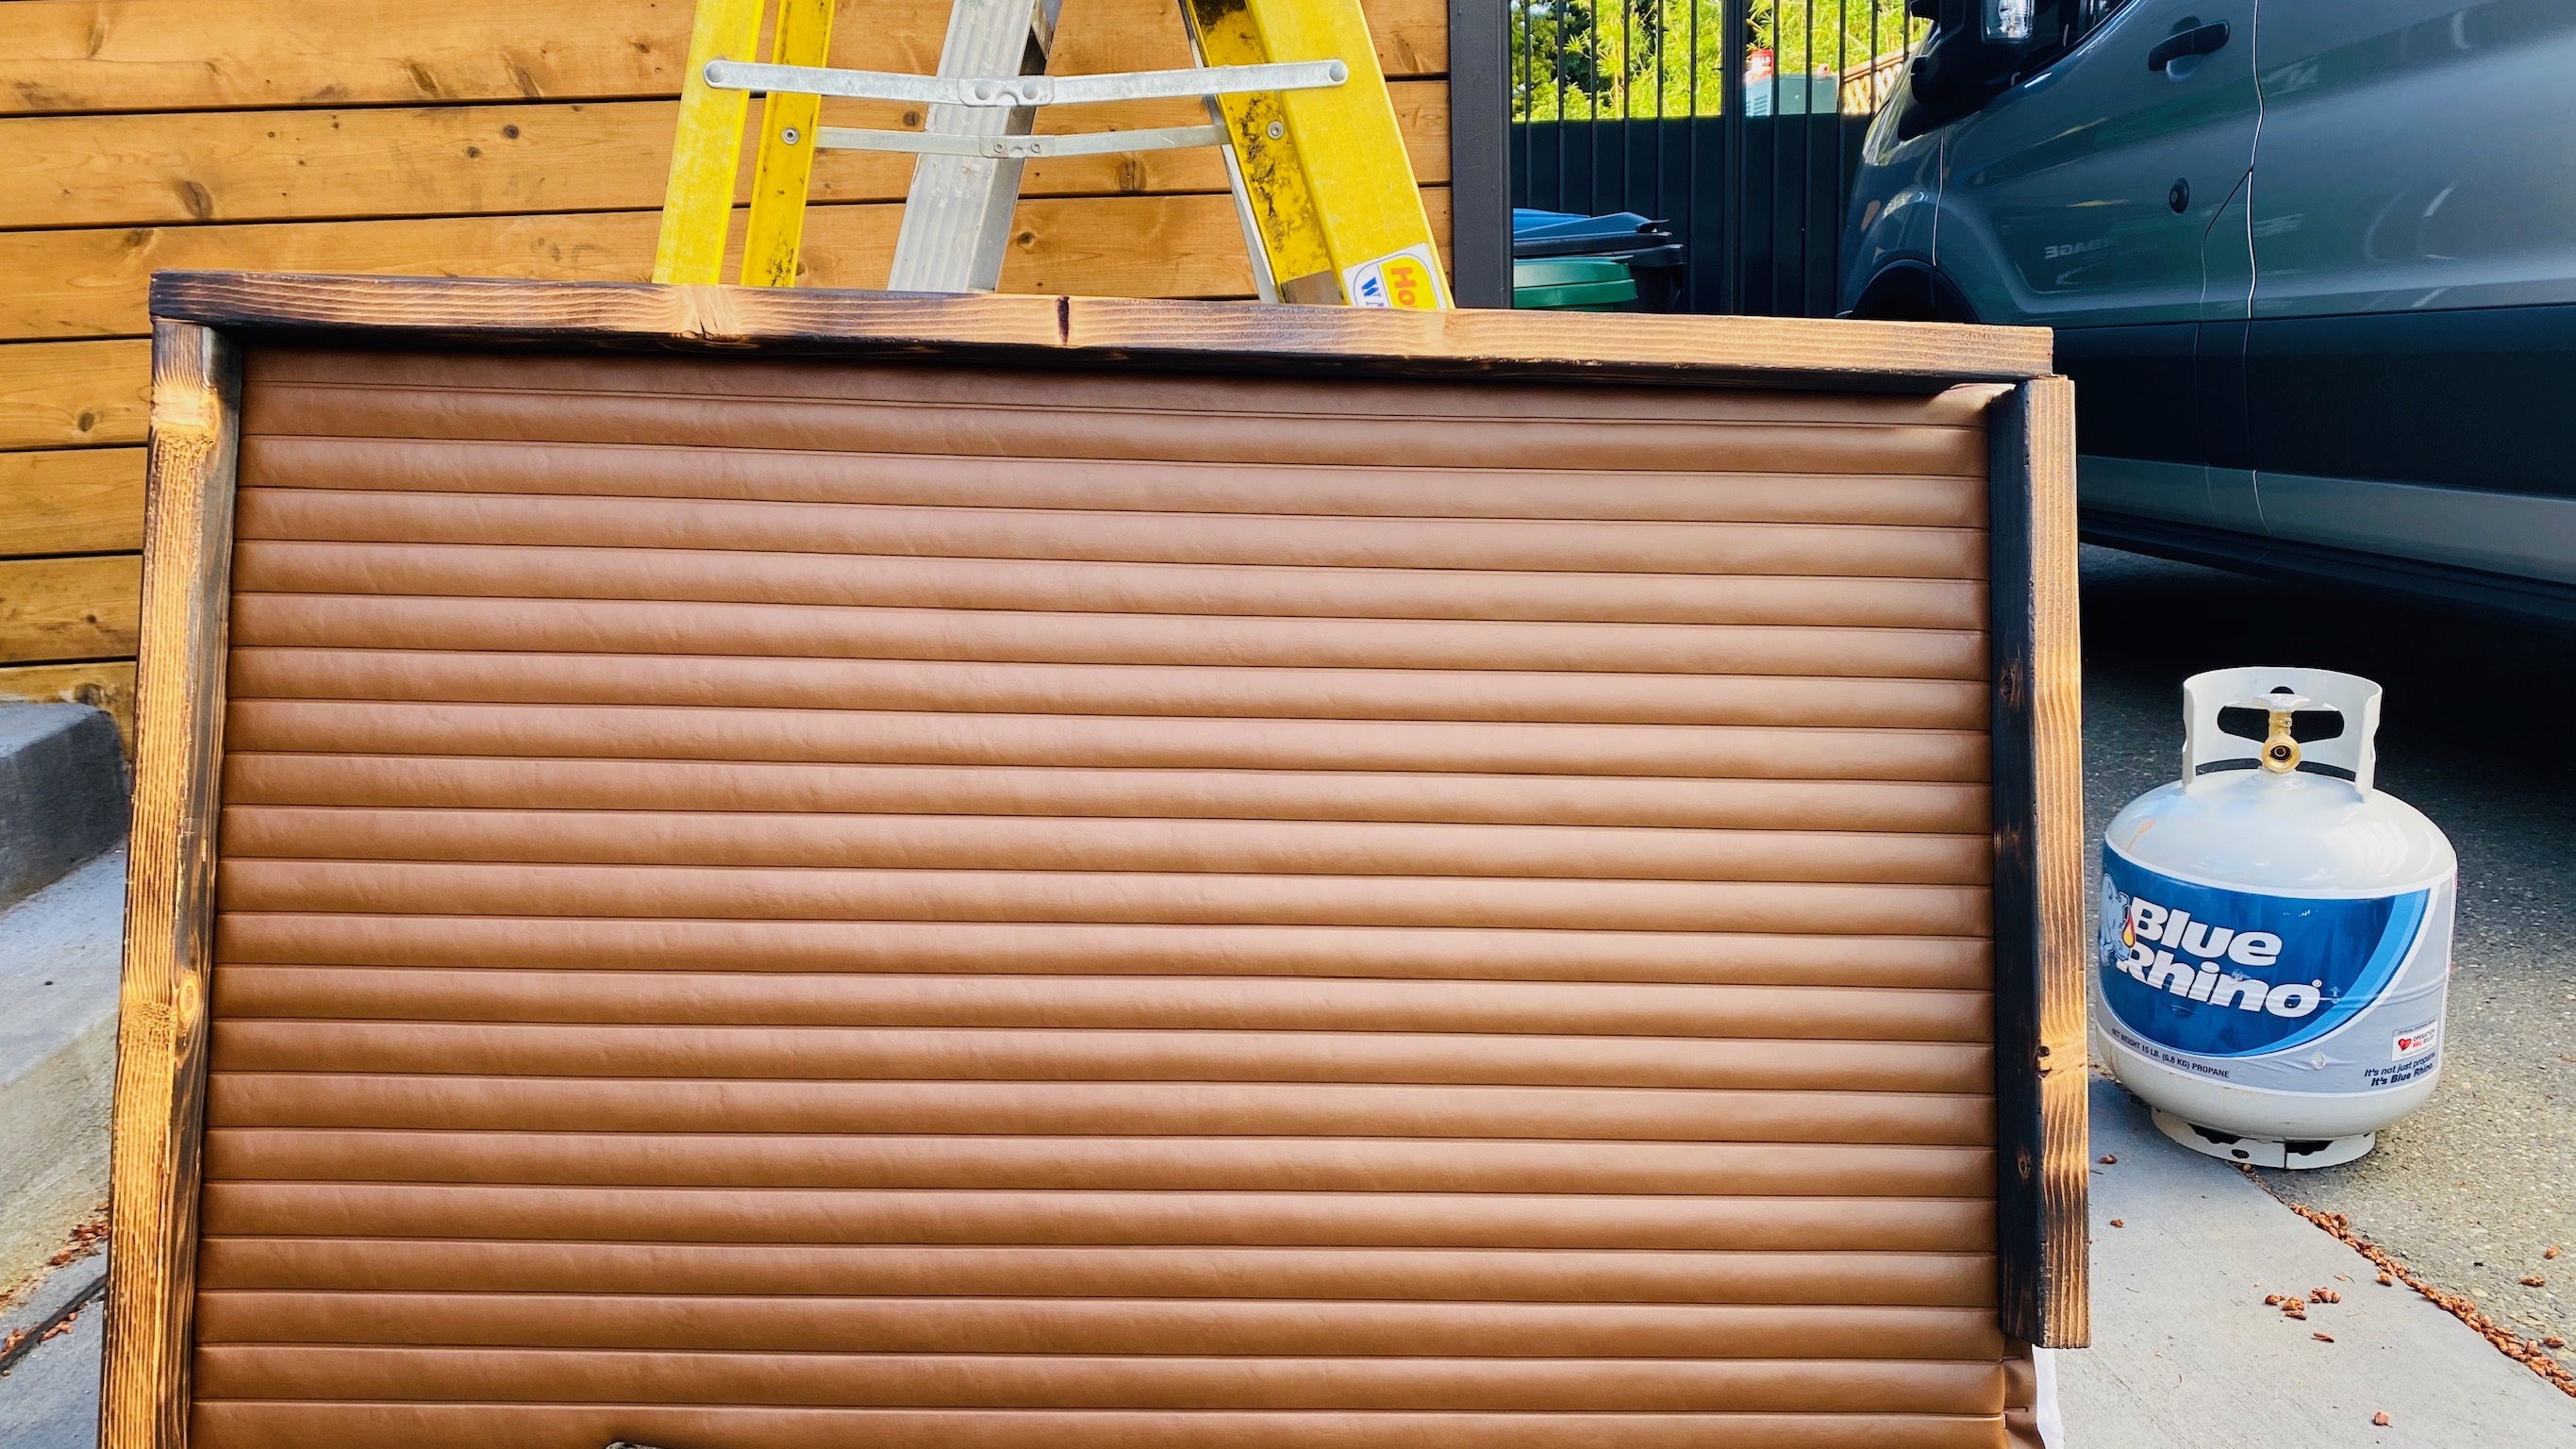
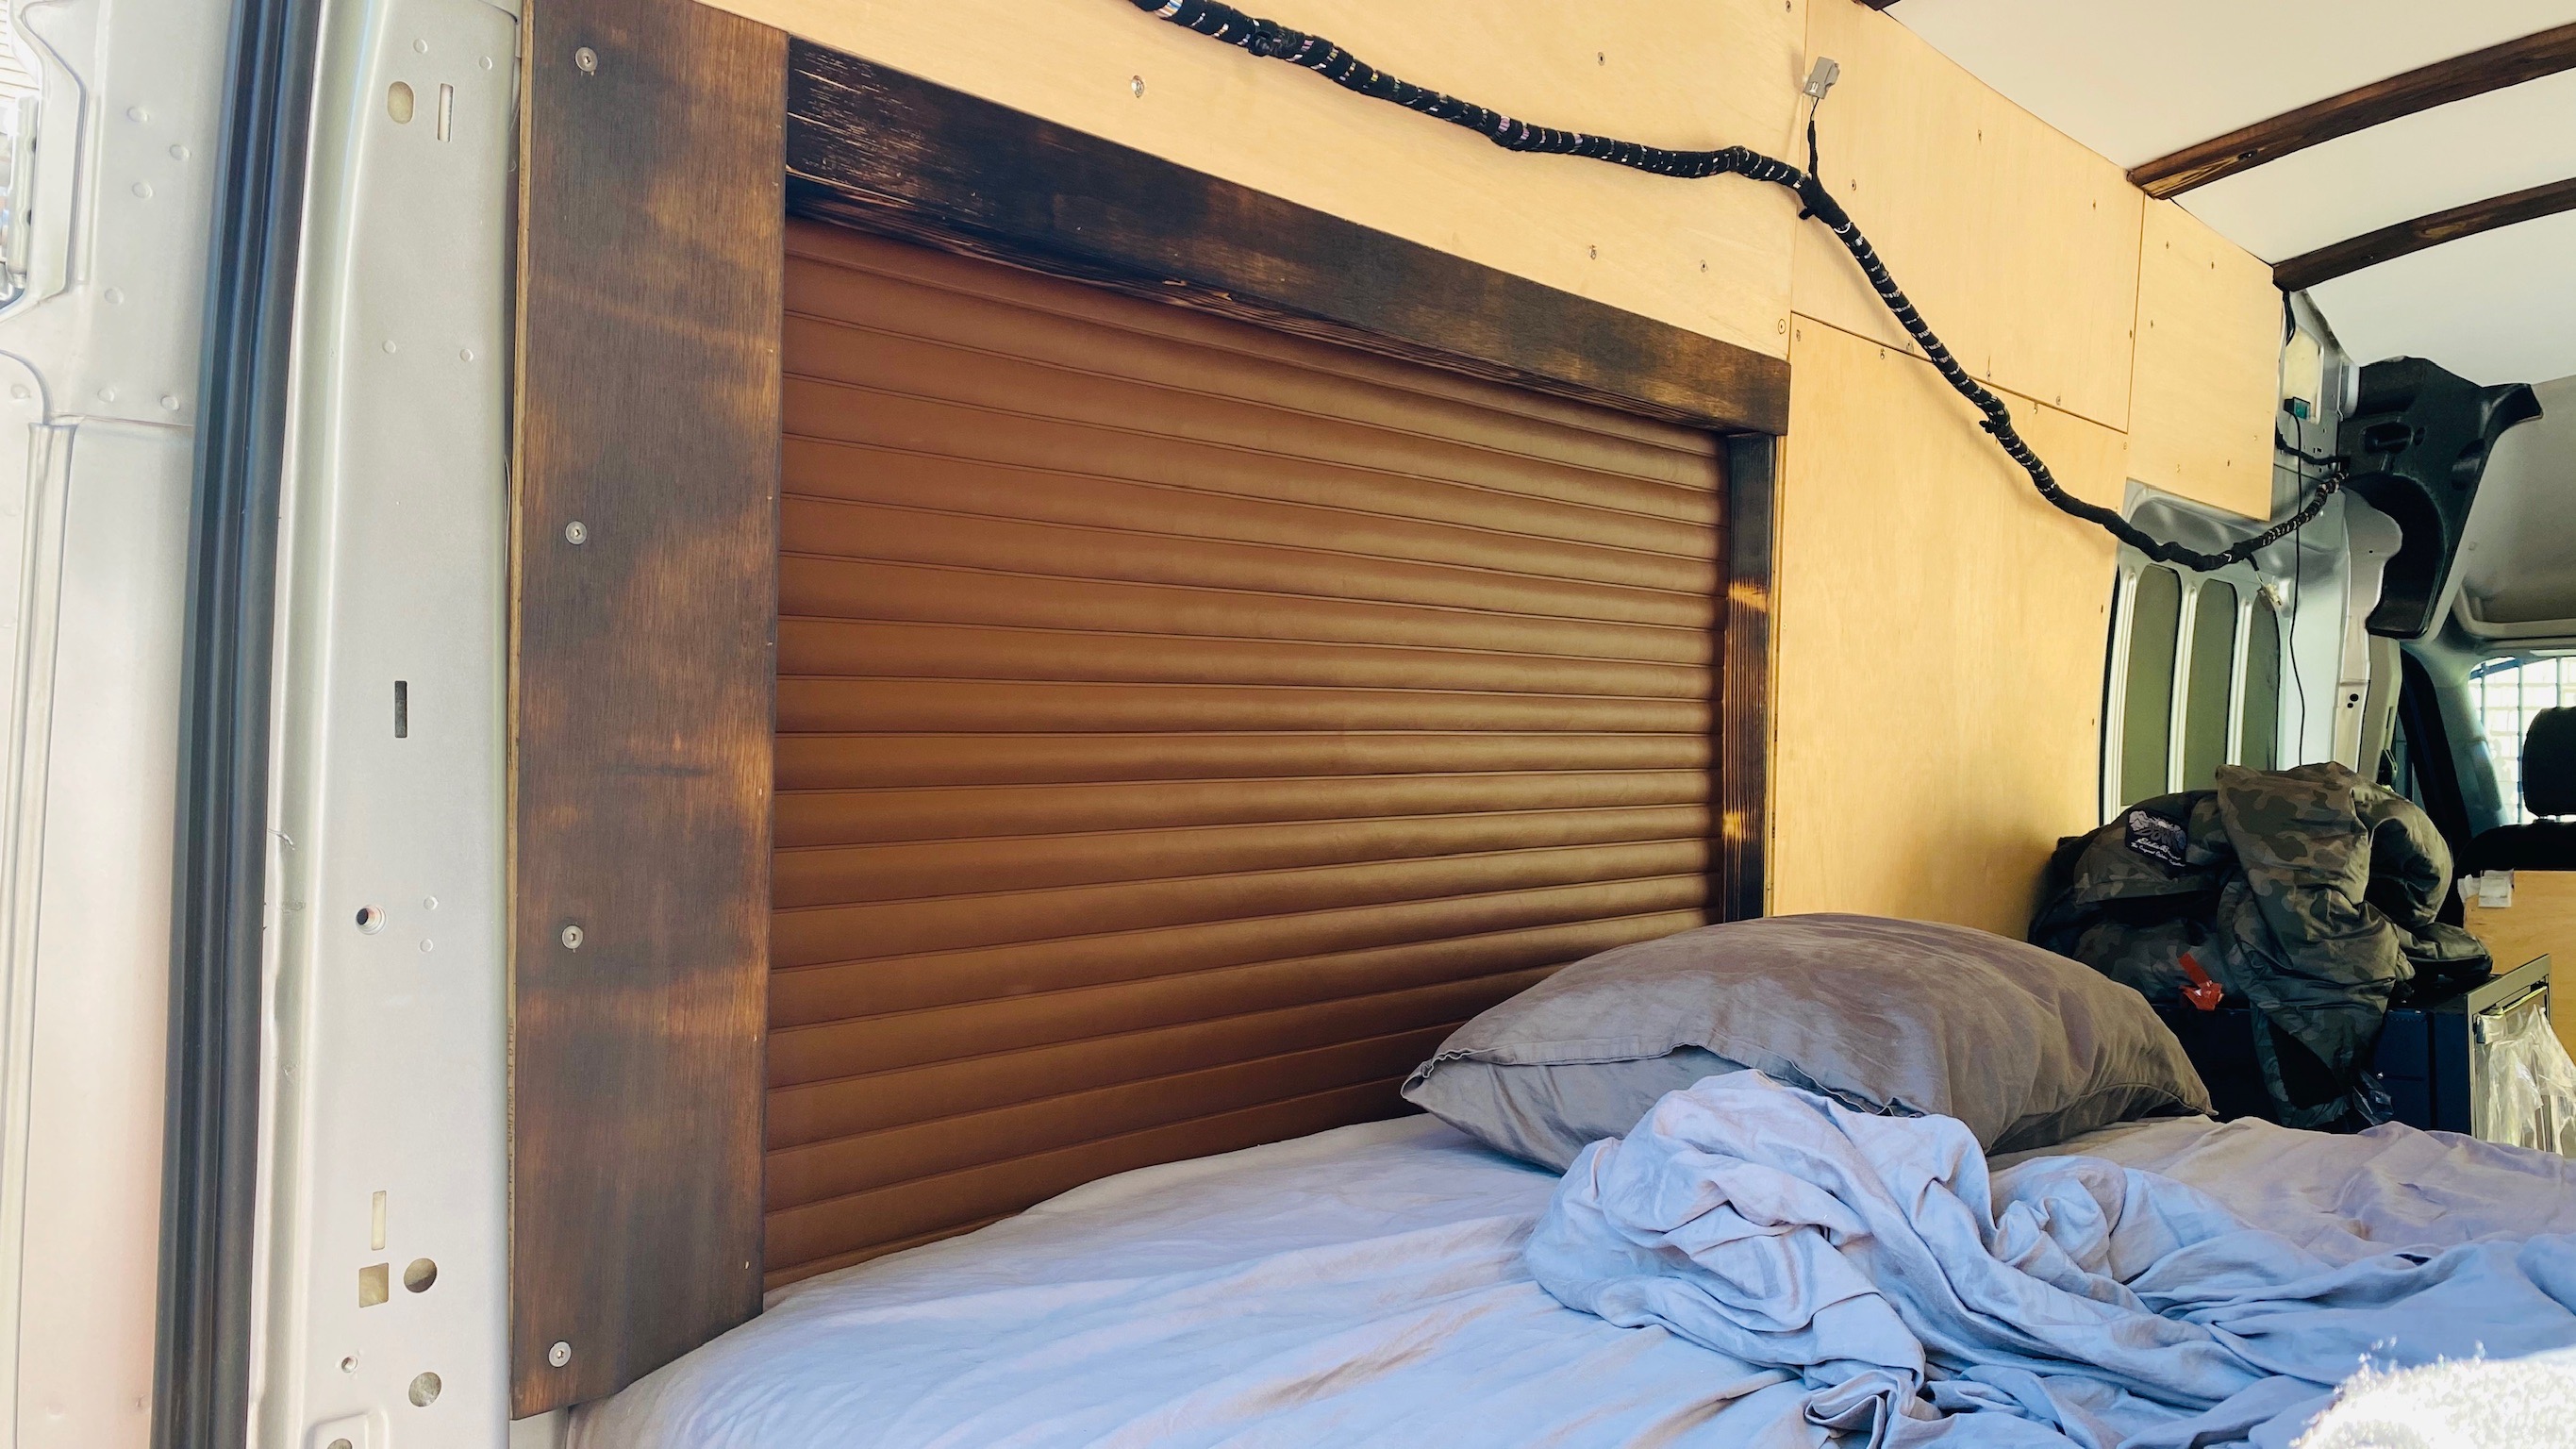
To finish at each end of the bed I made a wood frame with a piece of plywood, on the plywood I attached 1/2” high density closed cell foam to provide some cushion and insulation it was adhered with 3M90. Ontop of that I wrapped it with pleated marine vinyl adhered to the foam with 3M90 and stapled to the back of the plywood. This created a nice material at the foot and head of the bed and enabled me to have 75 inches of room for sleeping sideways.
Plumbing and water
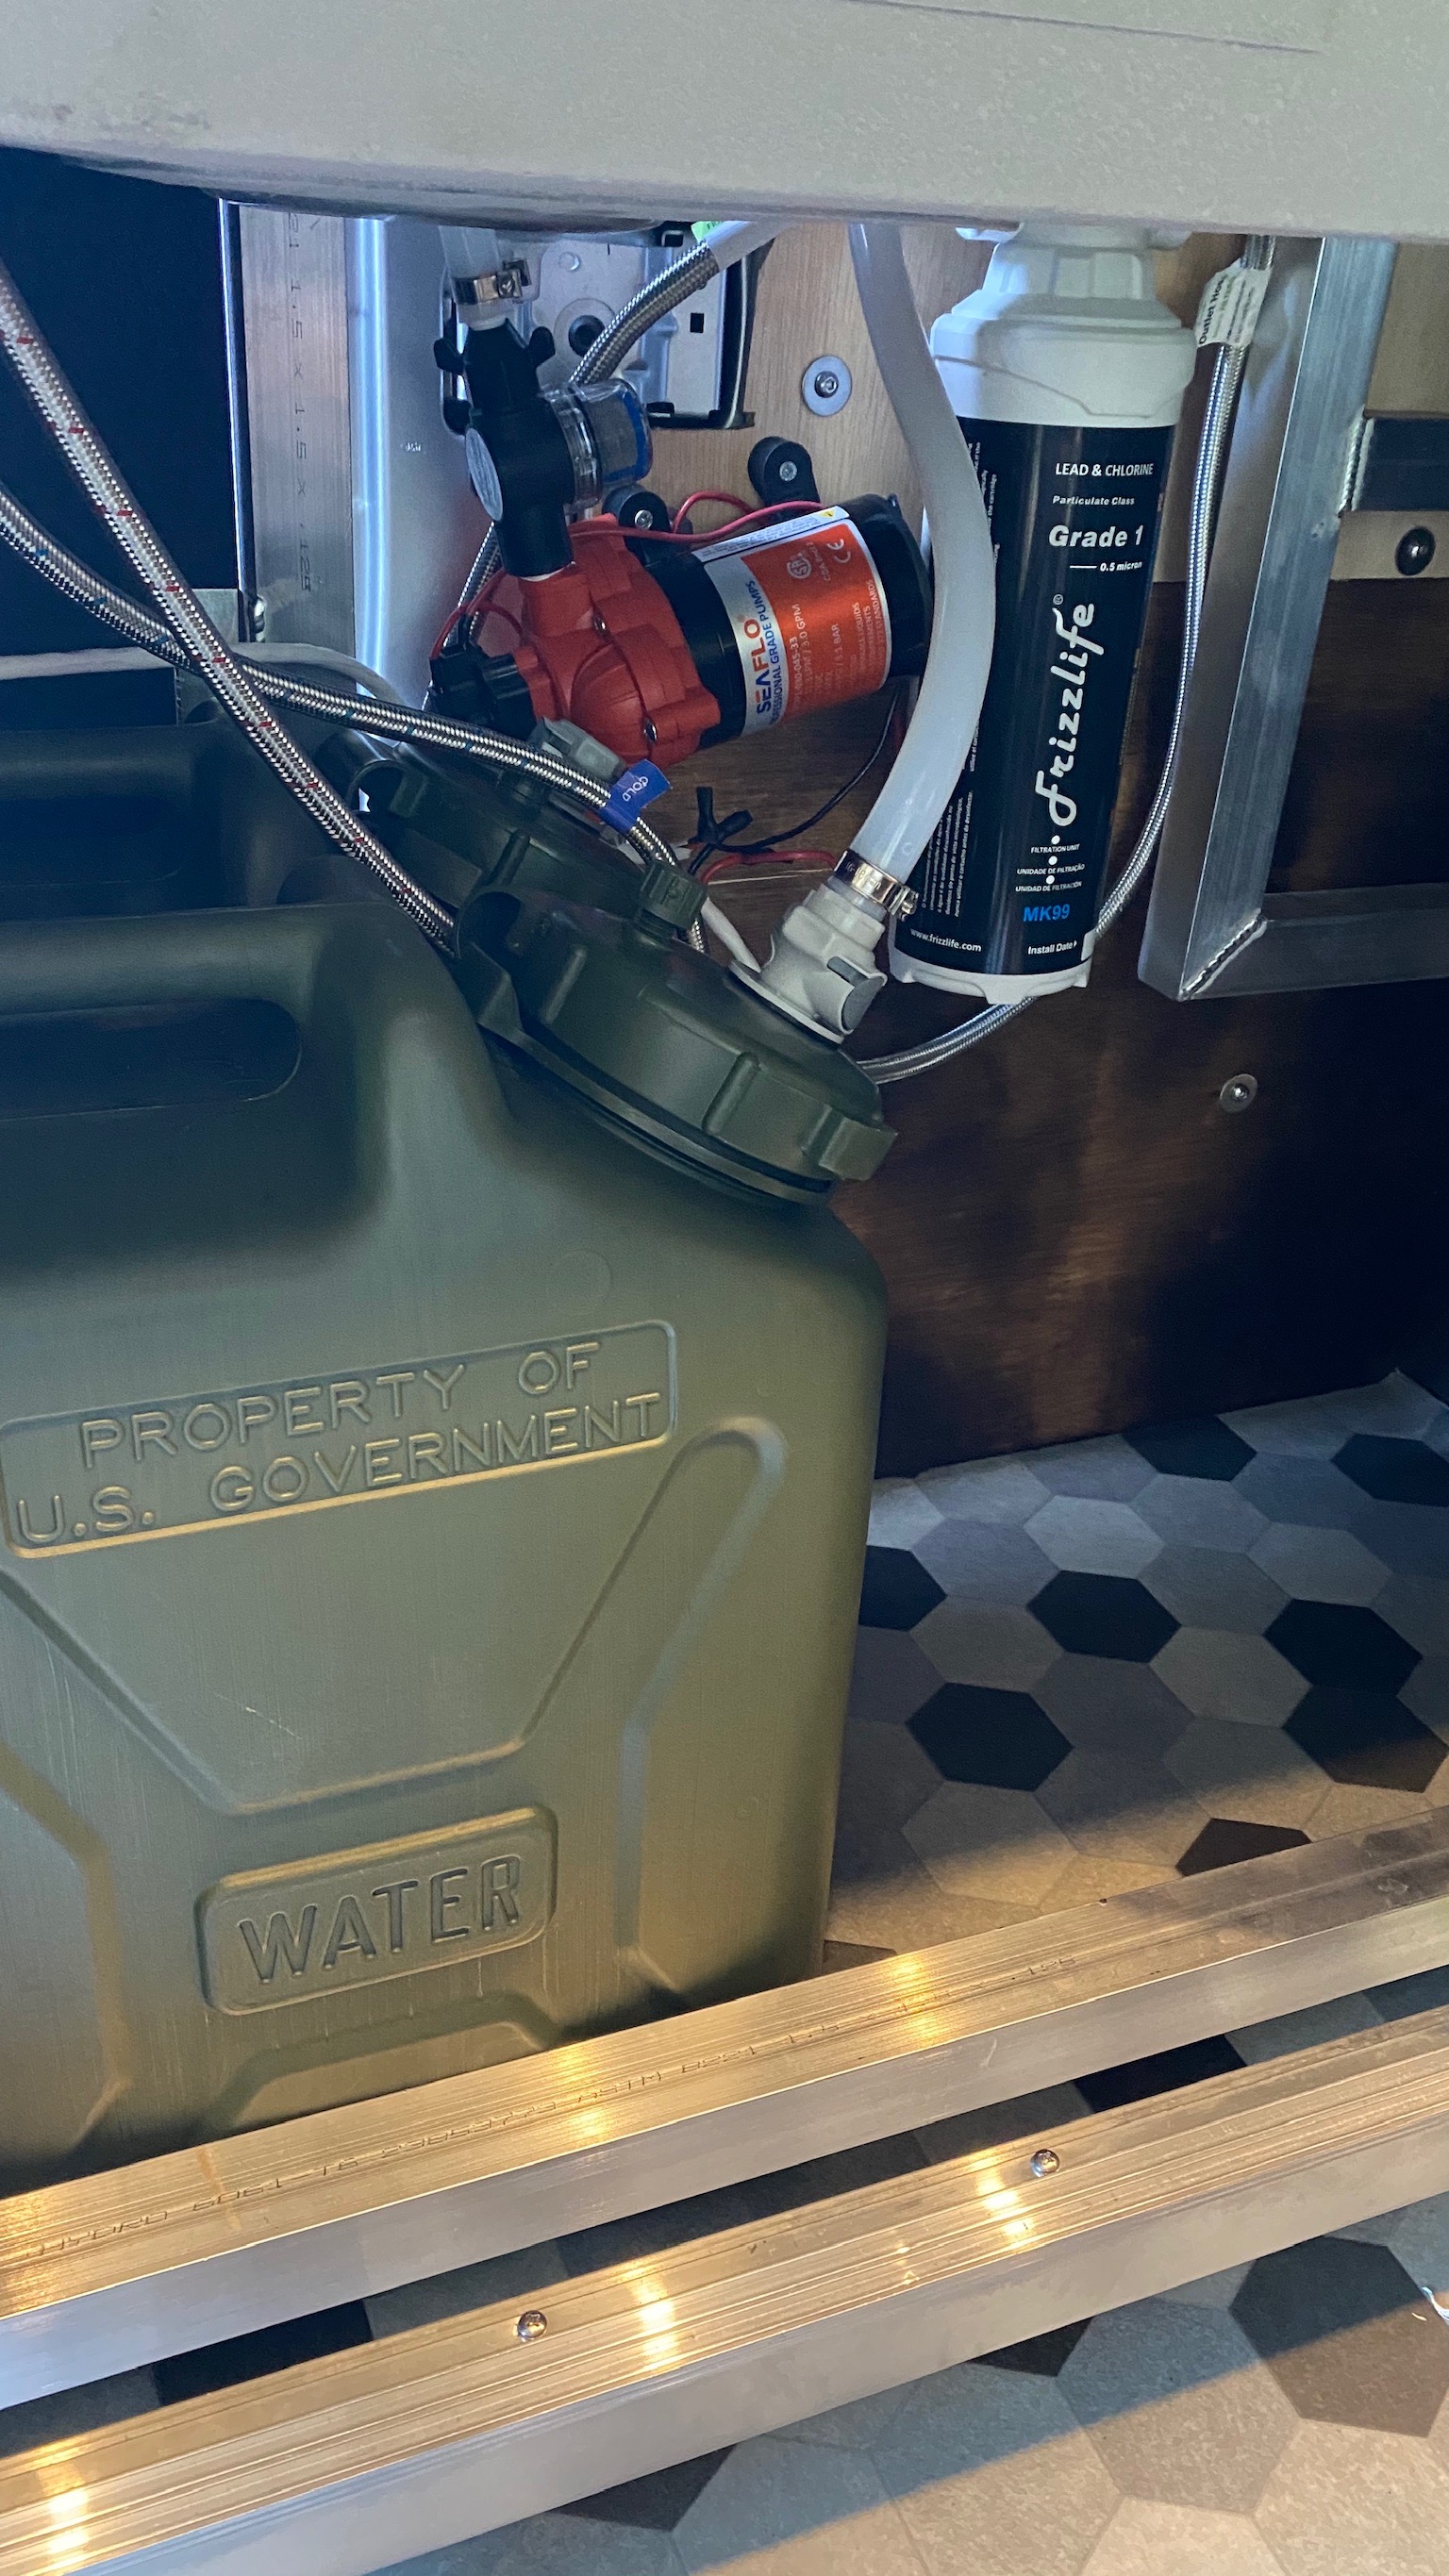
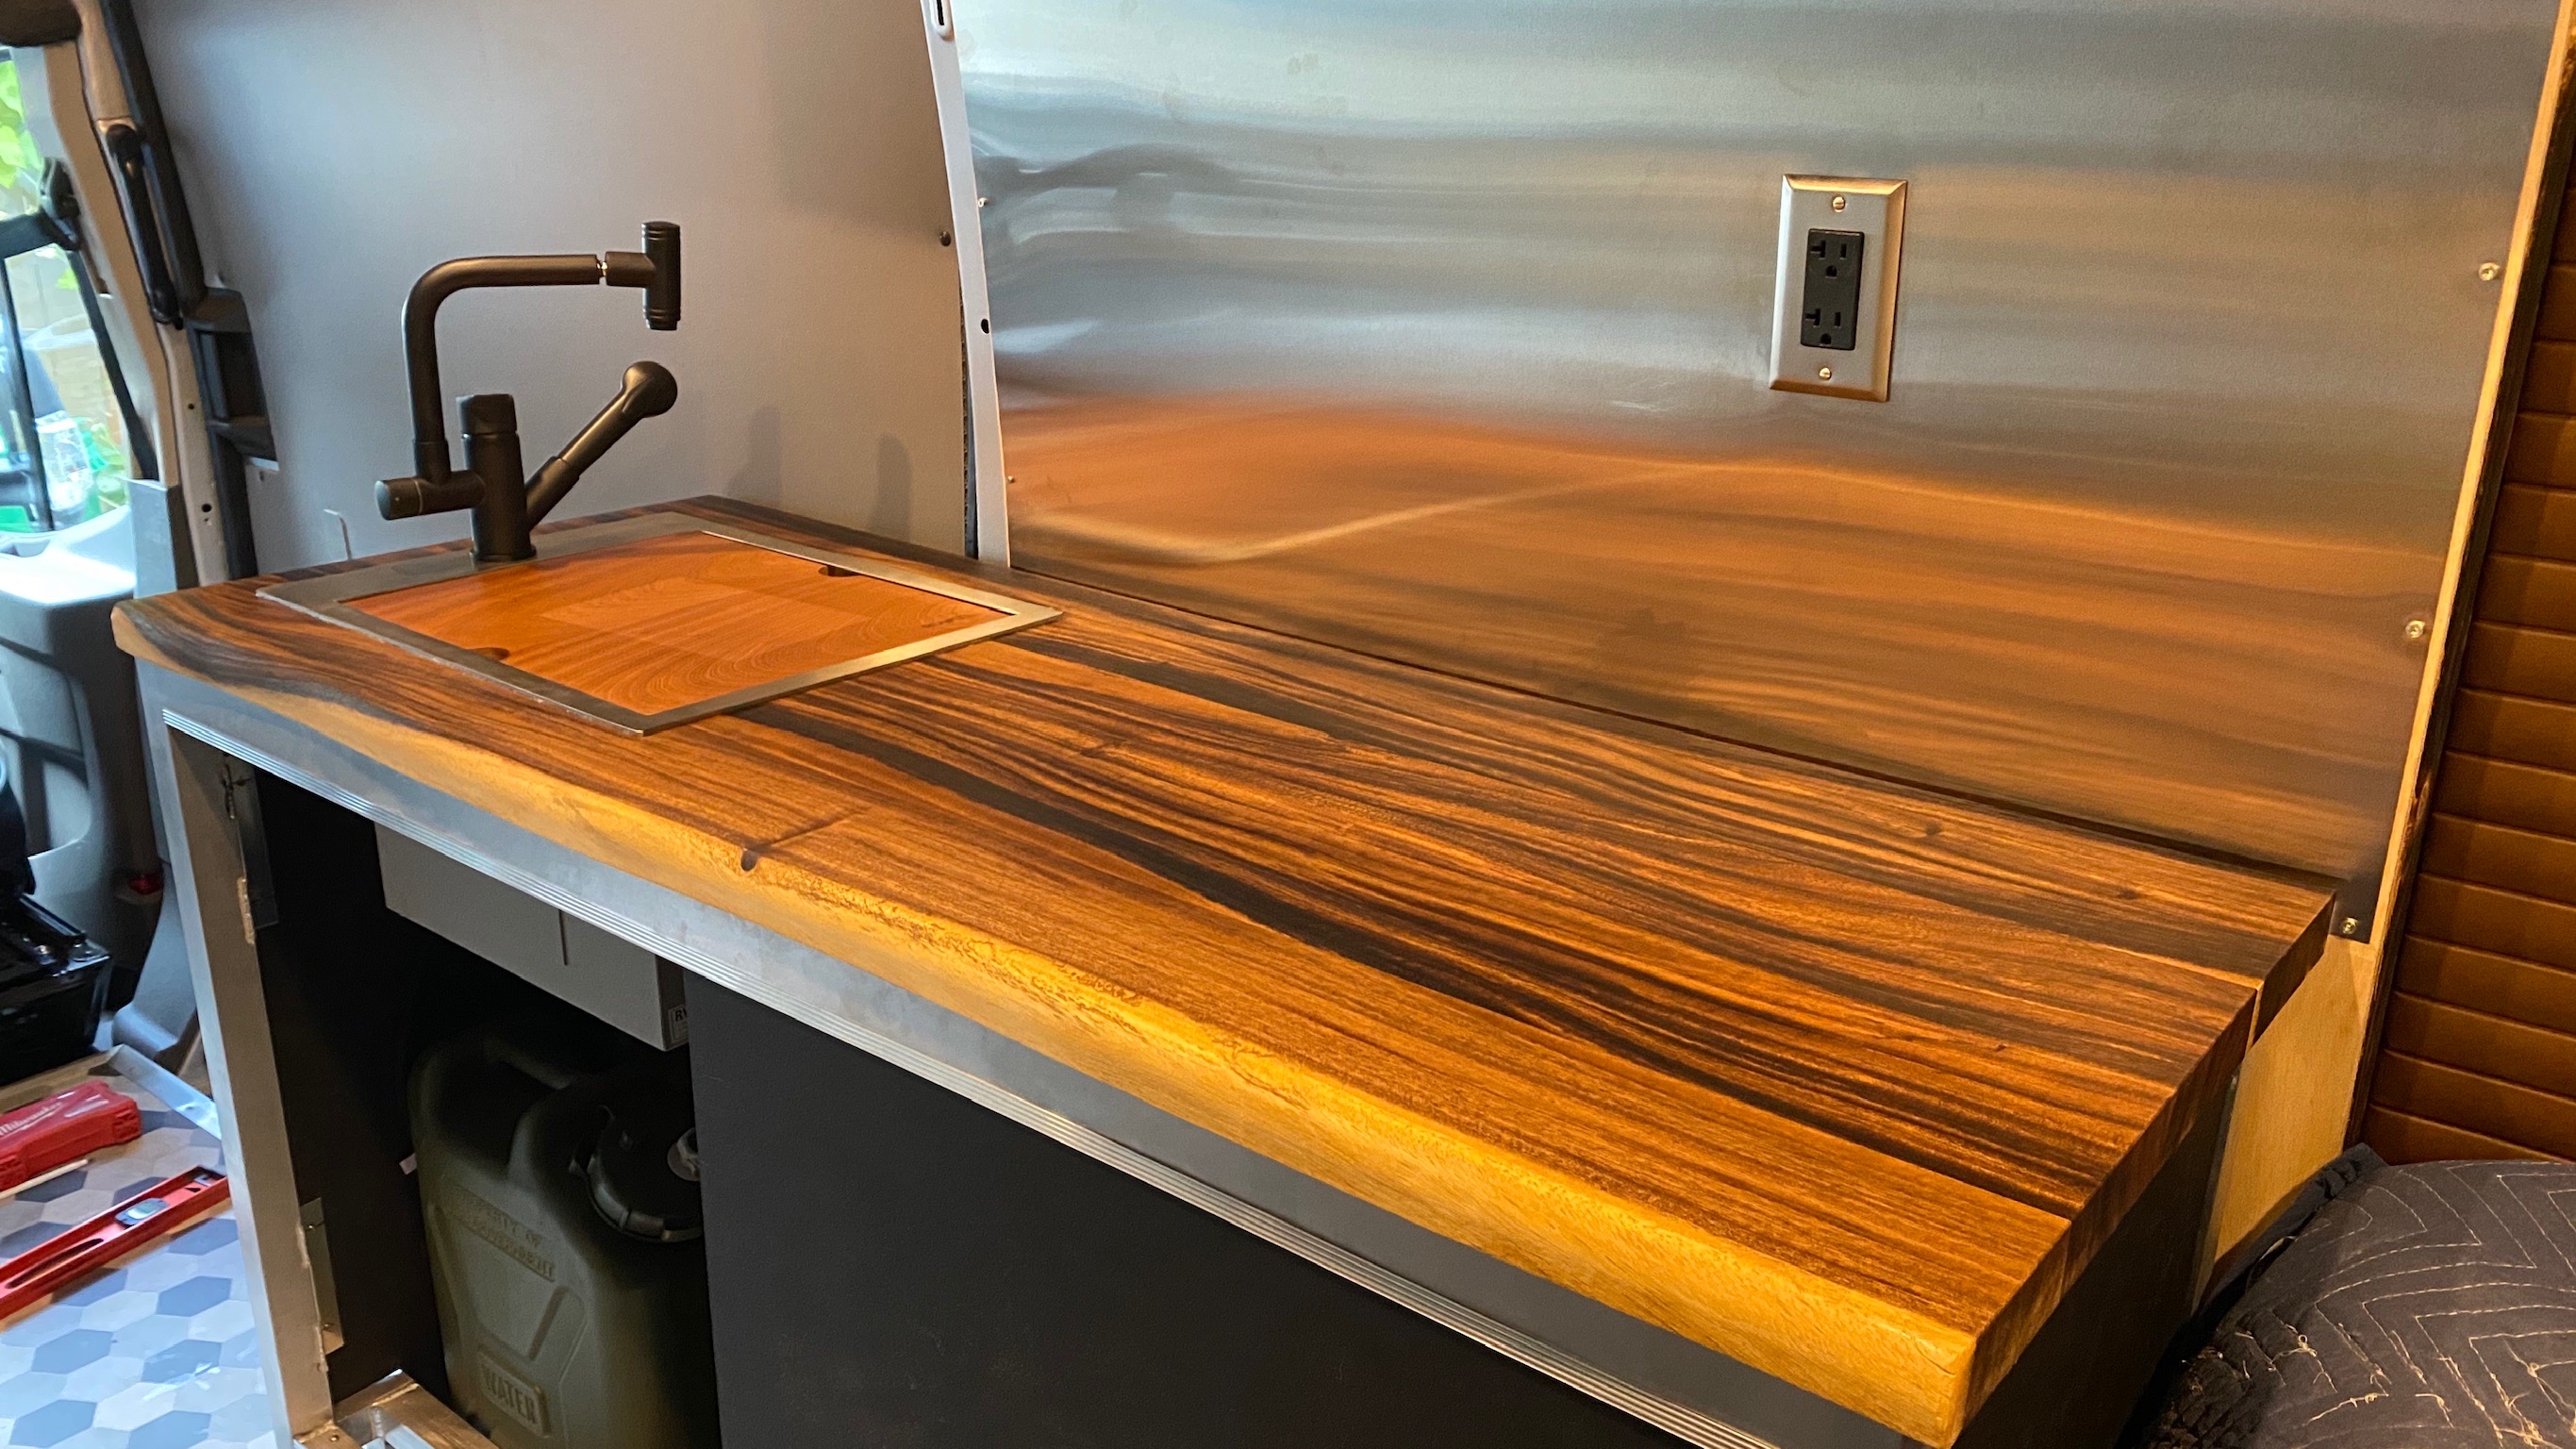
For the water I decided to only carry a couple jerry cans full. I used 2x 5 gallon cans. For plumbing these I used silicone tubing that connects via quick connect on the jug lid. You’ll need a fitting that goes on the jug and the fitting that goes on the hose. Inside the jug you’ll attach some hose going down into the bottom of the jug. This makes it easy to quickly disconnect your water jugs and pull them out for cleaning or filling but I usually fill them from outside the van with a flexible hose I carry. They also have a check valve inside so water doesn’t leak out while disconnected. You’ll also need some hose clamps that are safe to use with the silicone hose. To pump the water i’m using a Self Priming Seaflo Pump and it passes through a Water Filtration System before going to my sink. I wanted a good sized sink so I went with a Ruvati 15x20 sink with strainer and cutting board. For my faucet i’m using one with pull out sprayer that could be used out the sliding door to rinse off. The sprayer works independently of the faucet when in that mode so helps with water conservation as water doesn’t flow from the faucet at all and only flows from the sprayer when you push the button on it. Overall i’m very happy with this combo. For water draining from the sink I used a Flexible Hose Drain Trap going out to a small grey water tank under the van with a ball valve to release it when appropriate. I didn’t want a grey water tank in the van taking up extra room and will be only using water and biodegradable soaps so I felt this way the best approach.
I suppose I can group in my portable toilet in this section as well. The topic of a toilet in the van was a tough choice. I weighed options of doing a compostable one or Laveo dry flush but for my personal needs and from a lot of people I talked to who actually lived long term in vans they said you aren’t going to go in your van. You’ll plan around and and use toilets while you are out. I still wanted to have an option in case of emergency so I bought a GO Anywhere Camping Toilet. This folds up and takes up hardly any room and uses a bag that has gel in it to solidify things. Then you just toss it out.
I also discussed the topic of showering in your van with a bunch of full timers and came to the same conclusion. So I left that out of my build. As mentioned above the sink sprayer does come out pretty far and could be used to rinse off in a pinch.

Batteries & Electrical
I built my electrical system and did change and add new things several times since I “finished” my build. At some point i’d like to go back through and tidy things up due to these changes but everything is solid and i’ve really fine tuned it for my needs. Initally I bought a China made no name 12v 250AH lithium iron phosphate battery. I got a pretty good deal on it and it ended up working out well. I just couldn’t get behind the idea of spending the money for a BattleBorn. They are great batteries and have a nice warranty but the bang for the buck is seriously lacking and at the end of the day it’s really just some cells arranged in a plastic box coupled with a BMS. This makes a pretty large battery footprint if you’re using more than one and only 100AH of capacity each. The 250AH was smaller than a Battleborn but more capacity and the current 300AH batteries I am building are ever so slightly larger physically and 3 times the capacity for not much more money! I have a 12v system and currently have 600AH of lithium on board. This enables me to go for many stationary cloudy days here in the pacific northwest without fear of depleating my batteries. If you can afford it I highly recommend going lithium over AGM or Sealed Lead Acid. They are better for the environment, less wasteful and lasts for a decade or more rather than a few years. They can be fully discharged so you truly get the full capacity. With these other types of batteries you can only safely use half the capacity and they are bigger and heavier taking up way more space and weight capacity.
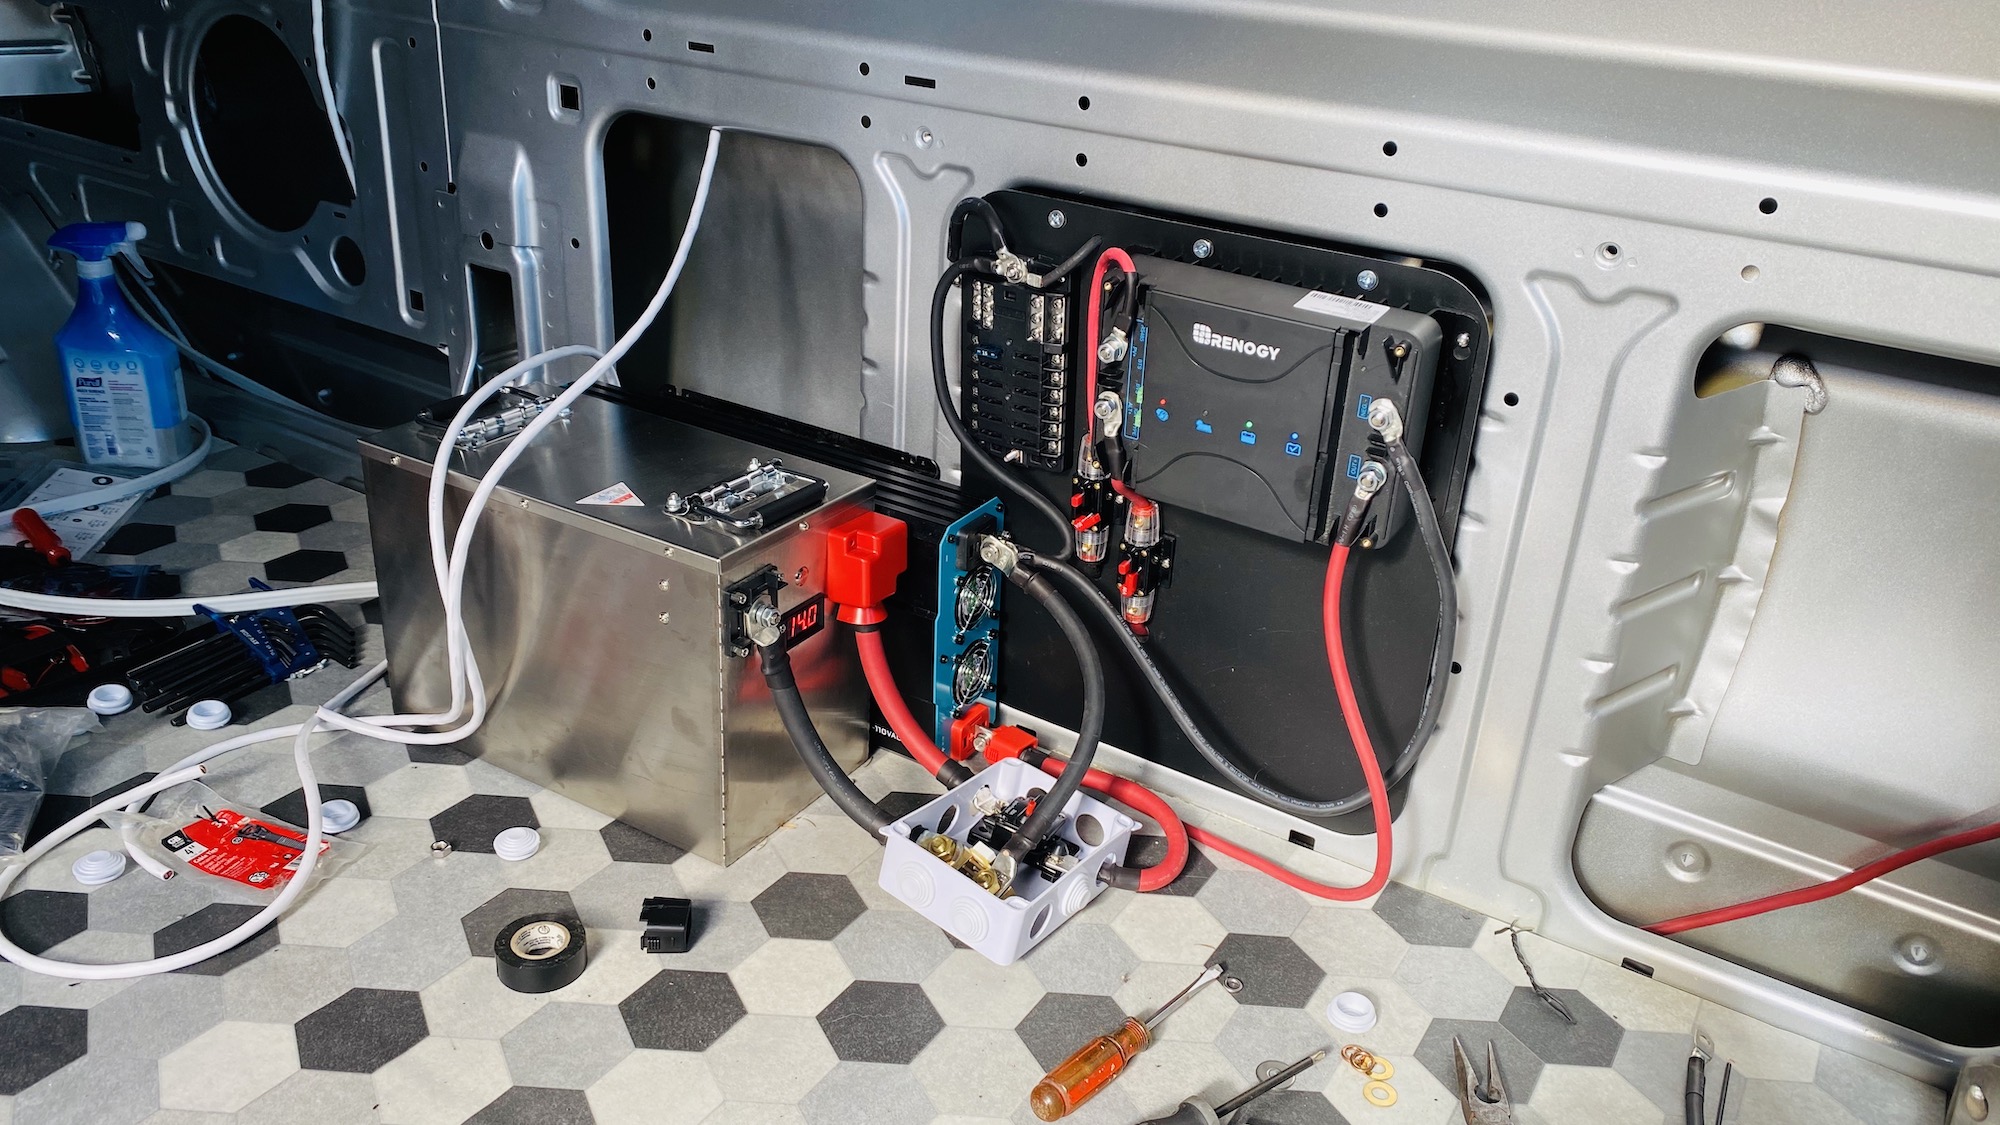
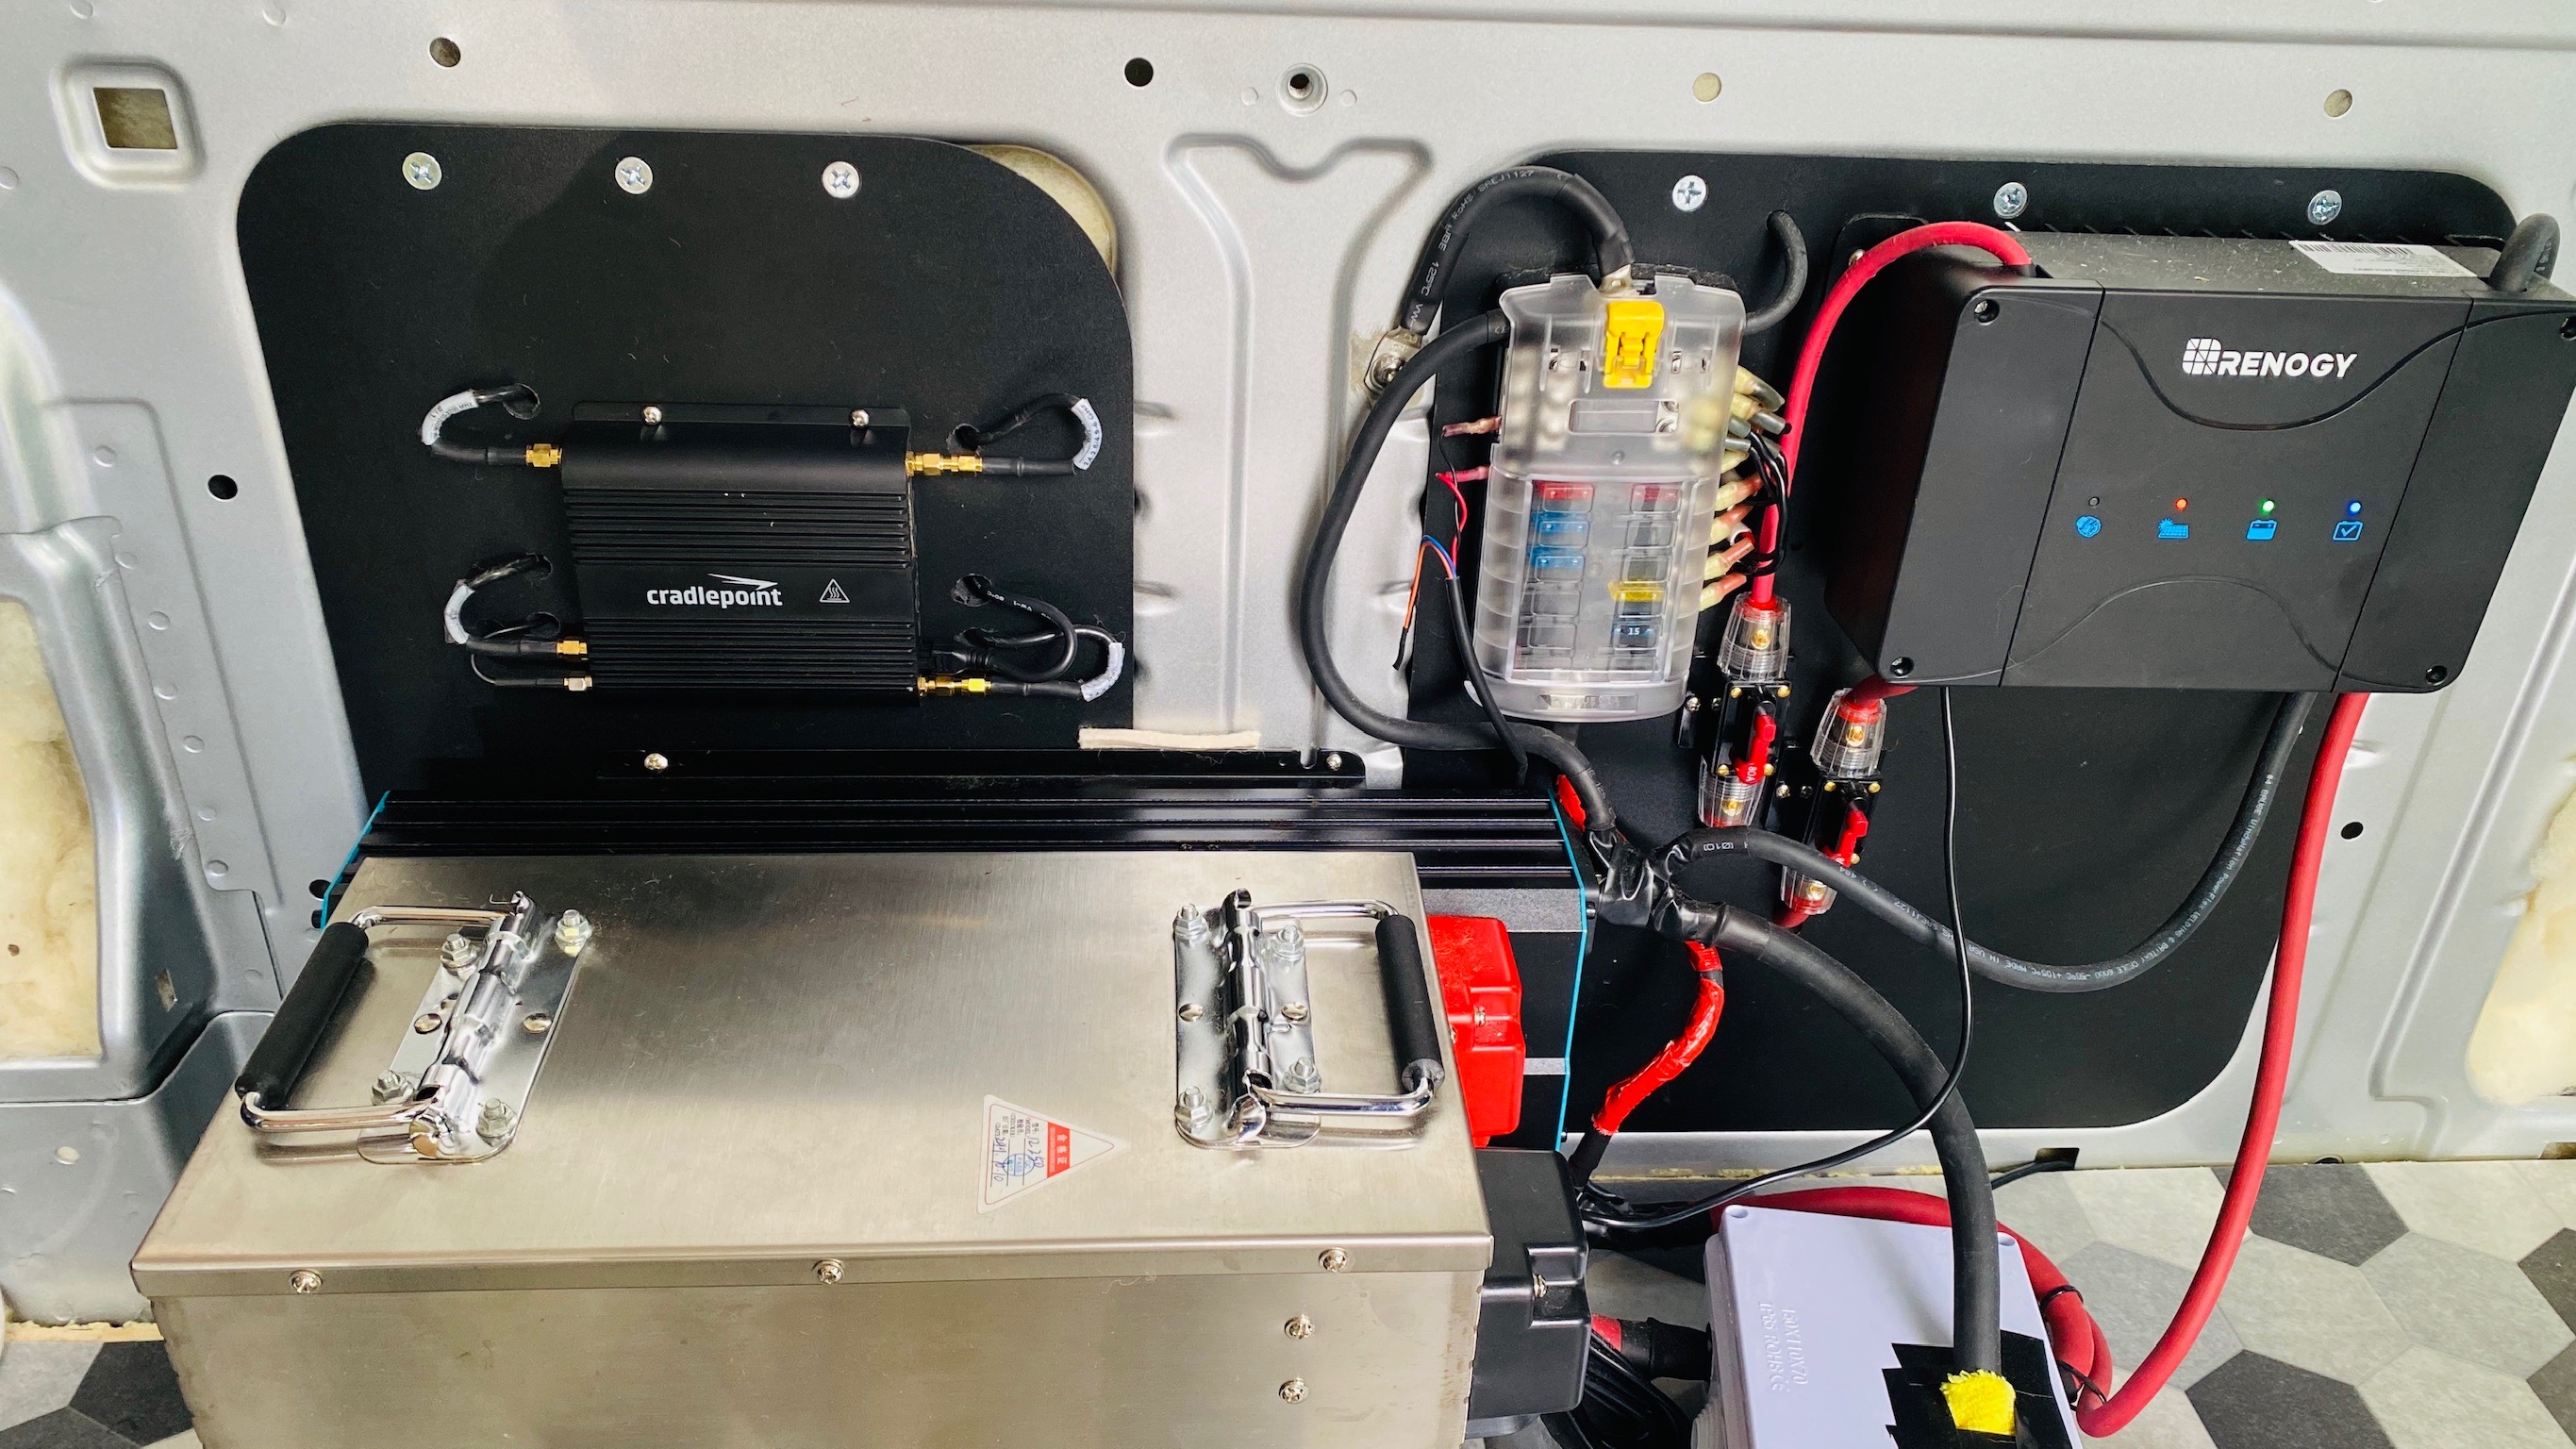
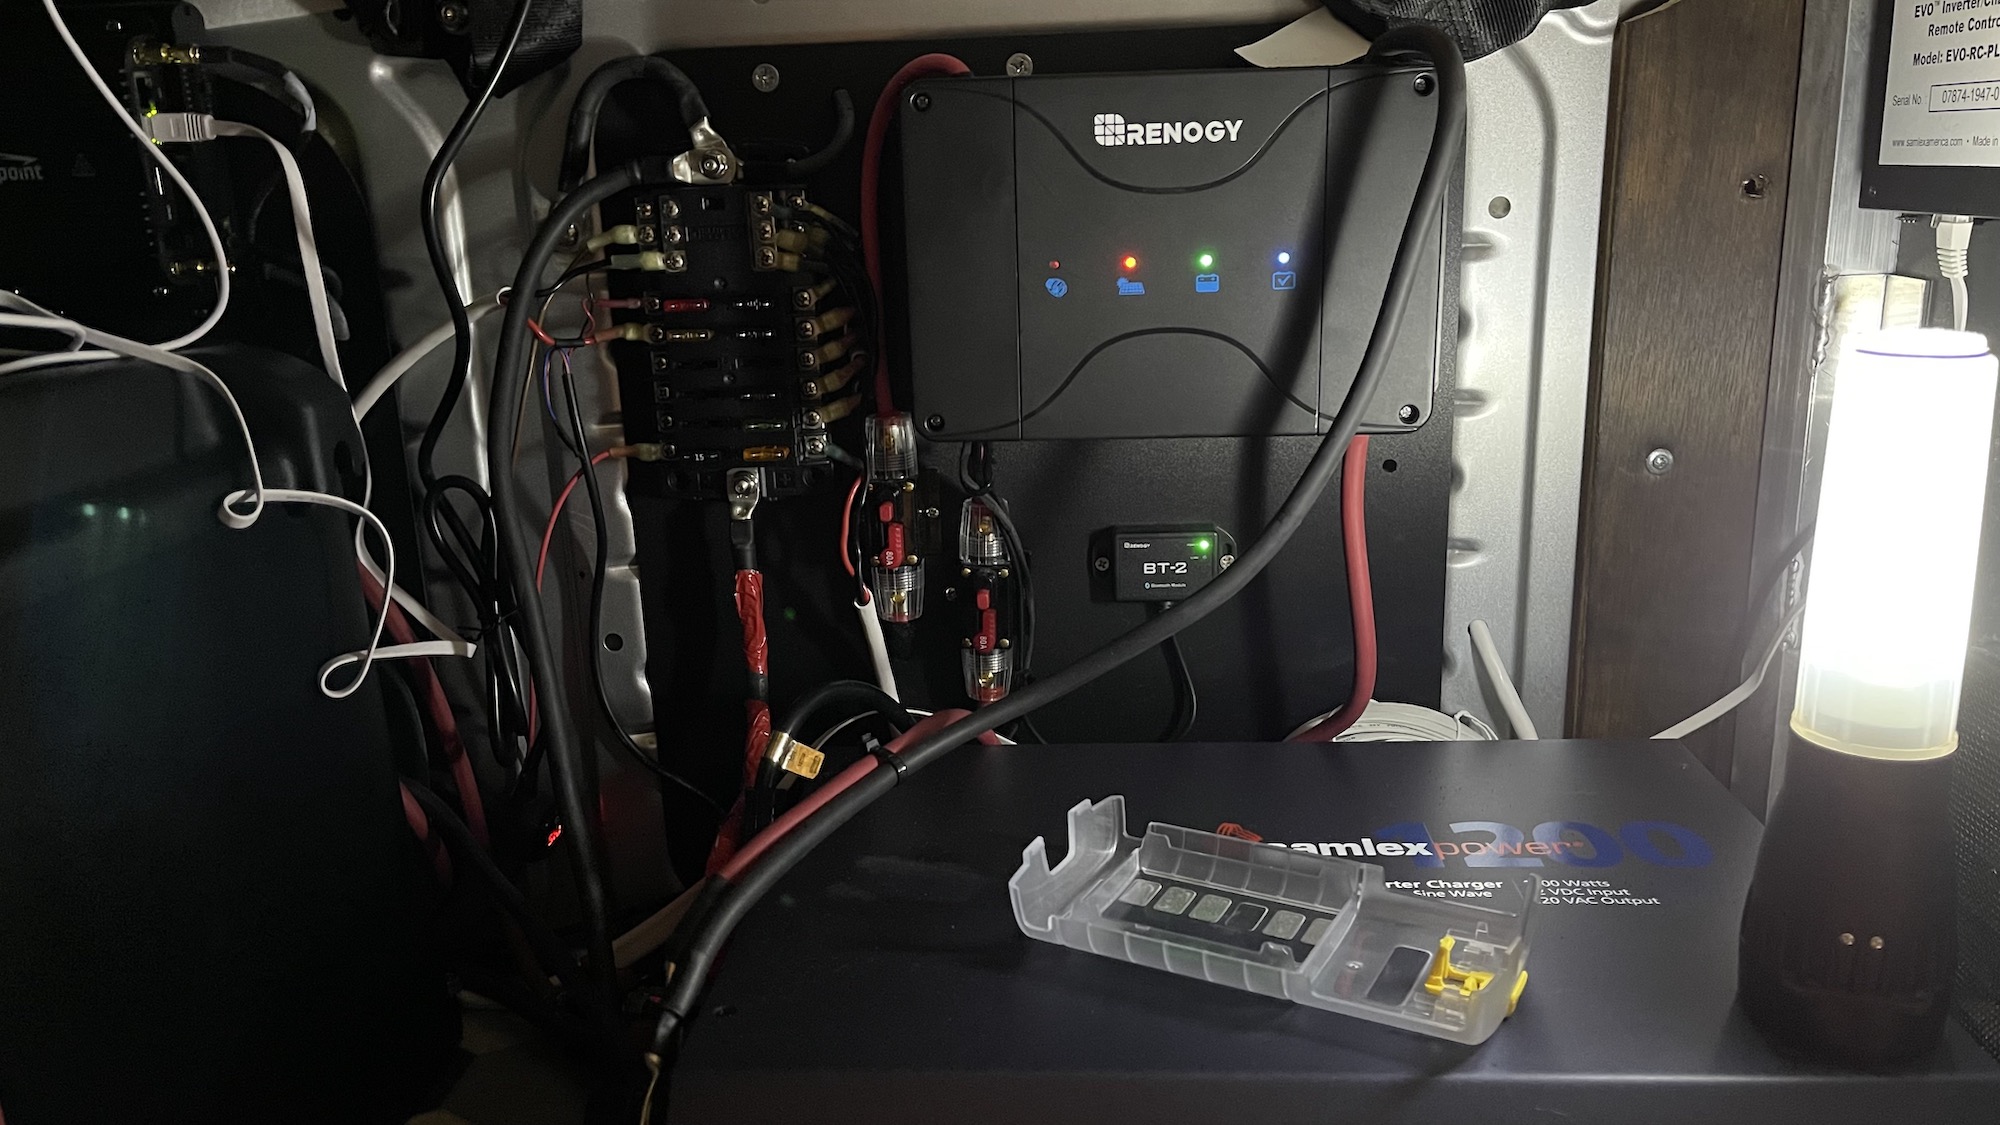
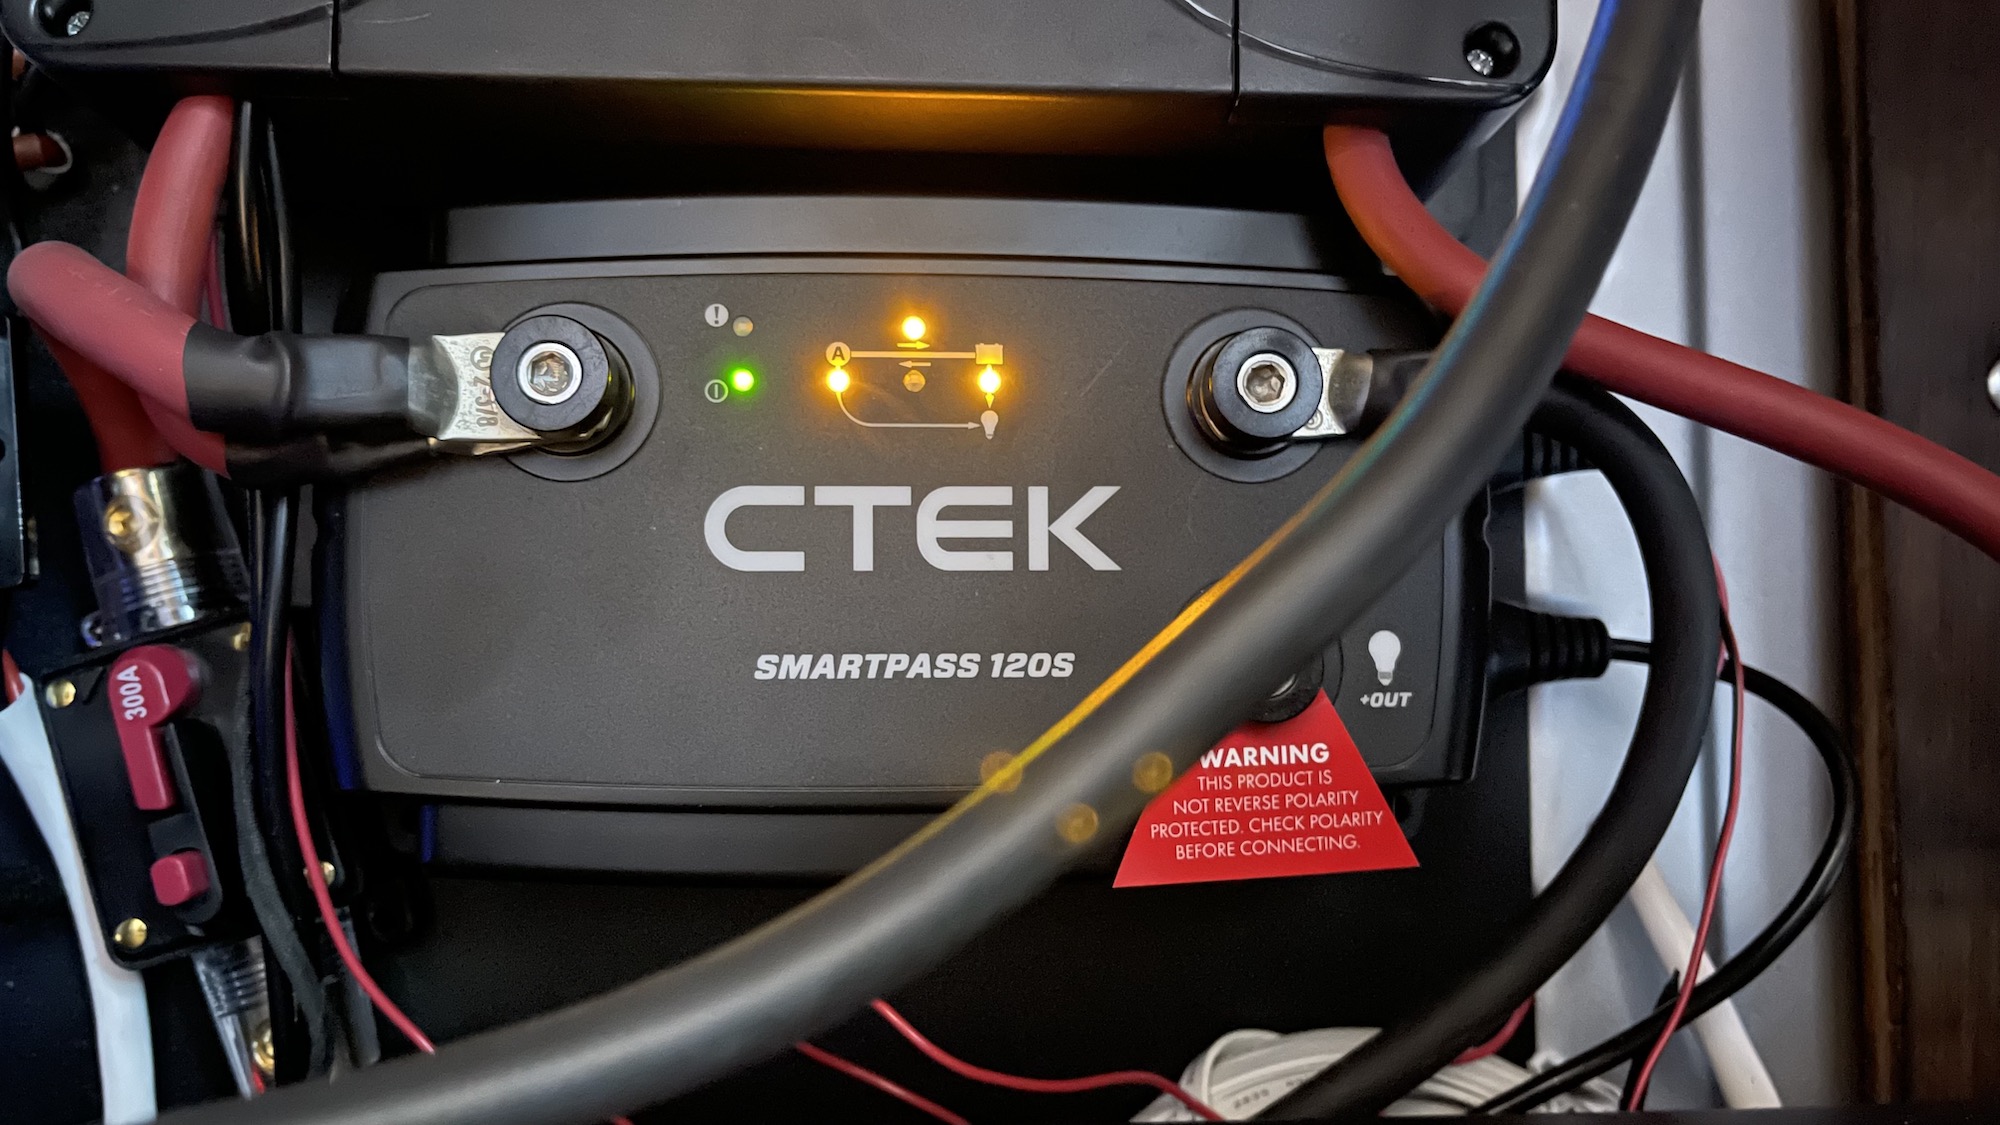
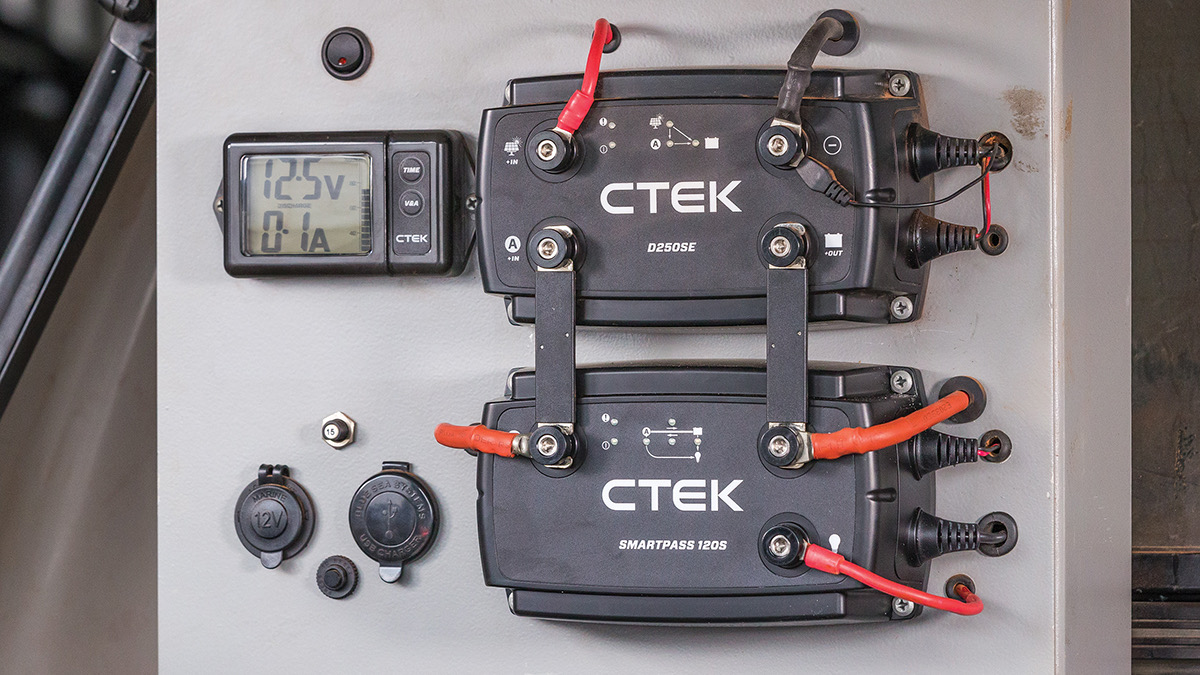
I decided to do a 12v system for a wide range of compatible things to go with it and I have a single stock alternator so it makes the most sense. Initally I only had a Renogy DCC50S this unit combines a MPPT solar charge controller with alternator charging compatible with smart alternators and all battery types. It works very well and has been solid but keep in mind although it can do 50A via solar or 50A via alternator it cannot do them at the same time. So if the solar is active you will only see around 25A coming from your alternator while driving. If you have a smart alternator be sure you hook up the lead wire for that to an ignition source or it will not be charging all of the time. After I upgraded my battery bank and realizing the max I could receive while driving when the sun was out was 25A I searched far and wide for the best solution for a device capable of moving more current. Victron makes a great device but recommends stacking 4 or 5 of their DC to DC chargers in line to achieve a high current draw from your alternator which to me seems crazy, expensive and would take up a ton of room. I have read mixed things on the Sterling DC to DC units that they tend to overheat and de-rate. I stumbled across a unit by CTek, their SmartPass 120S and couldn’t really find many reviews on it so I took a chance. This unit has been amazing! After installing it I am seeing up to 140A coming from my factory 250A Smart Alternator which will charge a huge battery bank up in just a few hours of driving around even if it was mostly depleated! Super amazing! The only thing is this unit does not boost voltage and will only charge when possible, it needs to be coupled with another charger that boosts voltage to finish charging the battery when it is in a high state of charge. They make a companion device that does just that and handles solar charging called D250SE. Since I already have the Renogy device I put mine in line with that. If I didn’t already have that device I probably would have opted for their unit for a super clean small footprint install. The Renogy DCC50S, the Smartpass 120S and the D250SE all trickle charge your starter battery via solar/house bank too so you never have to worry about being stranded due to a dead starter battery. The Smartpass takes this up a notch and will actually send up to 300A back from your house battery to the starter battery to enable you to start the engine. This is all done automatically.
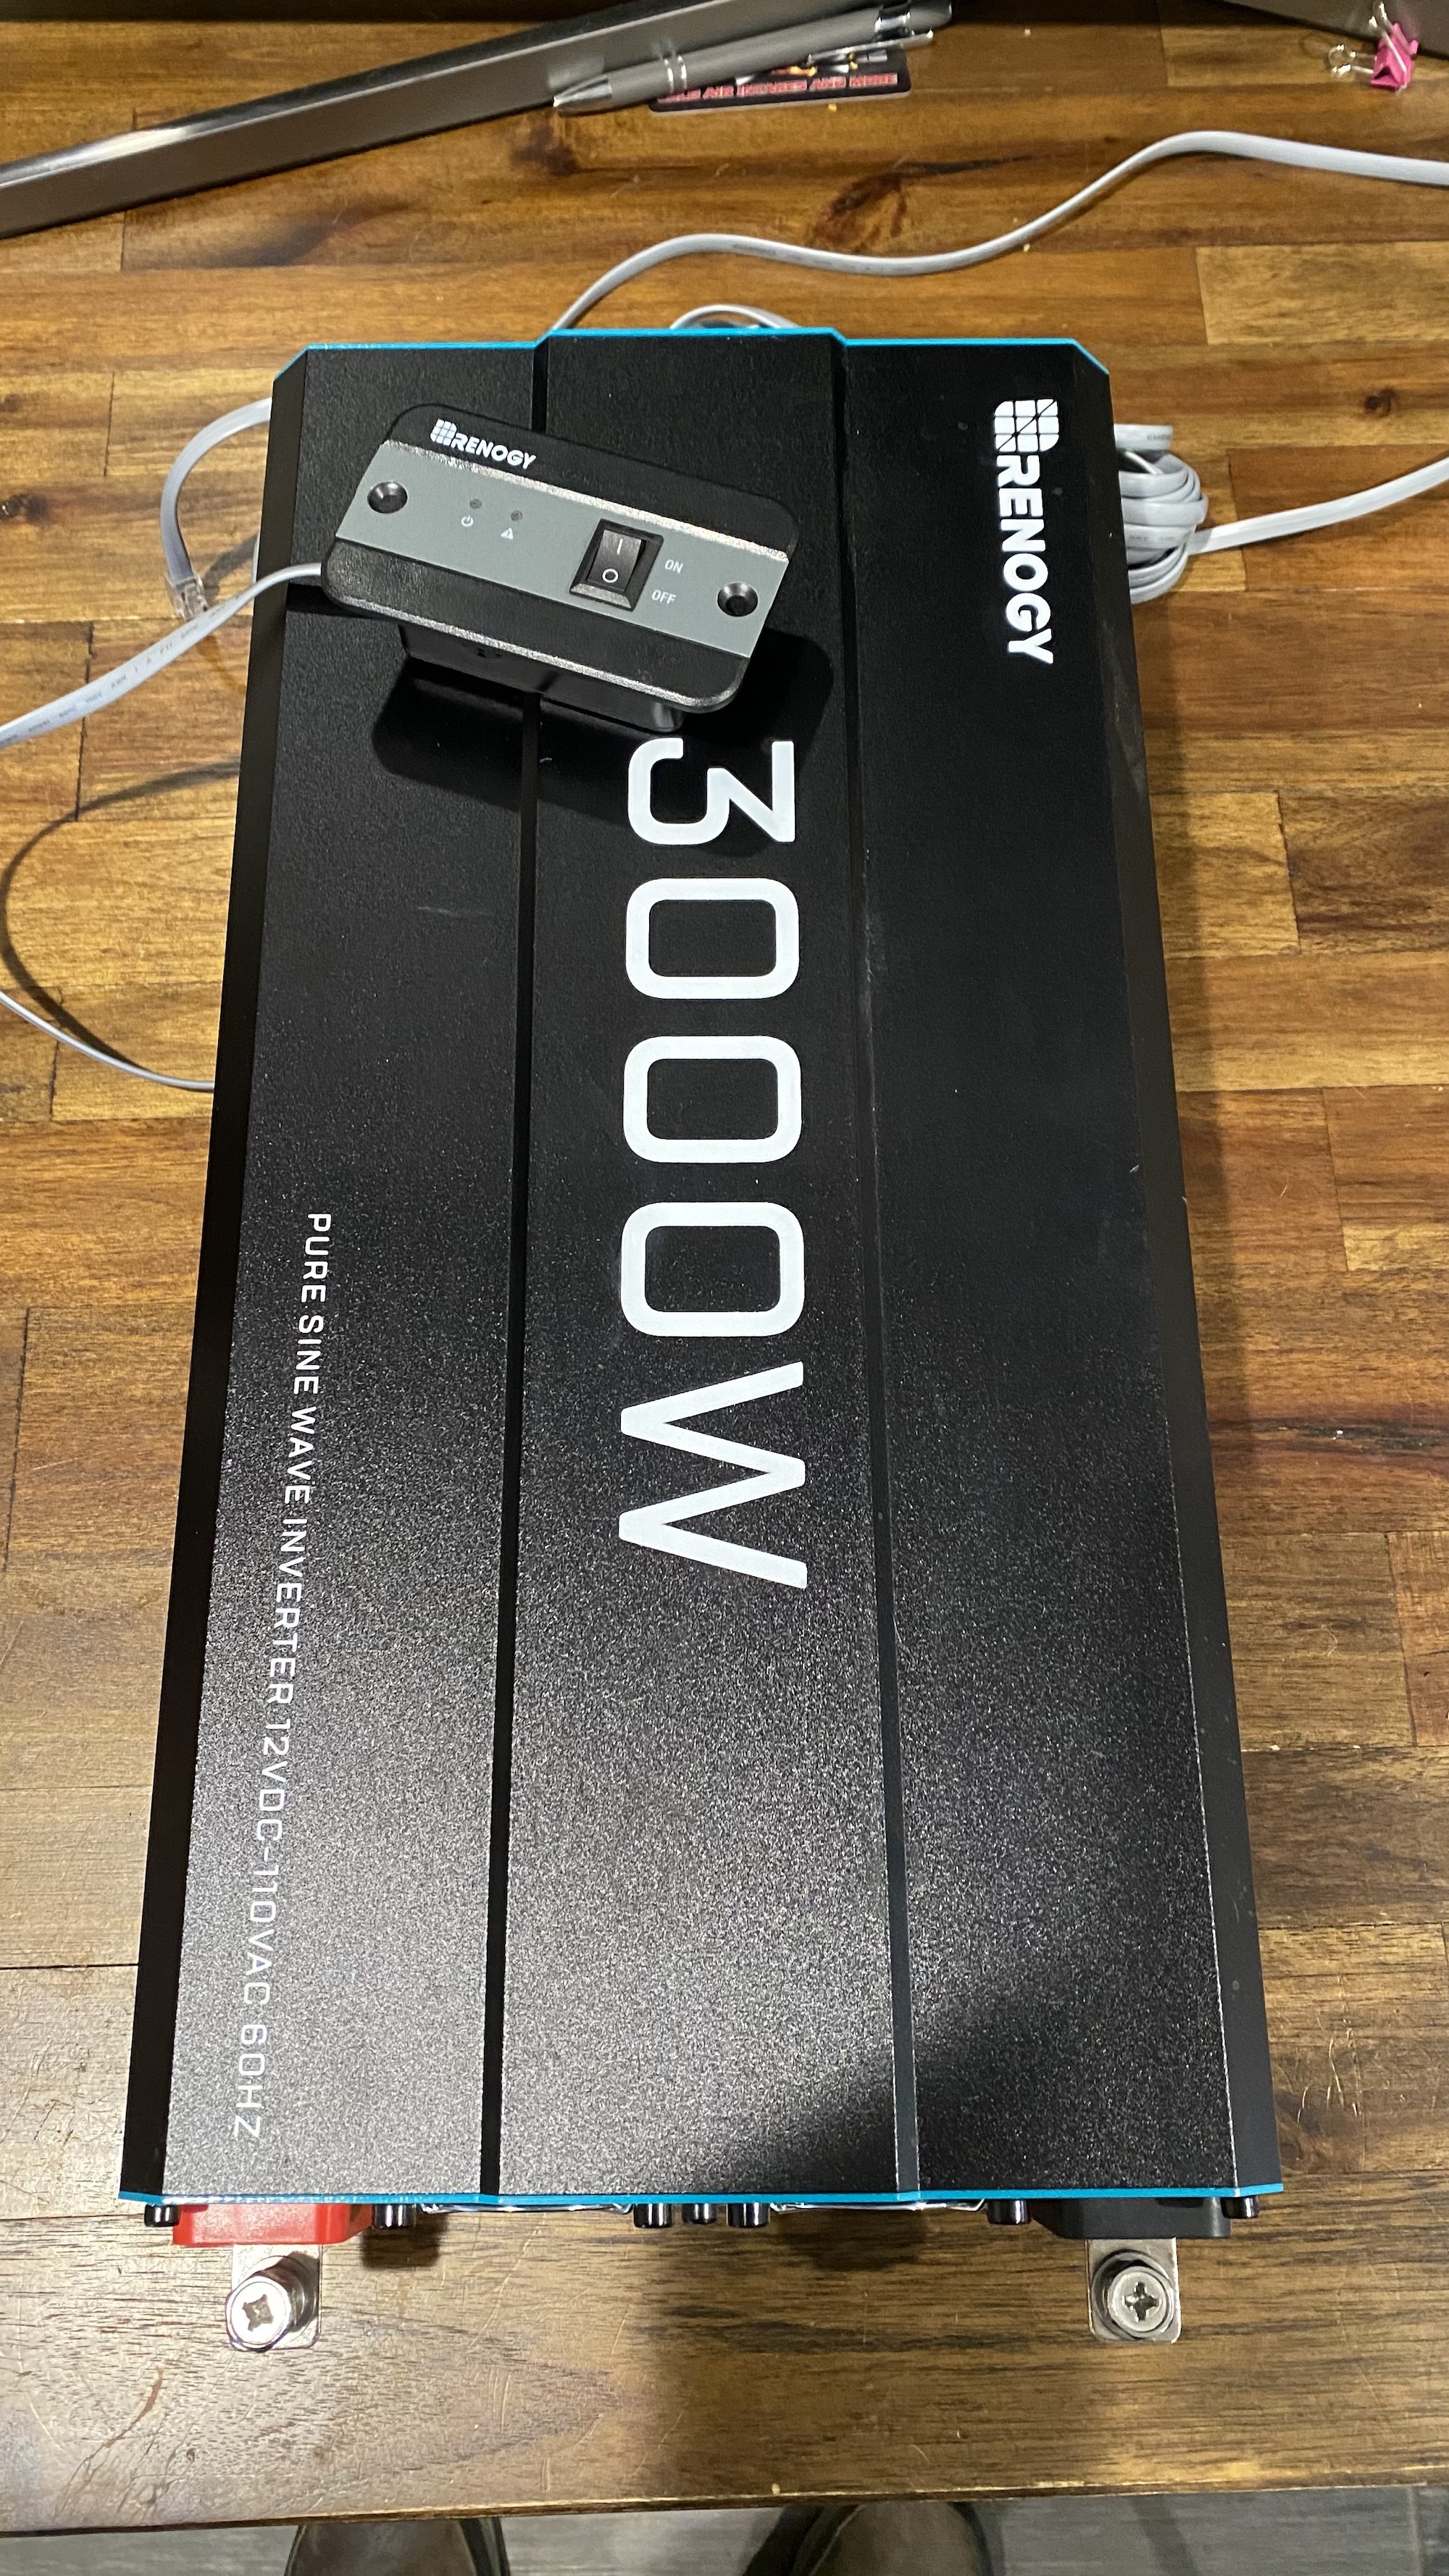
For my 120V devices I originally had installed a 3000W Renogy Inverter. It worked well but I wanted something a bit higher quality and that can also charge your batteries/take over loads when plugged into shore power. The Renogy unit is a high frequency inverter and those tend to be less reliable long term but take less power at idle. I ended up upgrading to a Samlex EVO1212 Inverter/Charger which only puts out 1200w but is a low frequency unit so the surge voltages are much higher and can easily be sustained for long periods of time. It can put out 1440w for 10 minutes which covers all my needs. I beleive Samlex is one of the best brands out there and is on par if not better than a Victron. This unit can also be attached to shore power and your 120v loads will switch to that and it will begin to charge your house battery bank. Since this Inverter/Charger has a GFCI outlet on it and my 120v needs are low I didn’t install a 120V fusebox. If my 120v needs were higher I would have done fuse box for that as well. For the 120V wiring in the walls I used a nice Ancor Marine Grade Wire don’t skimp on this and never ever used rigid home wiring in the walls from Home Depot.
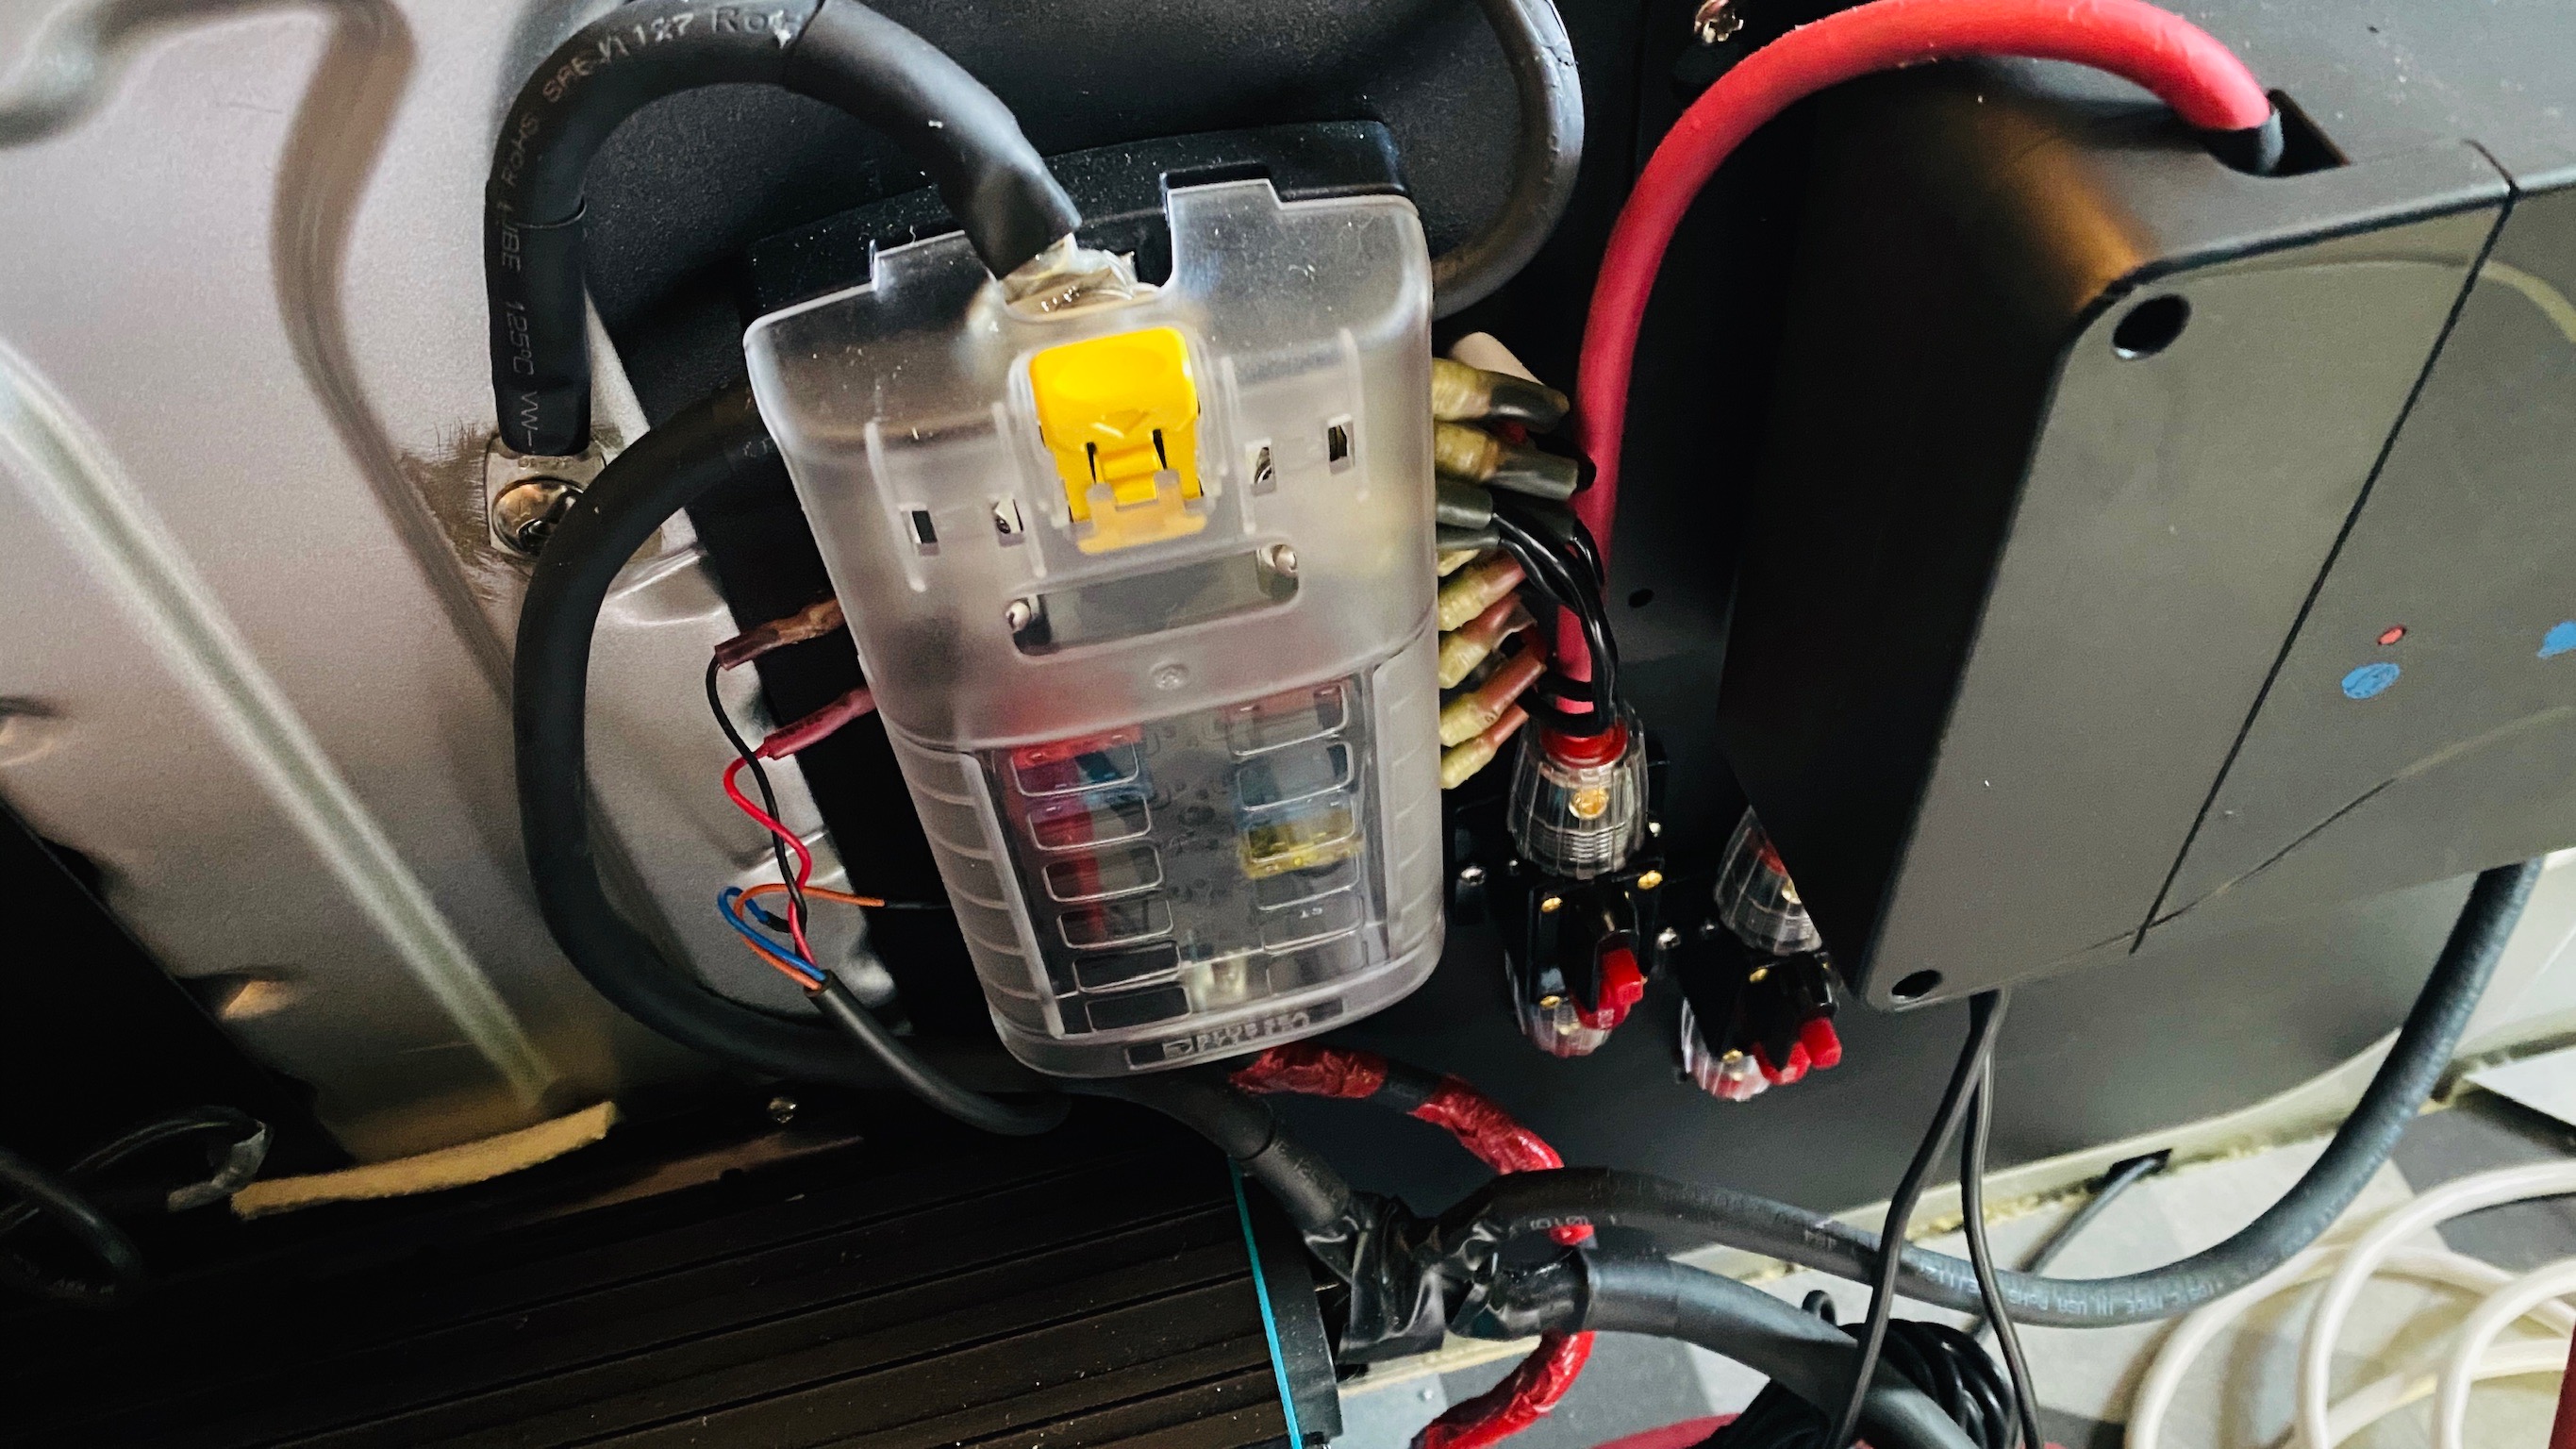
For my 12V loads I used a 12V Blue Sea Fusebox. I used many Resetable Breakers they are available in a lot of different amperages for your various needs. Also handy are inline resetable breakers also available in many different amperages. You’ll need ring terminals for attaching to the fuse box and a nice pair of crimpers for attaching them to the wire. You’ll also need some large gauge wire for hooking the inverter up, the chargers etc.. to your battery. For crimping the lugs on the end of these wires you’ll need a Lug Crimper, this one works well and only requires a hammer. For wiring my 12v devices I used Amazon Basics Copper Speaker Wire this wire is stranded copper wire double insulated and CL2 rated. It’s a great value and just as good as more expensive stranded copper wire for this purpose. When wiring anything you’ll want to refer to a chart to determine the appropriate gauge wiring required for the load. Don’t overlook this, it’s very important. With improper sized wires you’ll get voltage drops and wires that get hot.
To monitor my battery I use the built in bluetooth feature on the batteries I make and a Renogy shunt with a screen to quickly look at the value to see voltage/amps in or out etc.. To monitor my solar there is a Renogy BT2 module that plugs into the DCC50S. It does provide some interesting useful data but the app is kind of a mess and some information is not accurate or correct at all. There is also a bug with this module if the power is lost from the battery it will no longer connect and display data. To fix it you need to unplug the device, turn off all input power and the battery, turn the battery supply back on, turn the solar and alternator supply back on then plug the device back in. I’ve seen some other issues in Bluetooth smart devices, a Victron for instance doesn’t seem to capture and store data unless you have the app open. Kind of defeats the purpose in my opinion. I think there is some work that needs to be done improving smart data logging functions in most devices.
For solar i’m using 3x 200W Kosta Solar Panels. I wired them in parallel to accomdate the voltage limit of the Renogy DCC50S. This required some branch adapters and 8 gauge solar panel wiring. To offer a bit of deflection on the wind coming under the panels I adapted a Weather Guard 1247 Airfoil that was super affordable. It attached easily with some aluminum L channel and self tapping screws. This is a pretty large solar array for a van but keep in mind you’ll really only see near the rated wattage coming in under perfect circumstances i.e. a very sunny clear day at the right time at the right location. Most of the time you’ll see much less wattage and if you have a large battery bank you must have a good alternator charging setup or be able to plug in to shore power with an inverter/charger to keep your batteries charged. Of course this varies depending on the items you are powering.
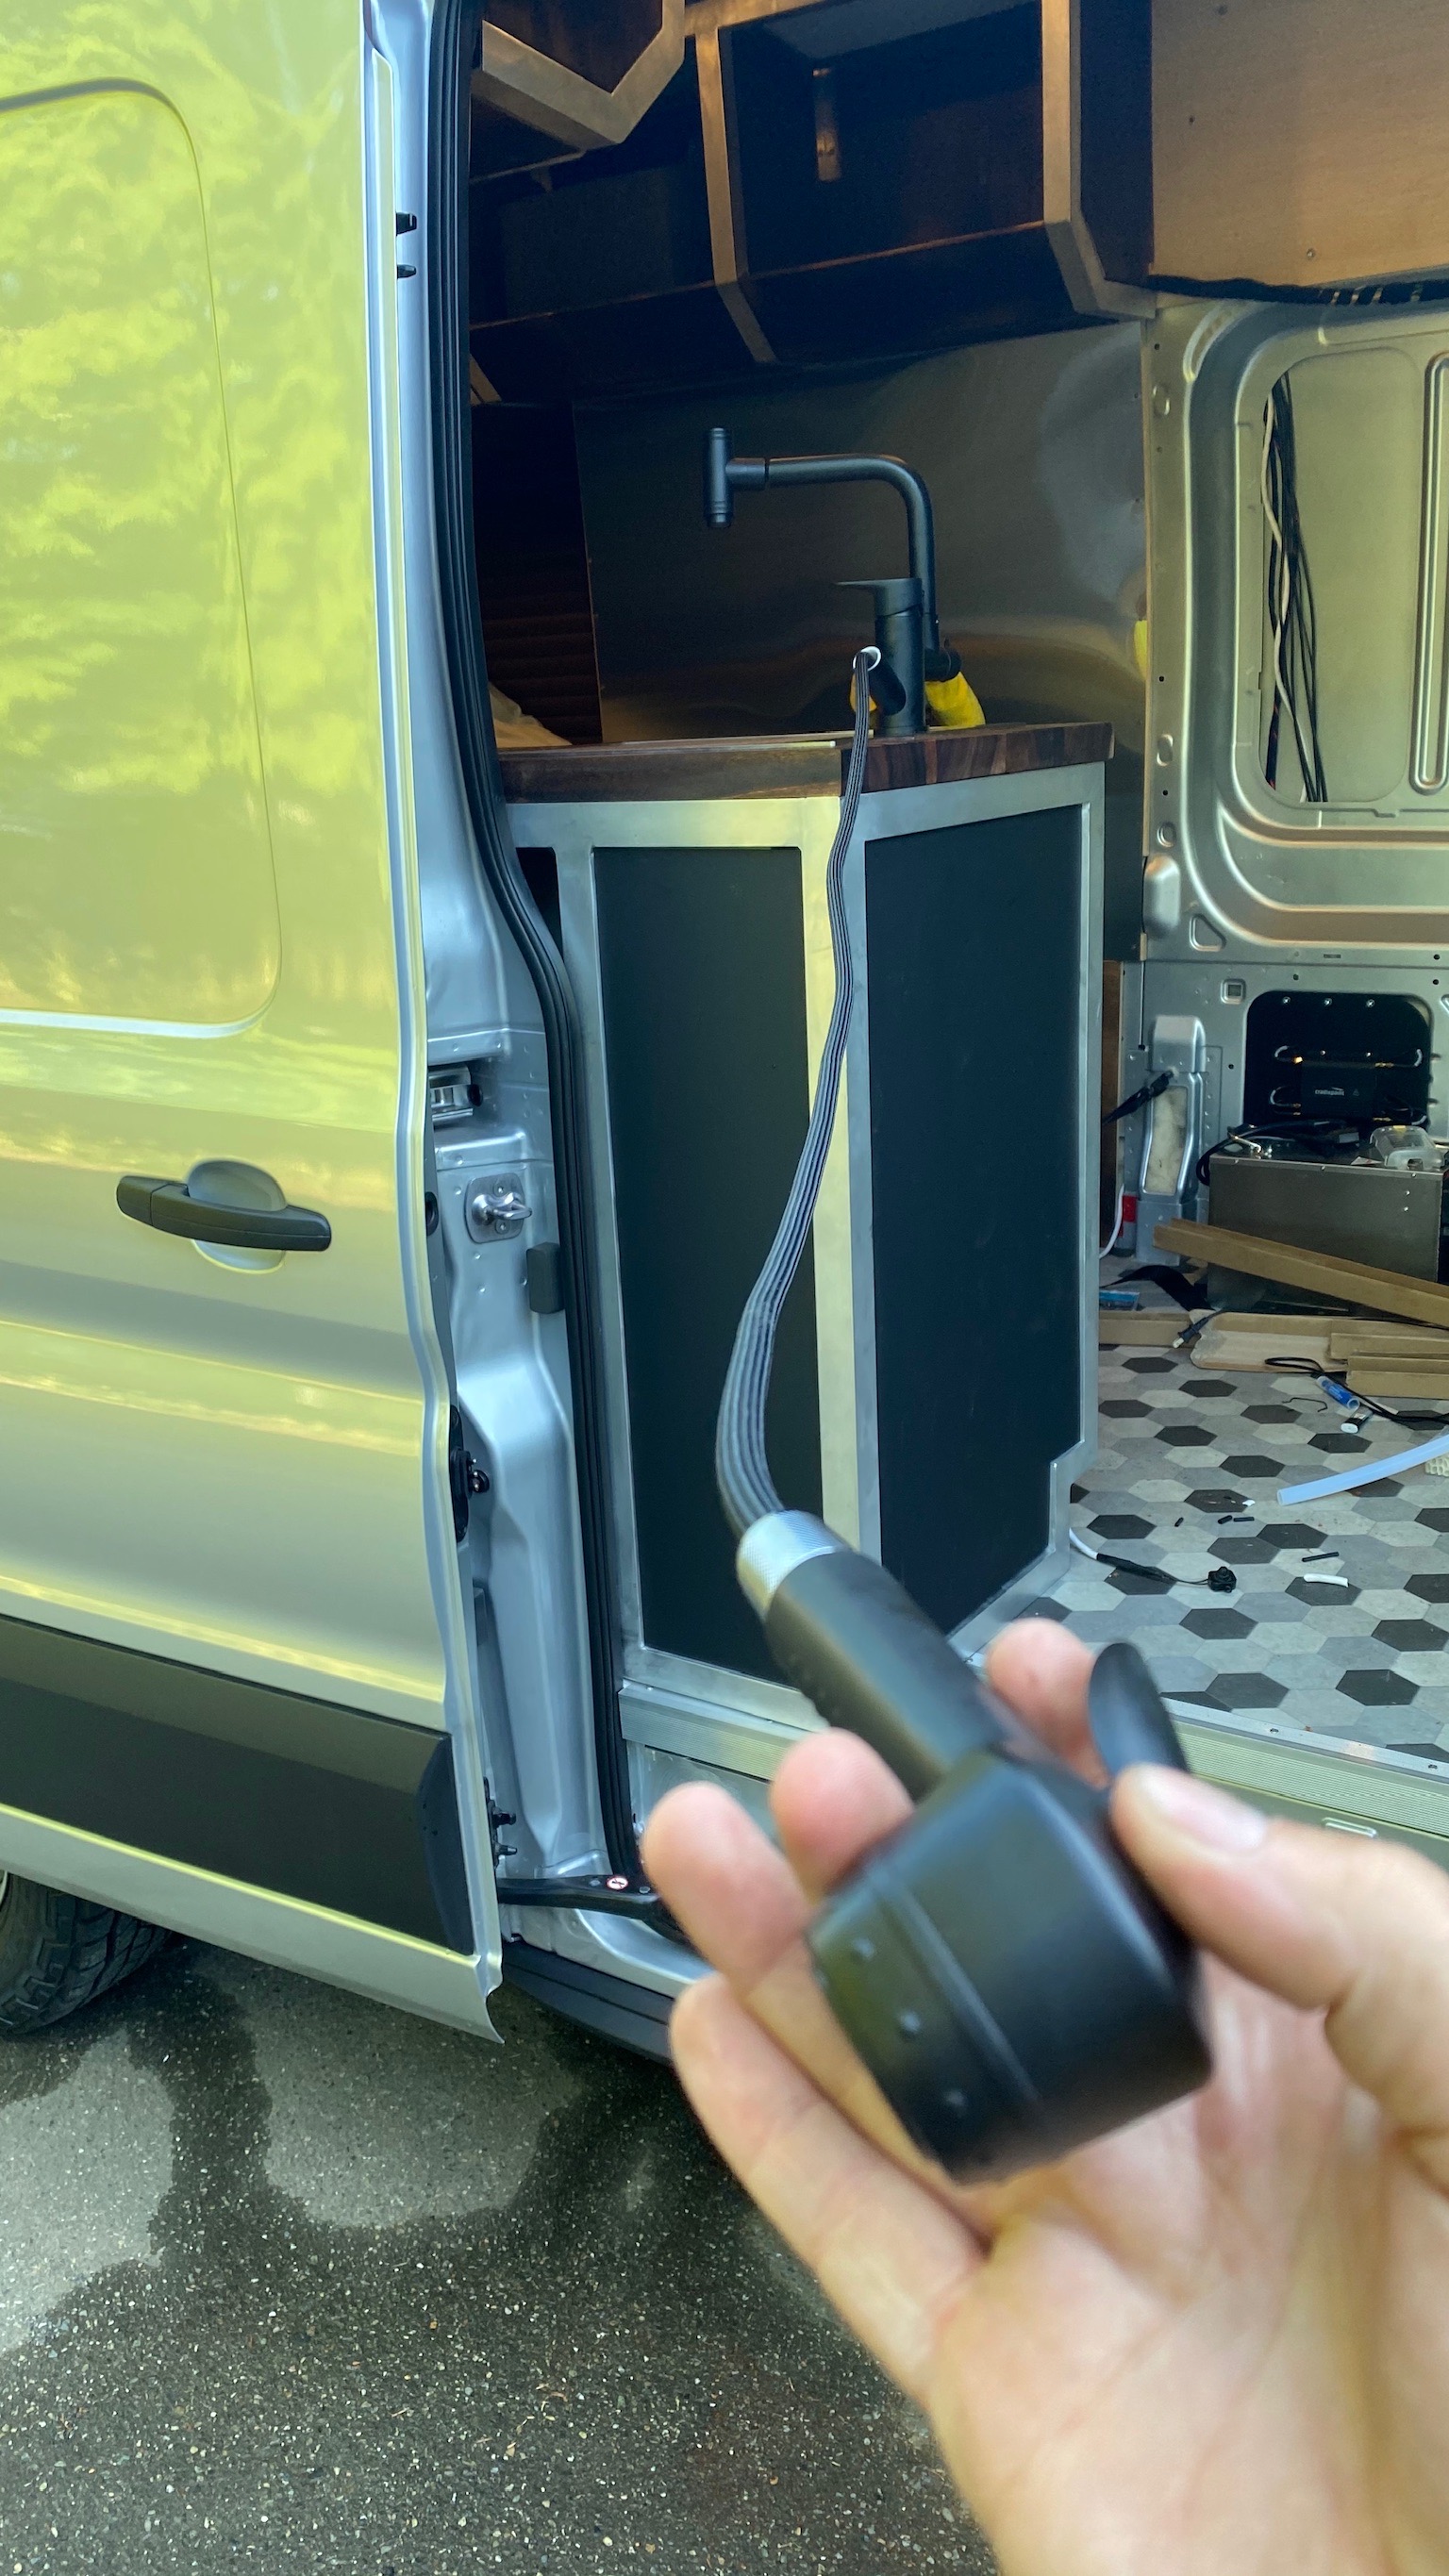
For charging devices and having somewhere to plug in a standard cigarette lighter socket item I used a panel mount charger and pulled the voltage display off and added in a more powerful charger with USB-C in its place.

Appliances, heating & cooling
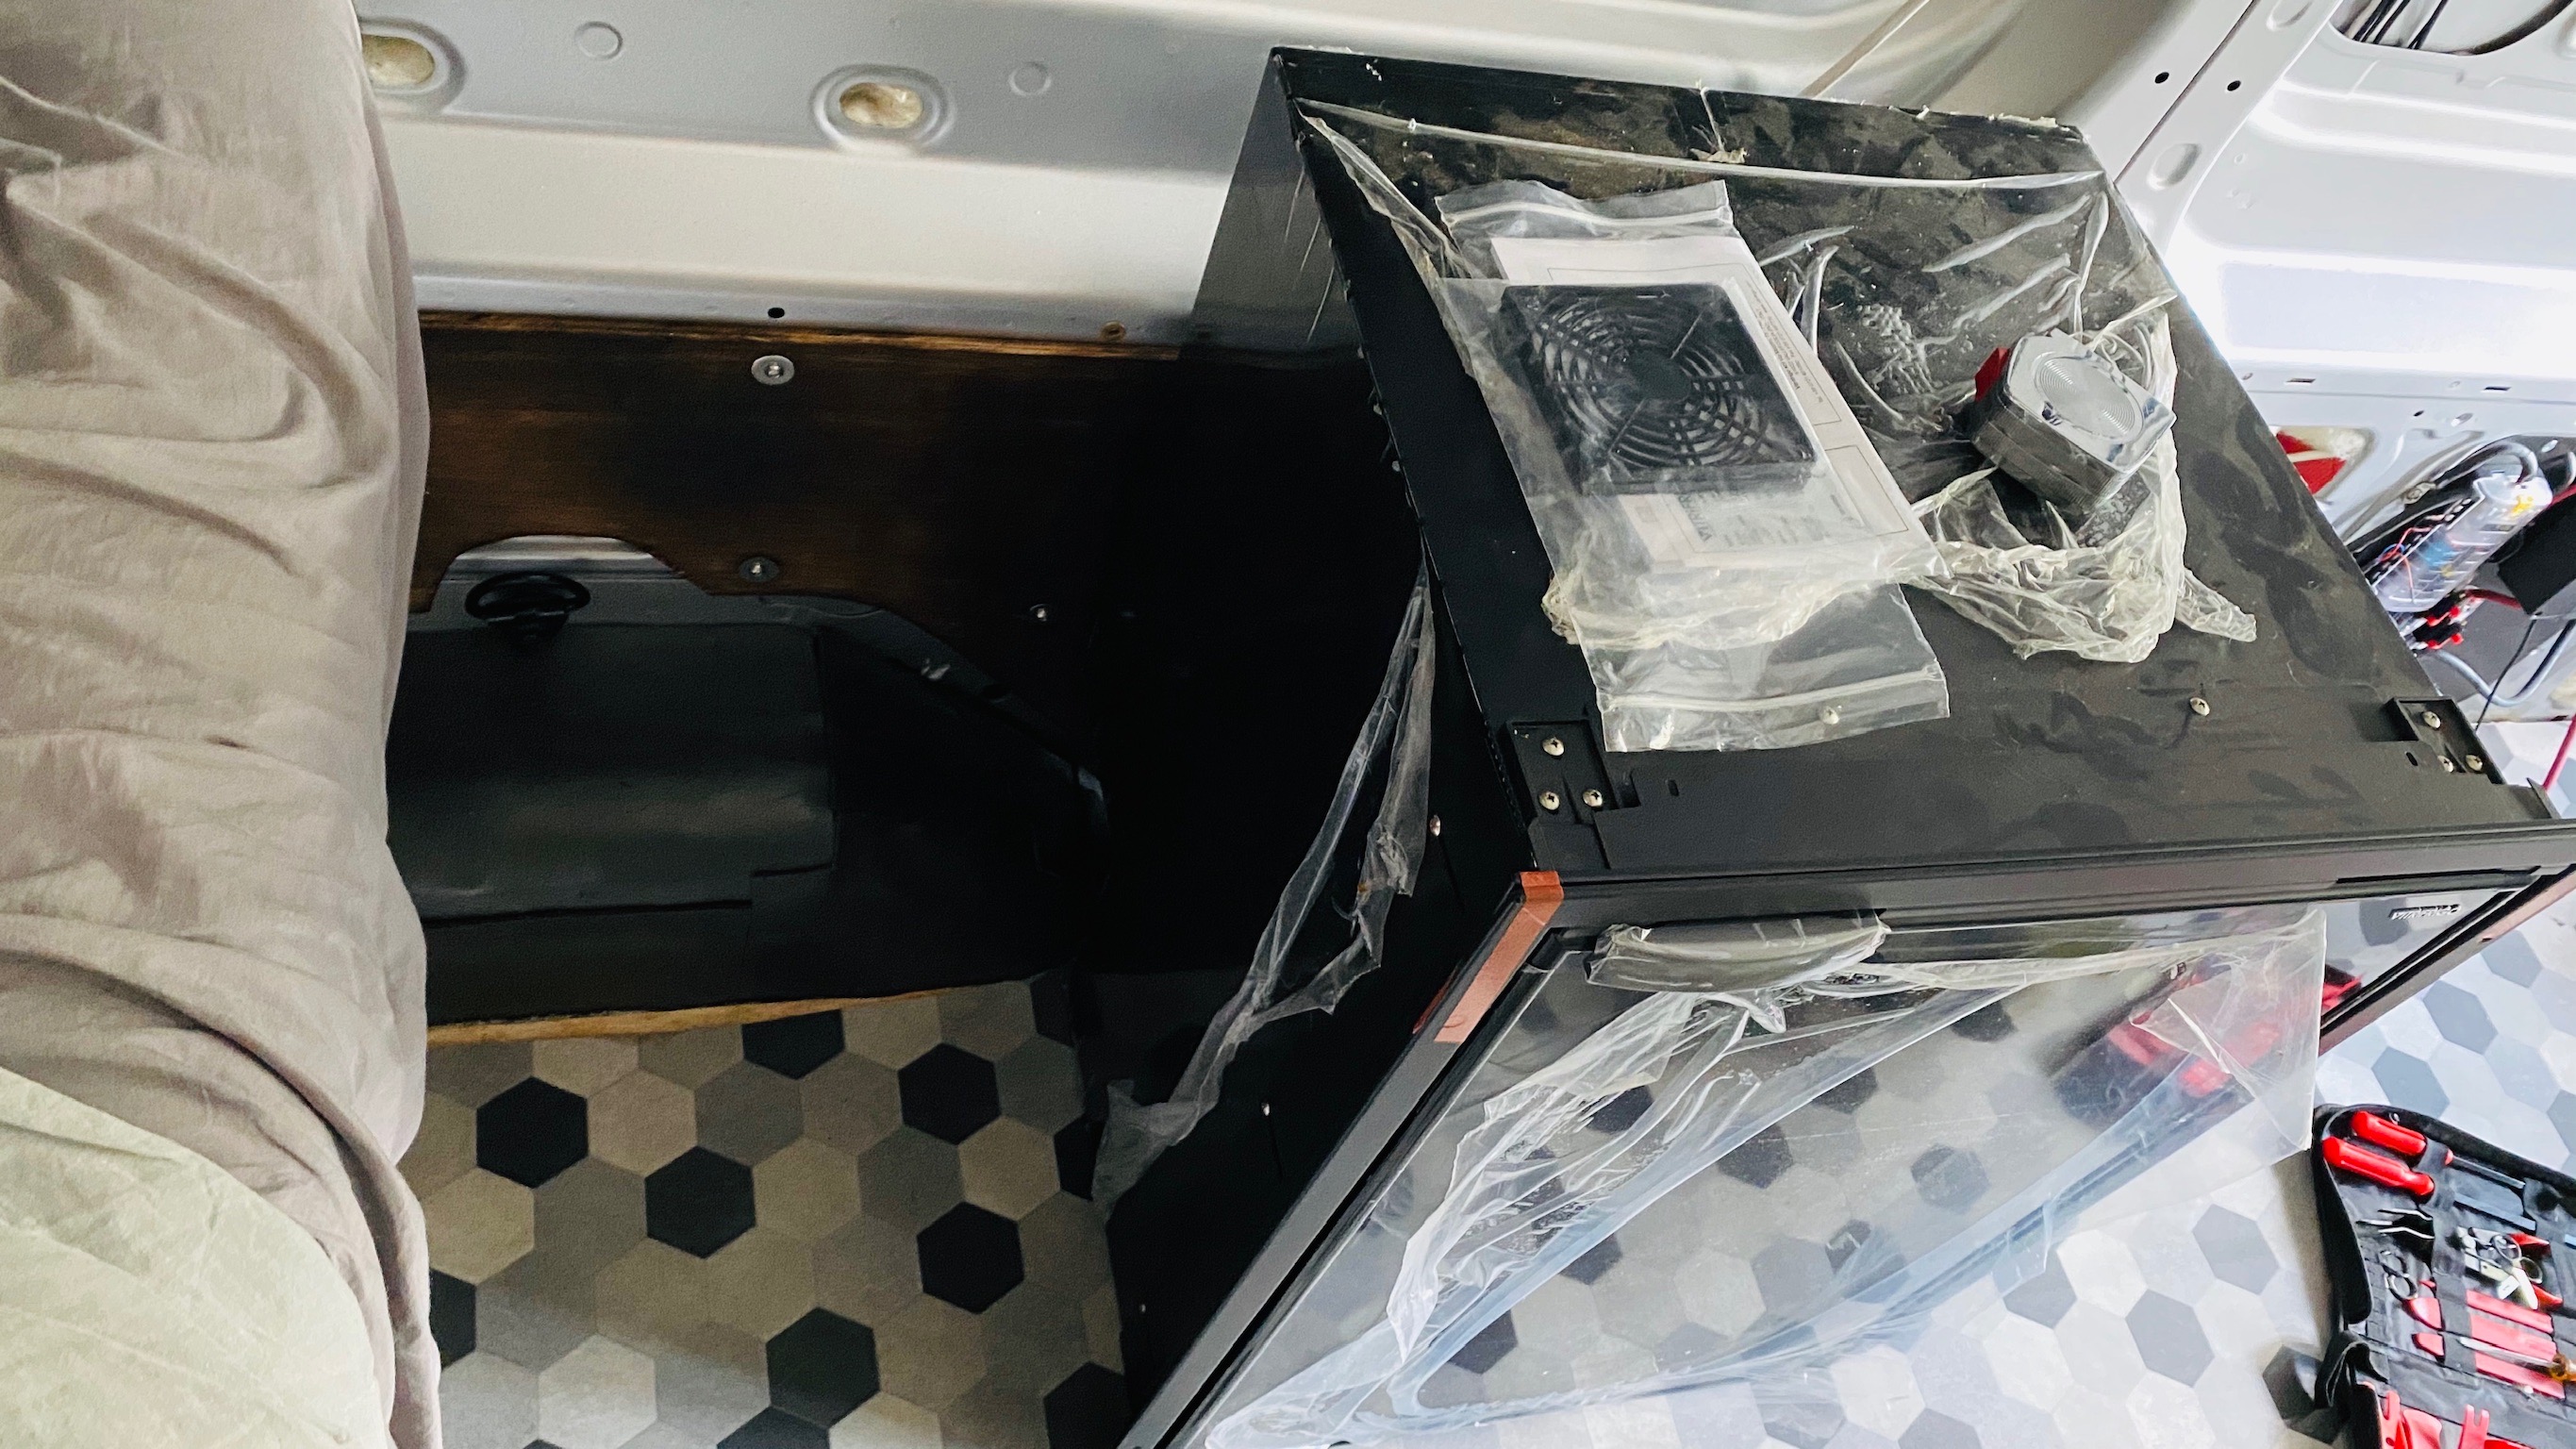
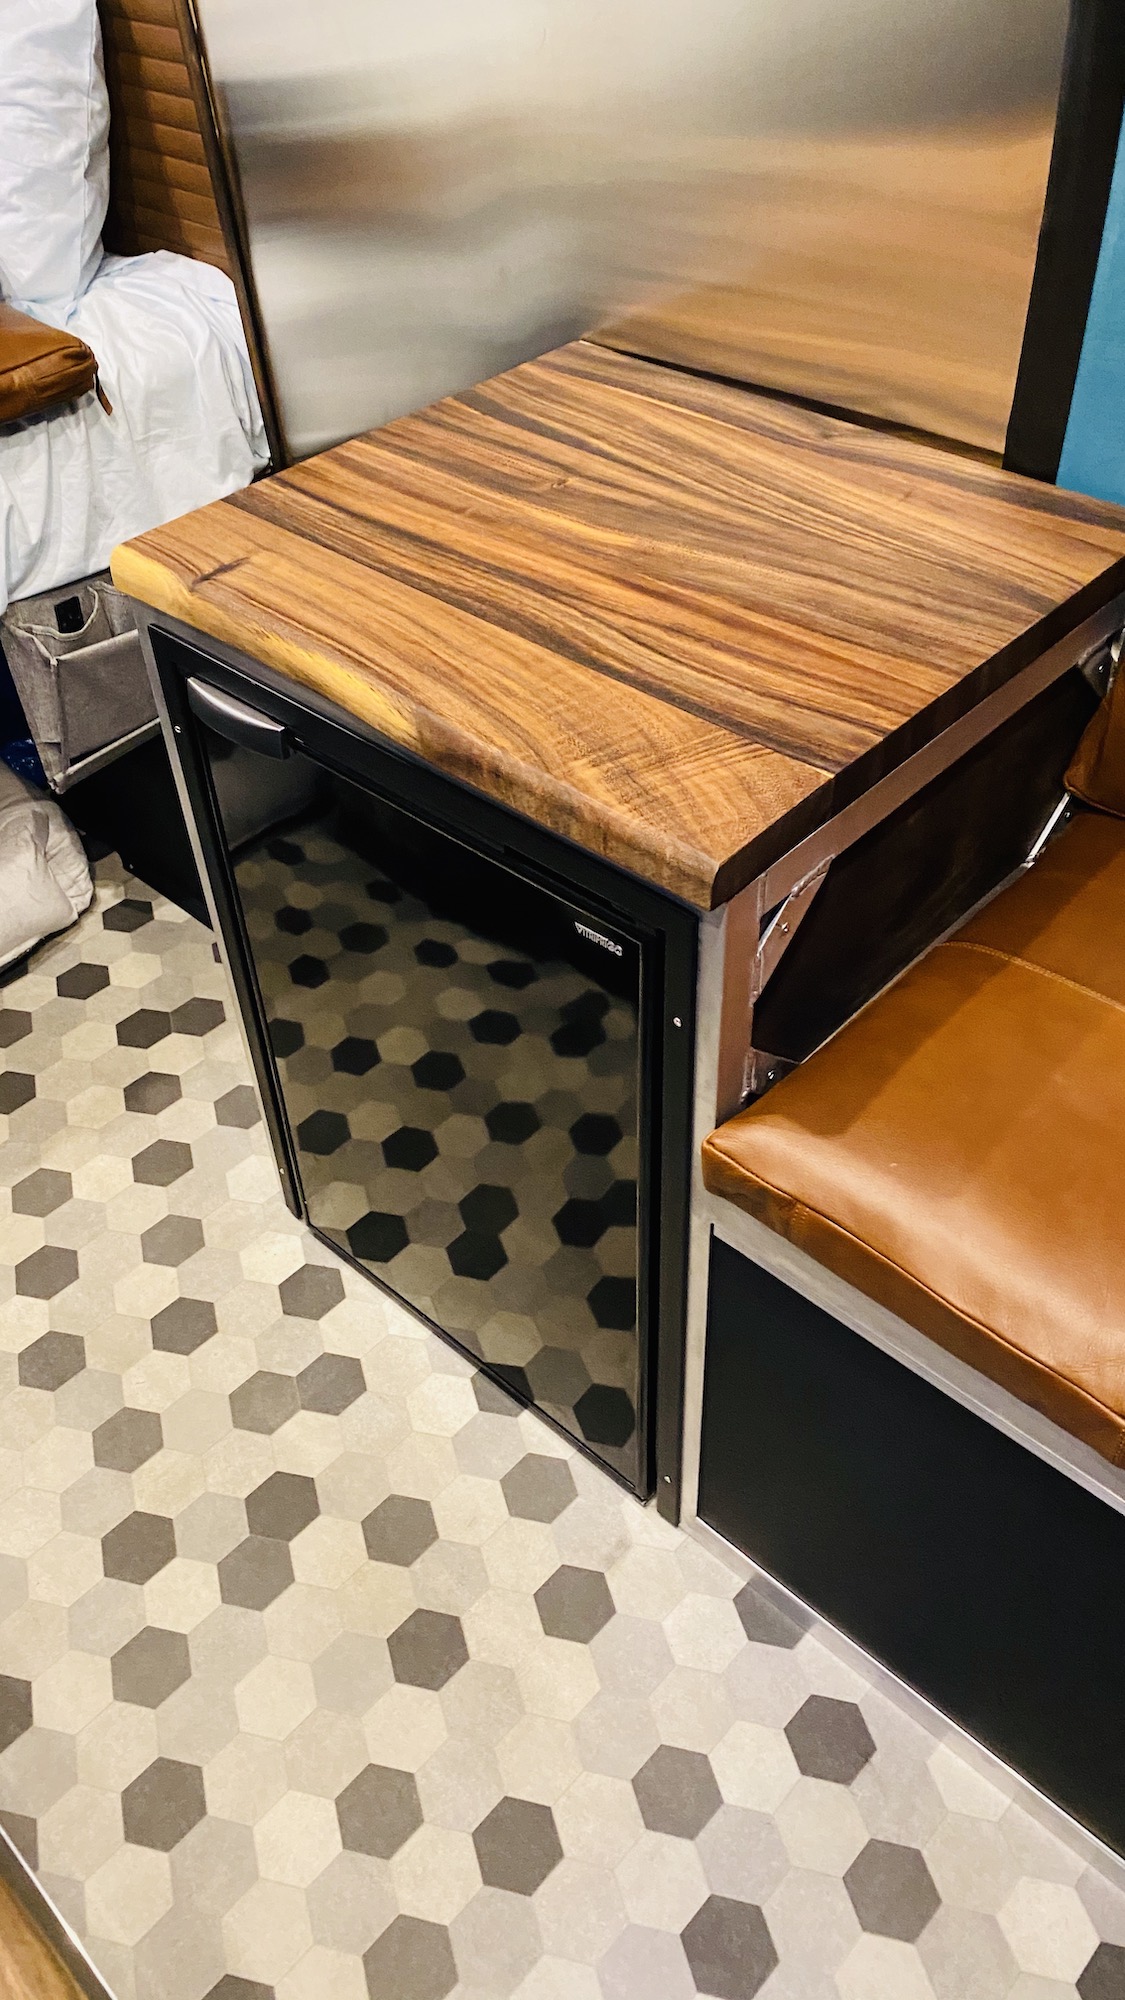
For refrigeration I have a Vitrifrigo 4.2 cubic foot AC/DC unit. These run great on 12v, are super reliable, efficent and have a locking door. It might be temping to just toss a 120v mini fridge in and make it work but I really think it’s smart to use something designed to be mobile and work on DC power. If you want to save money I suggest doing a cooler style 12v unit instead.
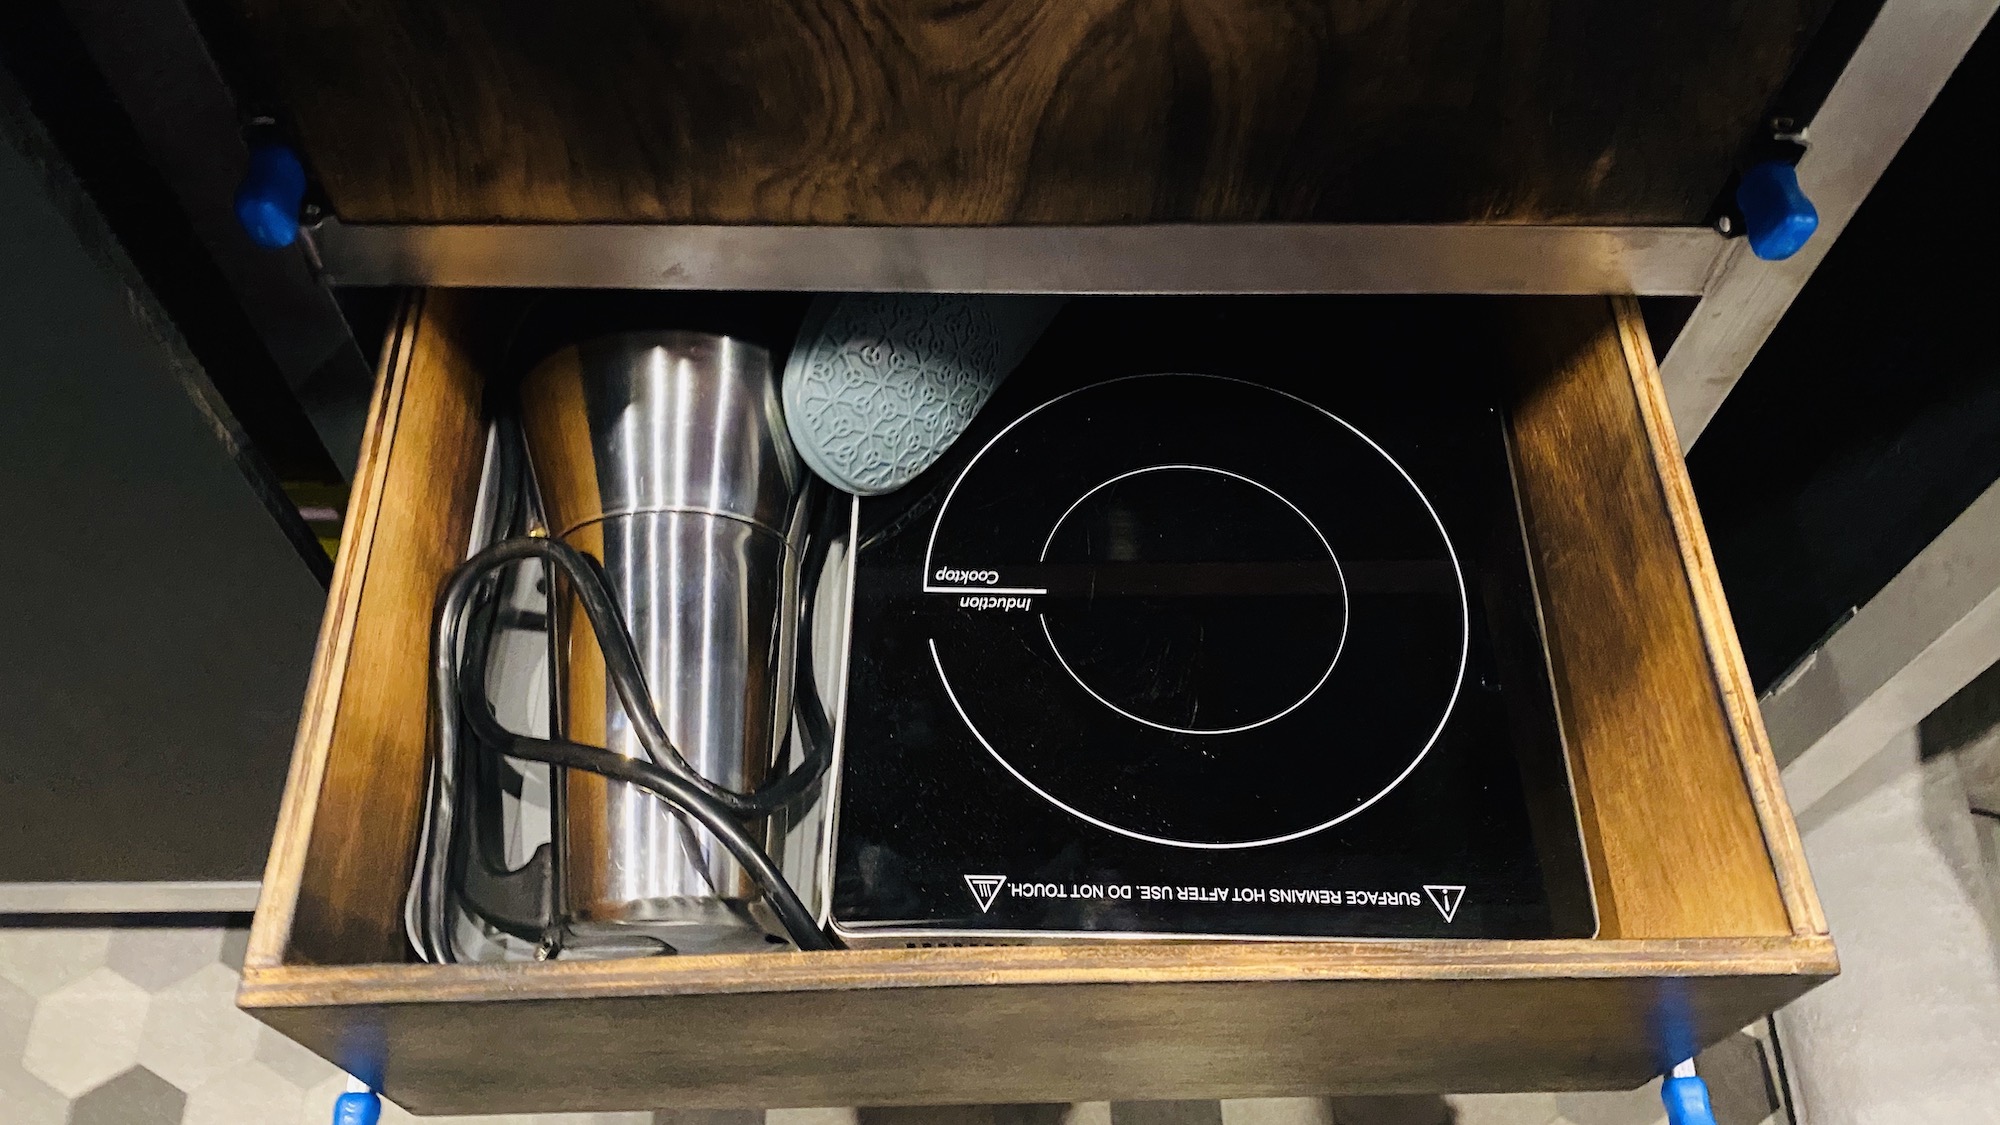
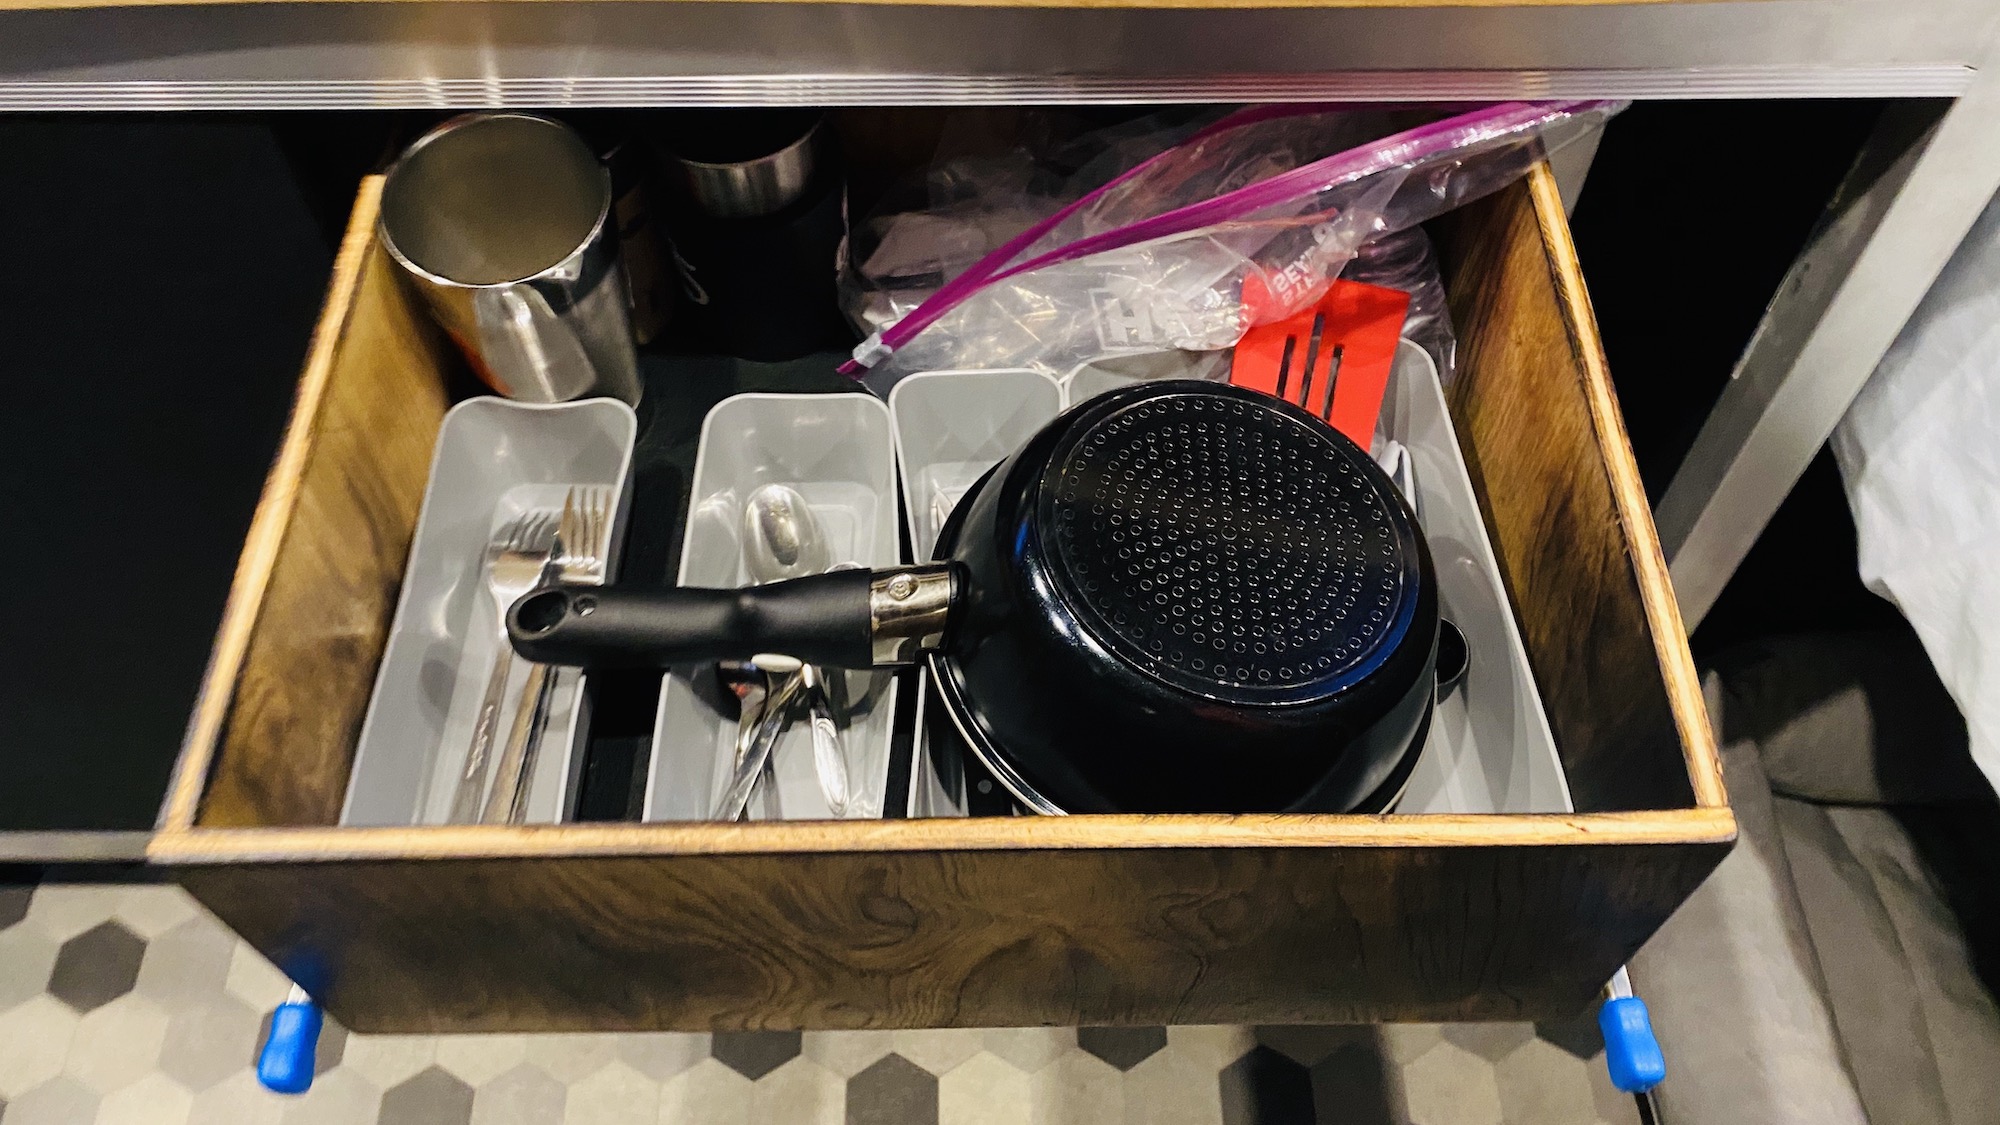
For cooking I use an induction cooktop. They are incredible how efficient they are. It’s able to boil water super quickly and can heat a pan up nearly instantly. They do use 1800w on full blast but I promise you will likely never use the higher settings. The heat is just too intense. Something to keep in mind is you do need your cookware to be compatible with induction. Be sure to check when shopping for them. I use a stainless steel moka pot for coffee and these nonstick pans with removable handle for cooking. To house all of these things I have 2 drawers in my galley with locking slides.
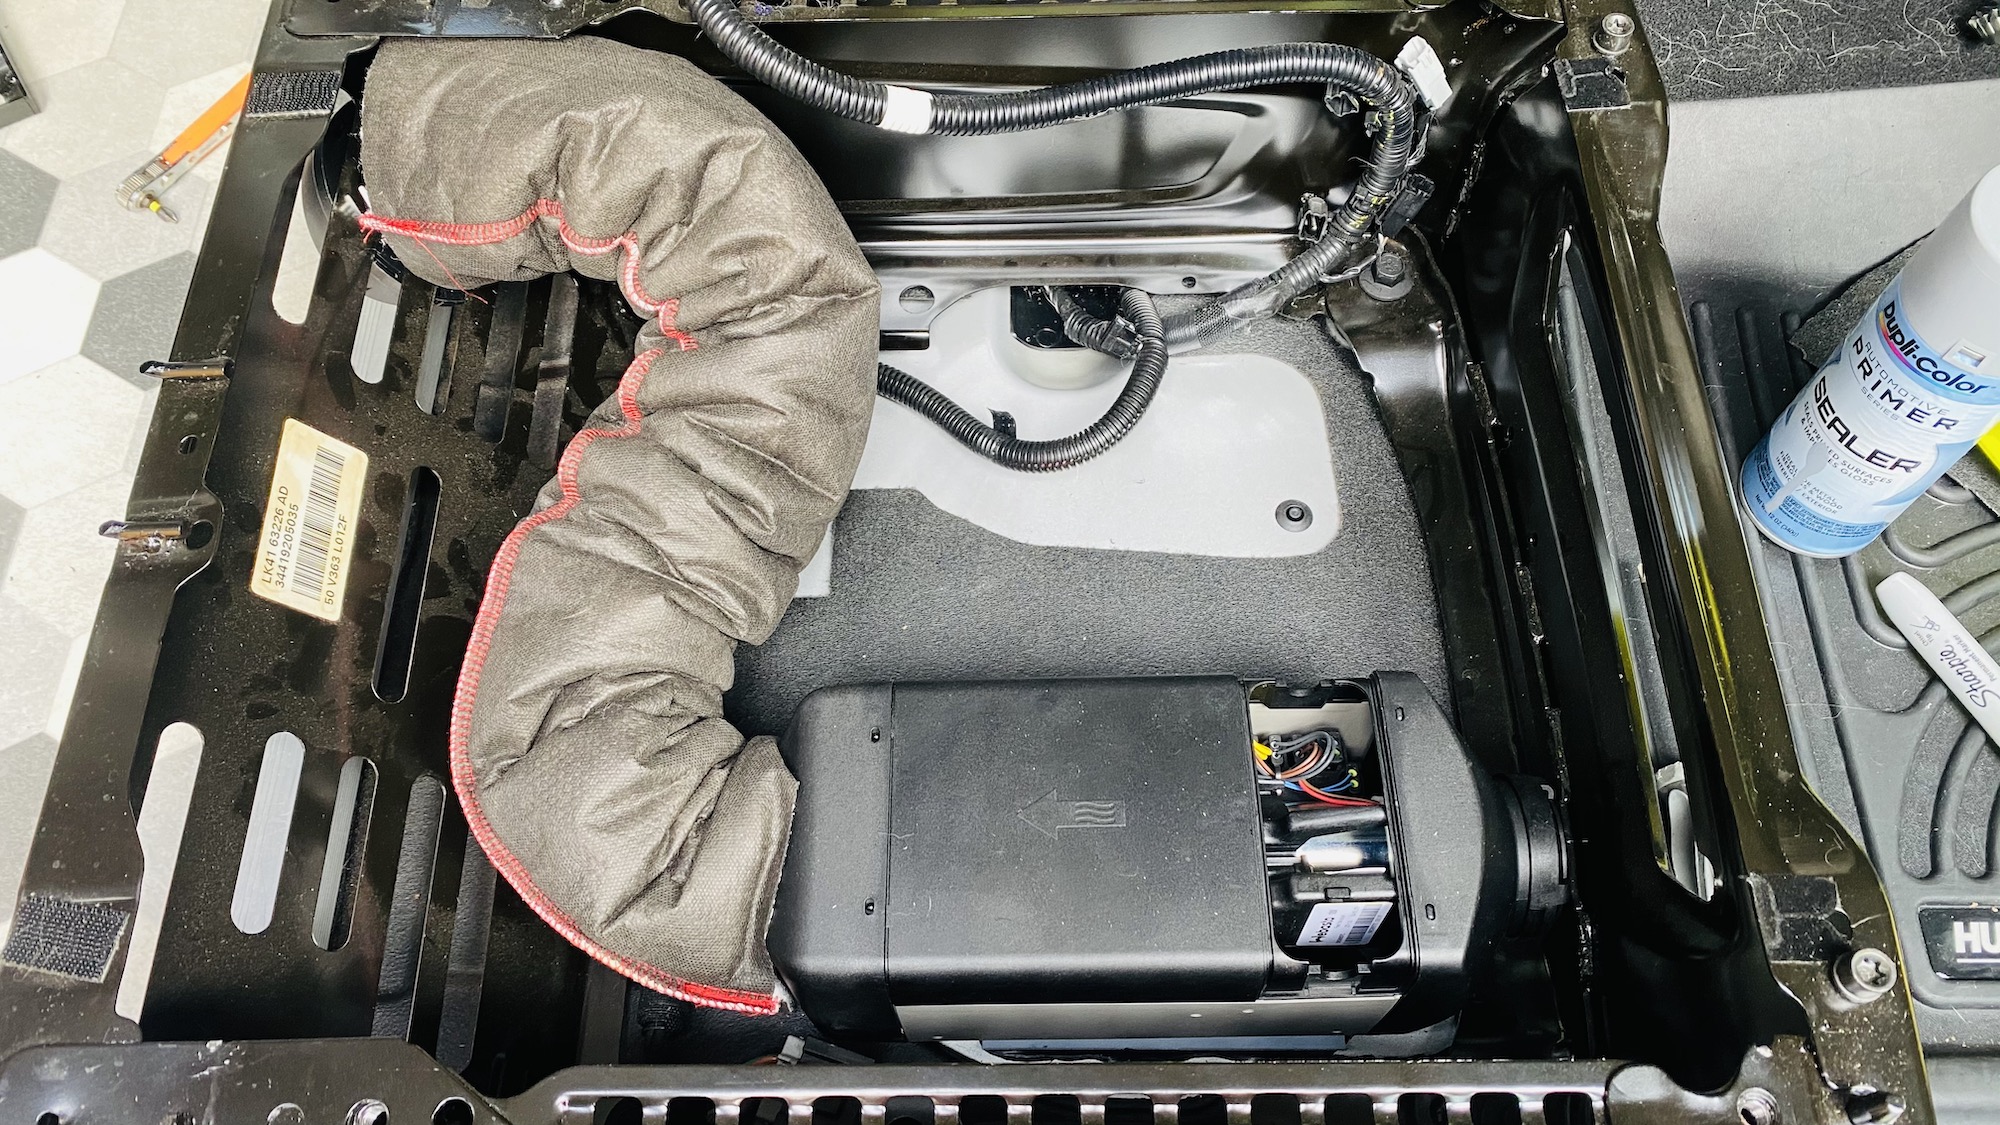
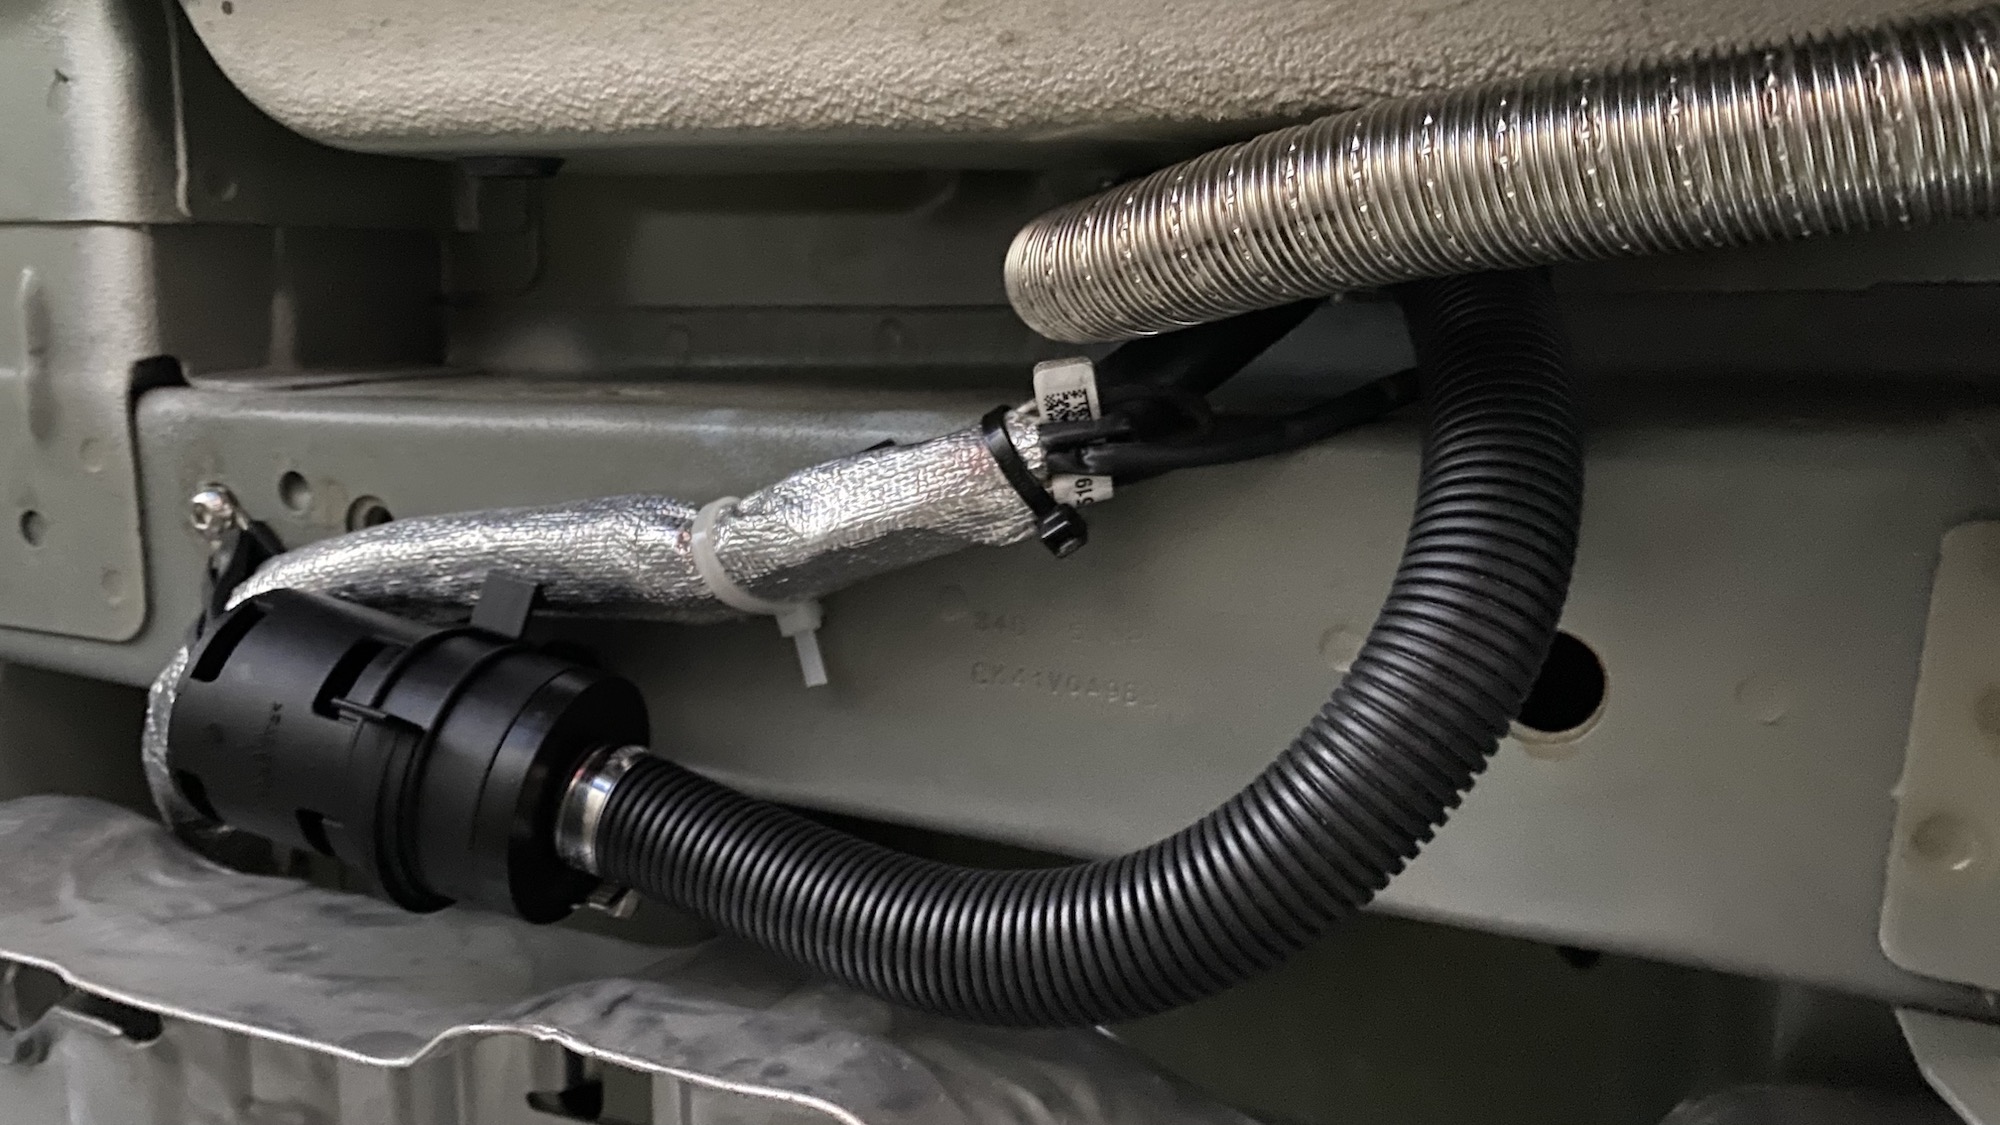
To keep warm in the winter I installed a Webasto AirTop 2000 STC under the passenger seat. In this area there is just enough room between the frame rails to install it. There are several guides out there to follow installing it in this location. If you buy it with the kit I linked you can get it with the digital controller and a plate so you have a flat mounting surface that helps with marking your holes. You’ll also need to use some silicone sealant under the plate to make sure its air tight. I opted for the digital MultiControl since it can reset errors quick and easy and adjust tempature and fan settings. Do keep in mind however the thermostat is controlled by the air at the unit itself and not the MultiControl. It will heat based on the air being draw in from the source (under and in front of the passenger’s seat). So you’ll need to set the temp MUCH lower than what you’d like it or else you’ll roast. There is a remote temp sensor that can be added to make it a bit more accurate. To tap the fuel for the unit the Transit already has a port on the gas tank and you just need the adapter piece from Ford which is part number CK4Z-9B210-A. One more thing to mention in regard to that is mounting the Webasto fuel pump. It might sound crazy but if it is mounted to the frame directly it will transfer the most annoying metallic clicking sound ever while it runs. I personally had trouble sleeping through the clicking and had to find a solution. The best solution I found was attaching this tool mount around the pump then mounting it. After that the noise is barley audible over the fan and much improved!
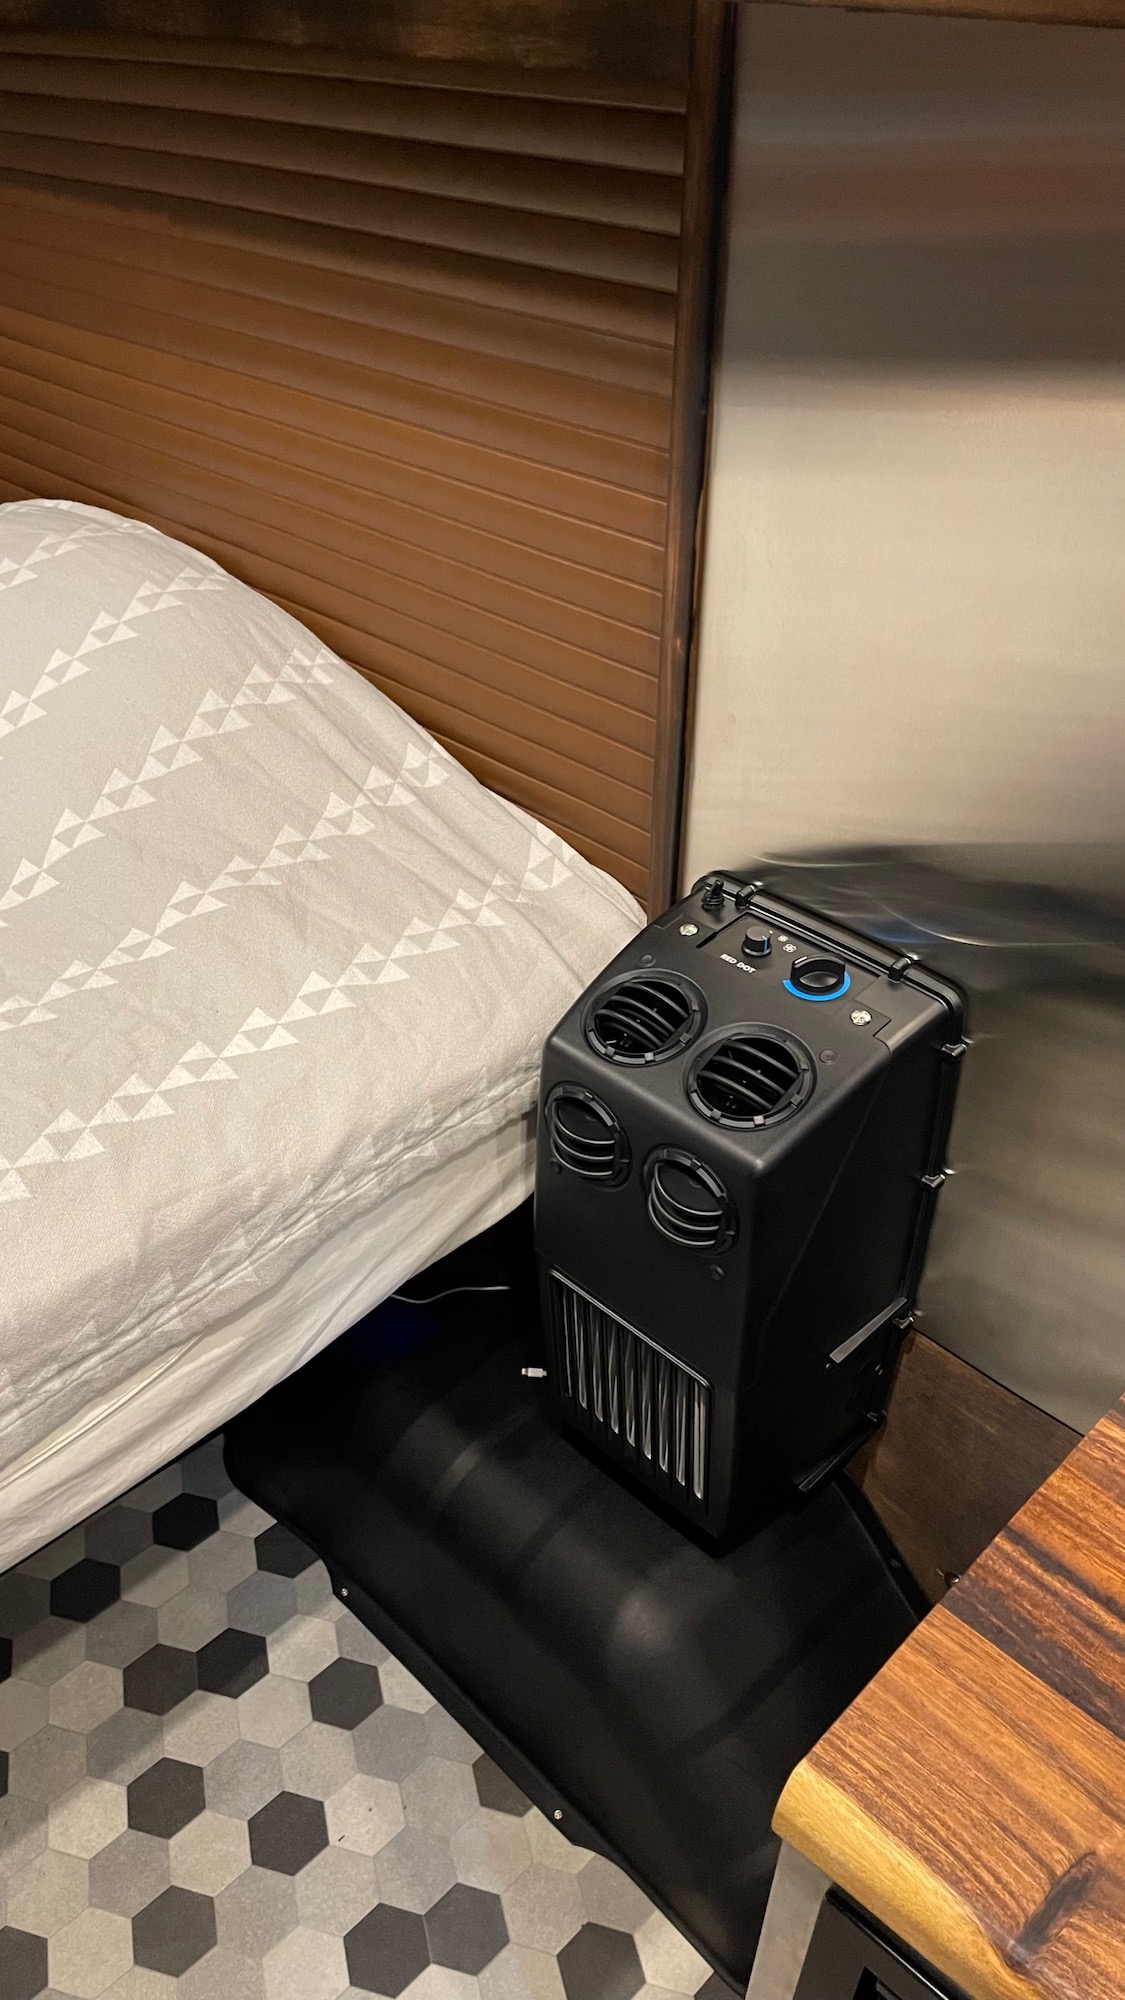
After doing an 8,000 mile trip during August across the country without air conditioning I decided it was a necessity to add at some point to make sleeping in hot and humid climates tolerable. I did a lot of research on the topic and decided things like the ZeroBreeze could potentially help take the edge off they weren’t really suited for cooling the entire sleeping space. There are others that use water more like a swamp cooler and don’t draw much energy but I would avoid those as well. You don’t want extra humdity and tanks of water for that purpose in the van. You really need something with a decent cooling capacity and theres no replacement for real air conditioning. If you have the open roof space a roof mounted unit might be the way to go but I didn’t have the space. Most of these are also only really viable to run while connected to shore power. There are only a couple 12v options. So what I really wanted was the Cruise N Comfort 12v air conditioner setup. These have a good capacity rating, run on 12v and can managably be run for extended periods of time with a decent sized battery bank. They are mounted inside and have integrated blowers or separate evaporator/blowers depending on model. By chance I stumbled across an unused Cruise N Comfort VES12 compressor box on eBay so I set out to frankenstien something together since it wasn’t a complete unit. After researching for awhile I bought a combination of things and assembled it. It seems to work well but i’ll need to wait until the summer heats up to put it to the utlimate test. I have confidence it will work well but even with a well insulated space it’s good practice to cool the entire van down using the vehicle A/C and then start the Cruise N Comfort to maintain that comfortable interior temperature.
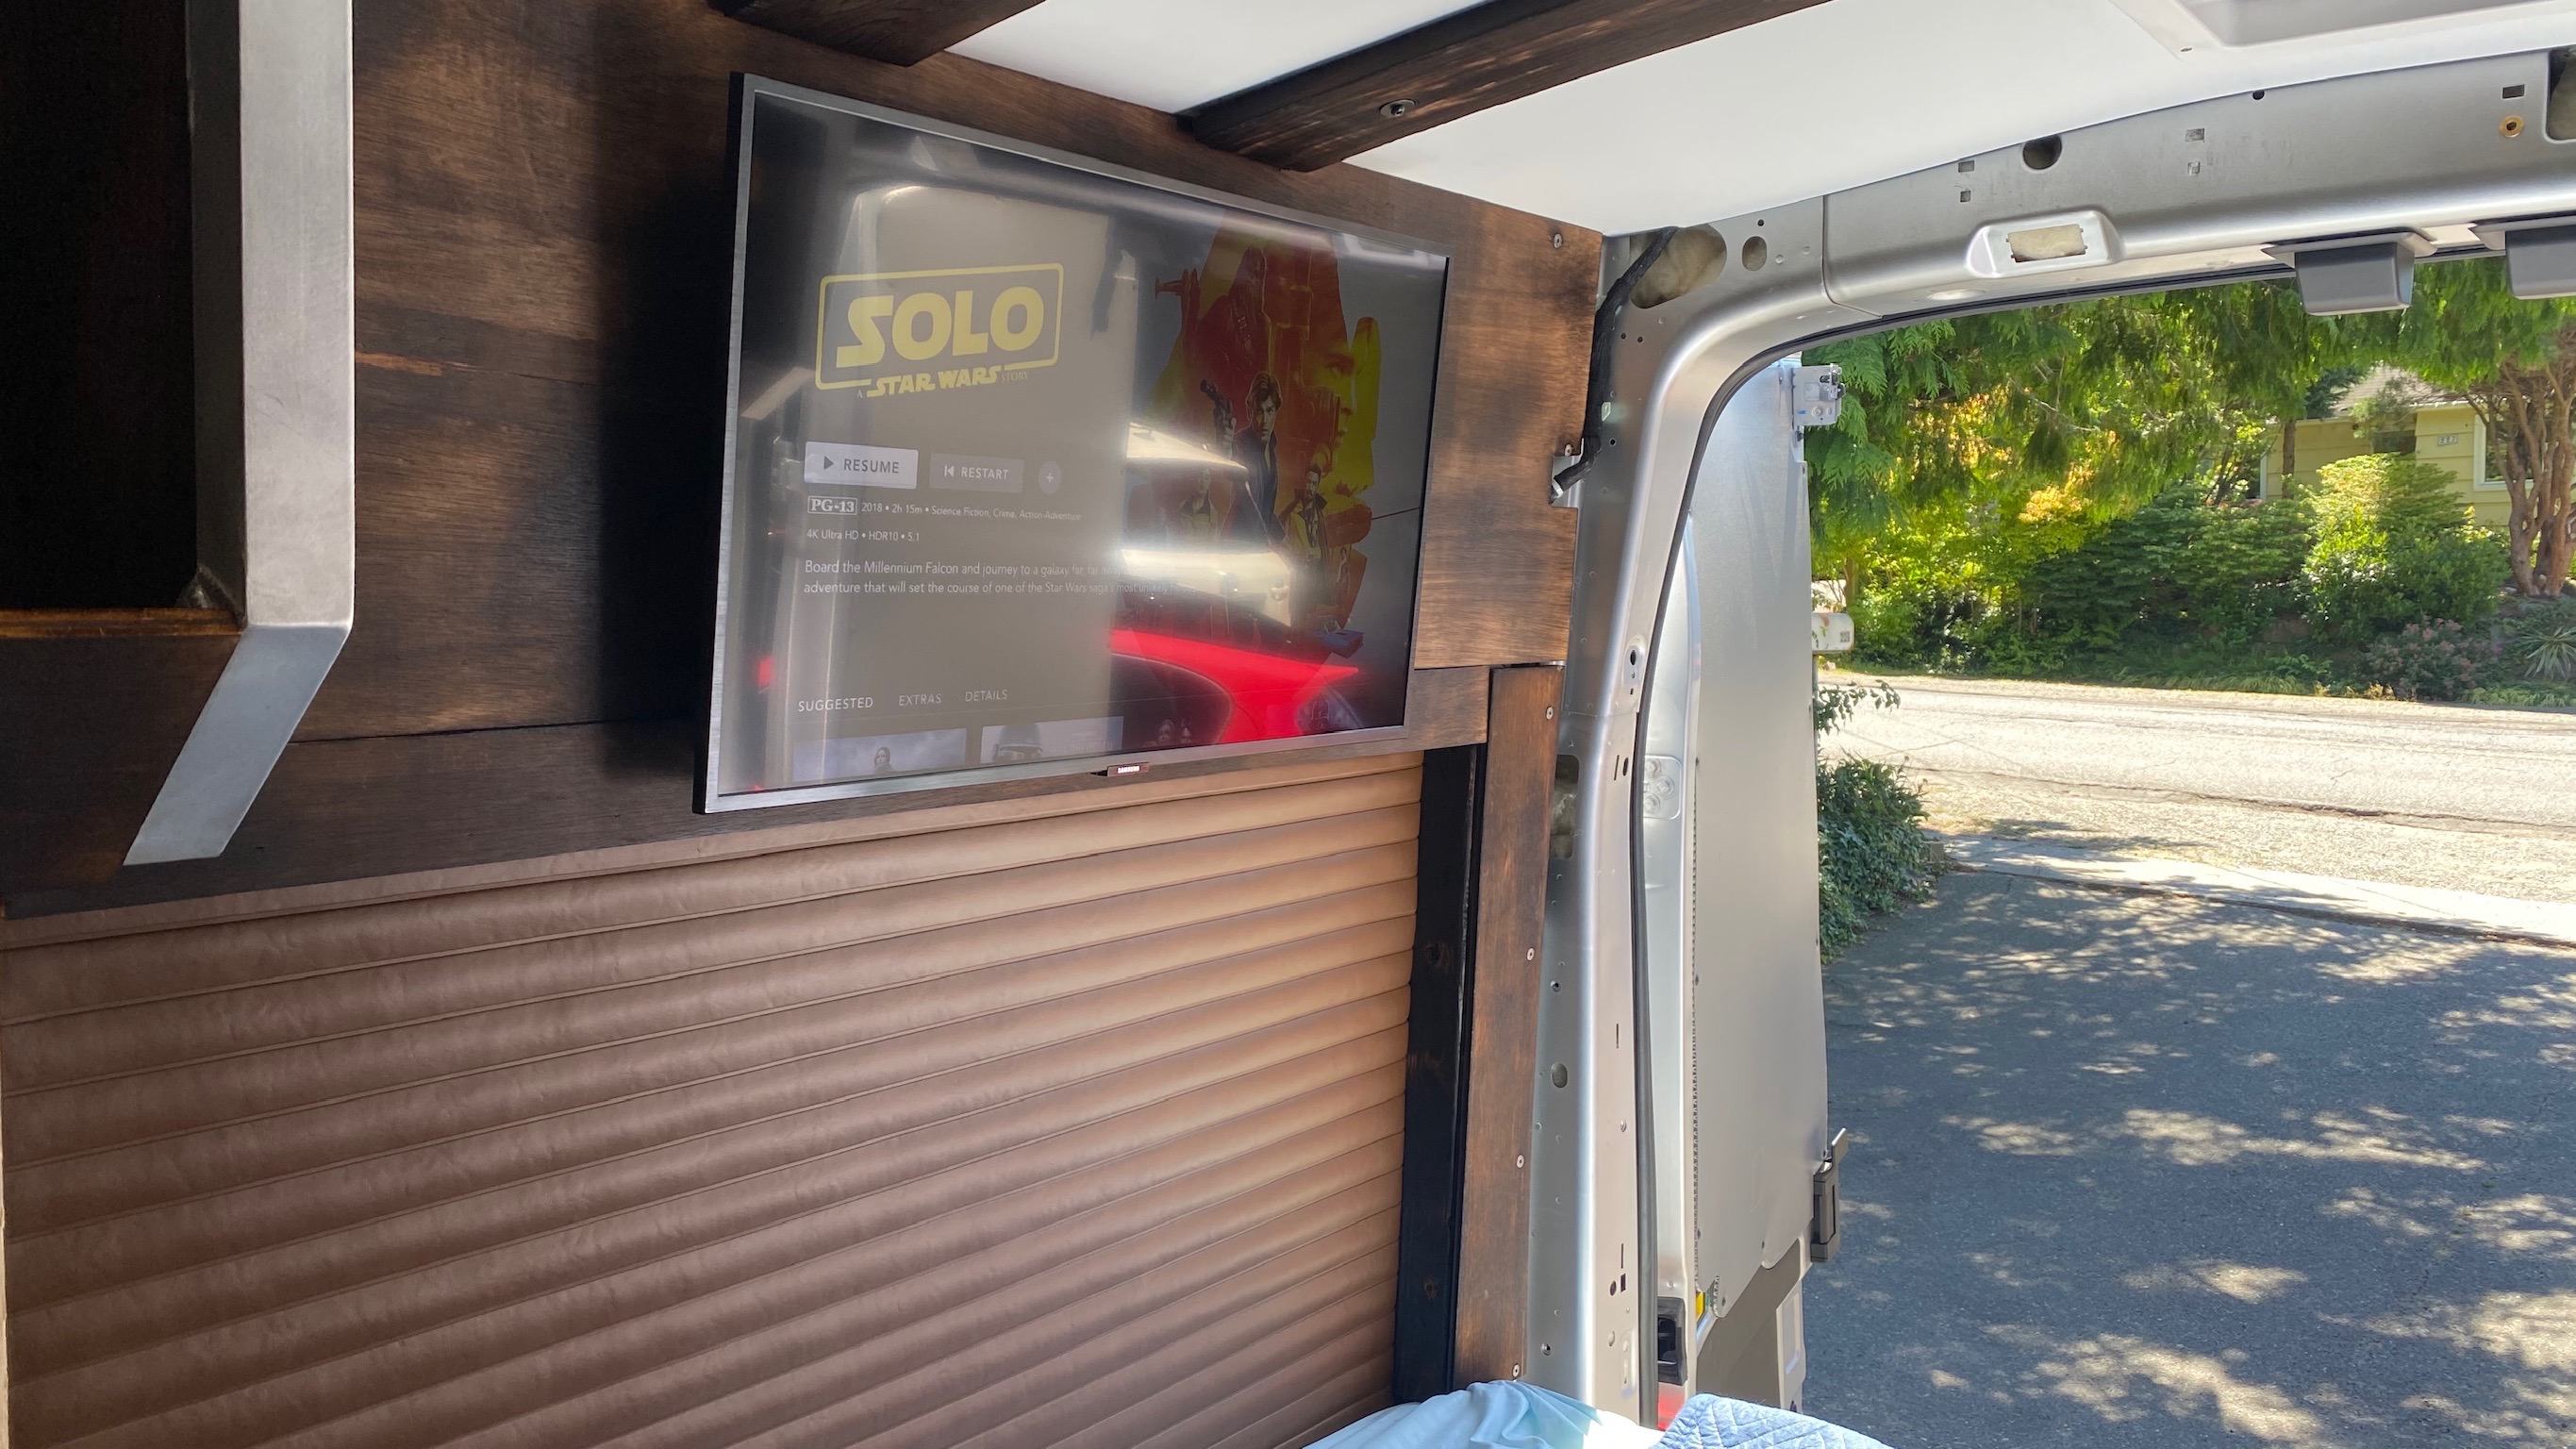
Even when traveling and out in the wilderness it’s nice to have the comforts of home and I really enjoy watching a TV show in bed before I drift off to sleep. As a tech nerd I wanted a great picture and ability to hook up video games to it and be satisfied with the quality. It’s pretty difficult to find a TV that fits these demands in smaller sizes. The one option I found was a Samsung QLED 4k 32” which totally fits the bill and is a SmartTV with the latest apps so I can stream content without any additional boxes or systems hooked up.
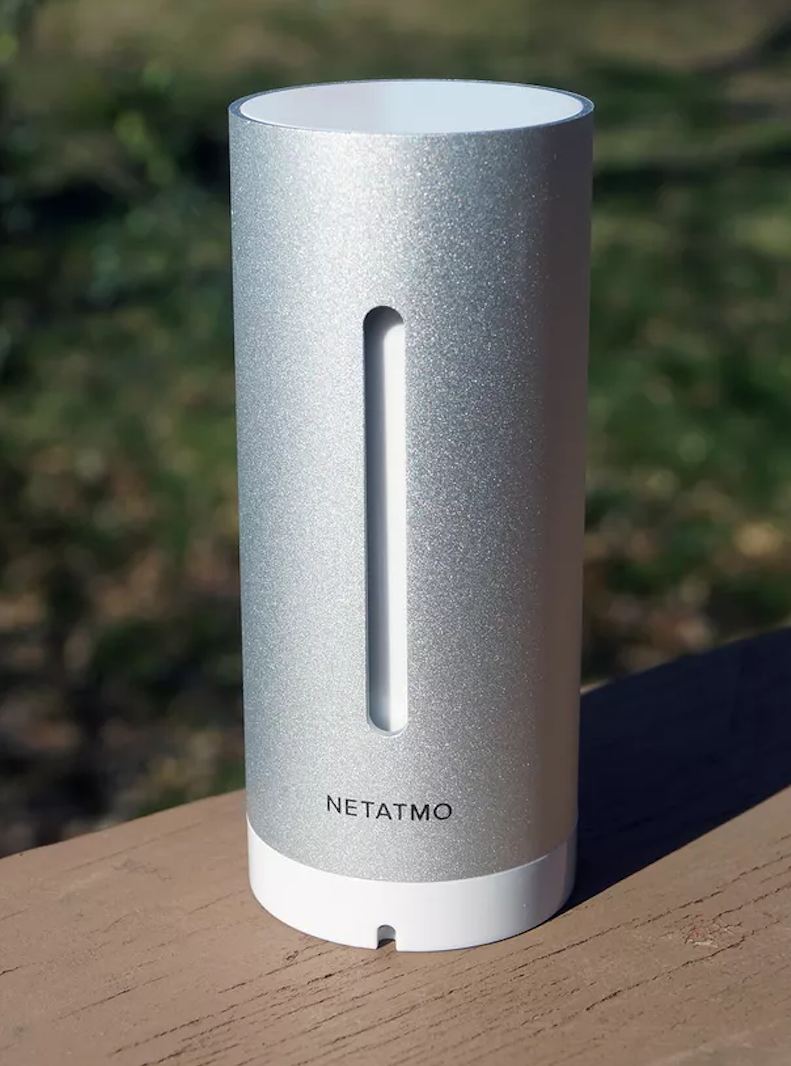
One last item that kind of goes along with heating & cooling but also checks some other boxes of things you might like to monitor in a van is a weather monitor. I wanted something smart that I could view from anywhere on my phone and found what I think is the best option by far the Netatmo Weather Station, this is such a cool setup. It’s a small aluminum cylinder the indoor unit plugs into USB for power and the outdoor unit takes AAA batteries which seem to last forever. I strapped the indoor unit to the wall inside using a rubber tool mount which luckily came in a 2 pack and I used the other one with my Webasto fuel pump. The outdoor unit I used a stainless steel pipe strap and a block of wood bolted to the bottom of the van with a PlusNut in the frame. With these in place I can measure the indoor and outdoor temperature, indoor and outdoor humidity, indoor CO2, and indoor decibel rating. All of these values are recorded and can be displayed on a historical graph viewable on the phone app or computer. This also integrates with Alexa for automation control and sends notifications to your phone when any of these values are high or low. For instance if it was very hot or cold out it can send you a notification and you can remote start the van via the FordPass app and regulate the temperature from anywhere. Of course you’ll need stationary on-board internet to use the functions which i’ll discuss in the next section.
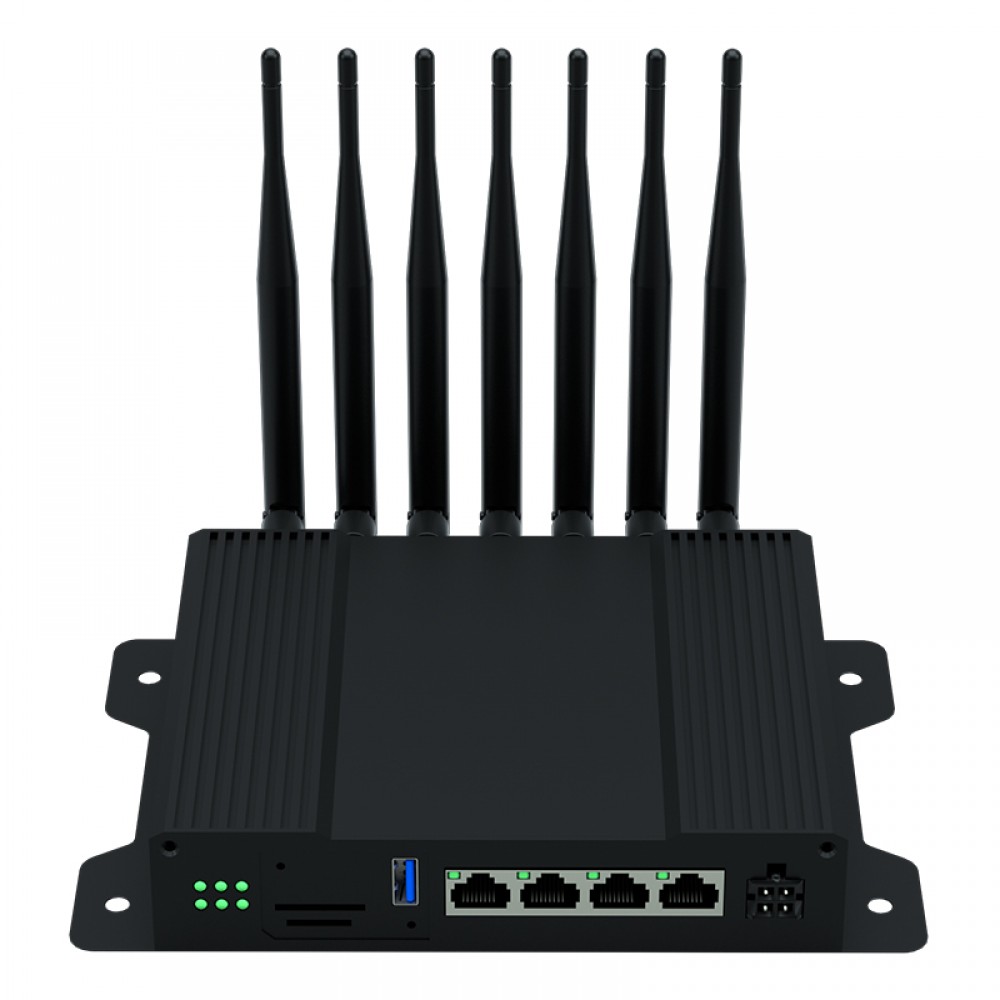
Mobile Internet
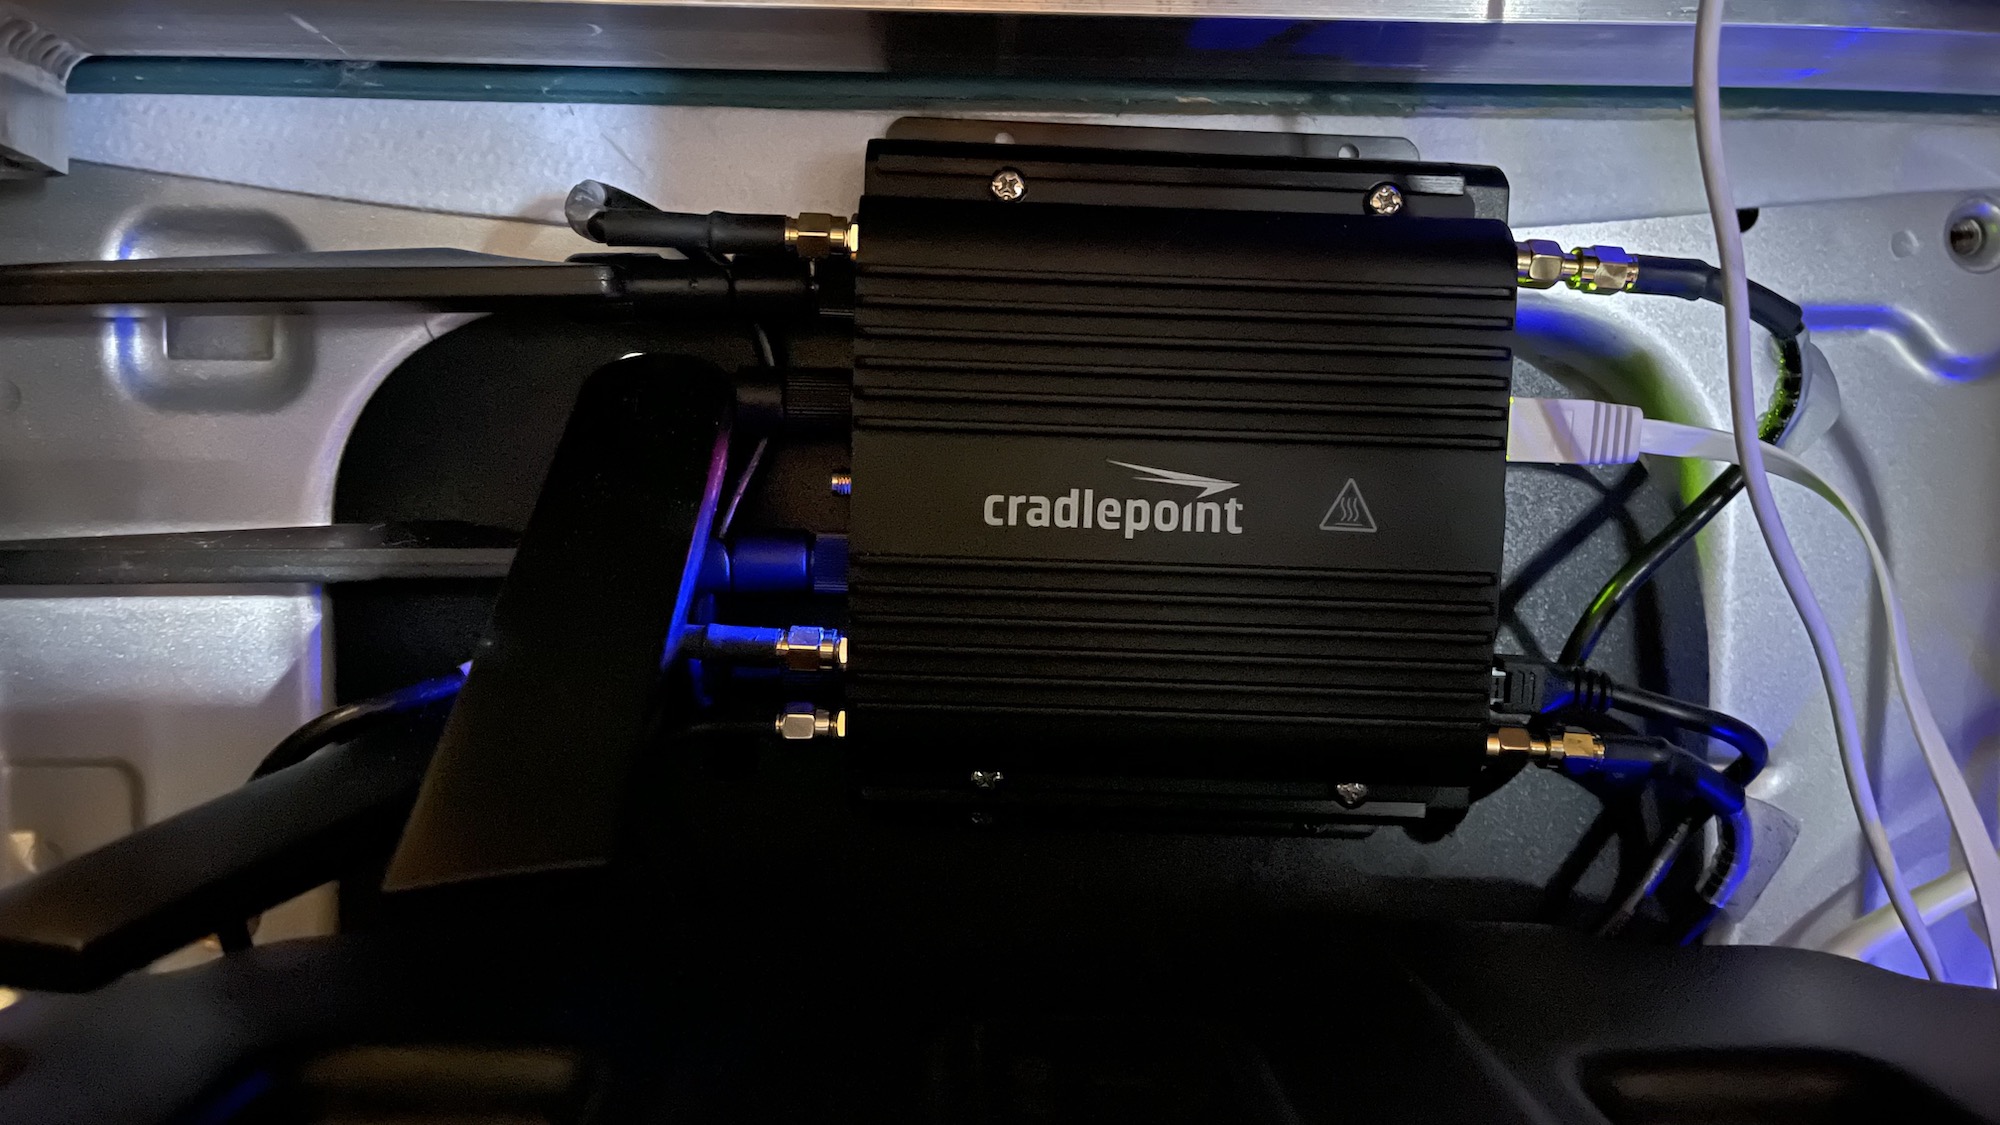
As a tech junkie I have trouble being disconnected for long so I set out to find the best solution possible. I initally went with a Cradlepoint IBR900-600m router and COR Extensibility Dock to add a second always-on 1200M modem. To get the best signal I installed a roof mounted MobileMark Antenna plugged into the router. A quick word about why a standard roof mounted antenna is better than a booster. Most people want the best signal and spring right to the conclusion they need a booster on their van. With a booster like a WeBoost you’ll actually hurt your data speeds dramatically and unless you are in a remote location where you’d get no signal at all or an unusably bad signal it is best to not use a booster. A roof mounted antenna helps you get a signal in remote locations and doesn’t adversly effect your data speeds. There is a great YouTube video that explains this topic in an easy to understand way I recommend checking out. If you are often in remote places and maybe just use a phone or tablet for your internet without a roof mounted antenna then a WeBoost might still be a good thing to buy. Since I bought these devices Cradlepoint has started charging all users $180/yr subscription to use their device which I understand from a business prospective but it does not make sense for someone using just 1 device in a van or RV. You can opt not to pay and let it expire and it will work but you are locked out of all configuration changes so if you have any issues you are stuck.
One plan I use is an AT&T Unlimited Tablet plan. This is a post-paid plan so you’ll need existing service with AT&T to add it to your account. The cost is $20/mo and you’ll need a celluar tablet to sign up for it and activate it before moving the SIM card to another device.
These plans are not intended to be used like this or in a router instead of a phone or tablet but it does work currently. At any time they may stop working or suspend your account. With further tweaks you can make your router appear to the provider that the phone or tablet is connecting to the network but that is pretty advanced and only certain devices are capable of it but in doing so you rule out any possibility of being suspended or having your internet stop working.
I built some devices to cover all these needs and work the best way possible. As soon as I finish testing them i’ll offer them for sale. I also may offer monthly celluar service with the device so you just order it, plug it in and are all set and never need to worry about obtaining the plans I mentioned, setting them up in the router and hoping they continue to work.

Appearance, Exterior, Suspension & Mechancial
When I set out with my build my intention was to be as stealth as possible and have no exterior windows. When I was almost finished I decided to have one window behind the drivers side seat and used a CRL Bunk Window.
I did some exterior upgrades including adapting a pair of the OEM Bi-Xenon HID headlights to my cargo van as you can only order these on a passenger or crew model. I felt like lighting was important and halogen headlights just don’t put out enough light. To do this I needed to make a harness, at some point I may offer that for sale on my site. I added yellow LED foglight bulbs. This combo puts out a ton of usable light.
To help step up in the rear grabbing things and to prevent someone from bumping by bumper I got a Weathertech hitch step.
To make it easier getting in and out of the sliding door I installed a Amp Research powerstep it folds up automatically keeping your ground clearance which is great.
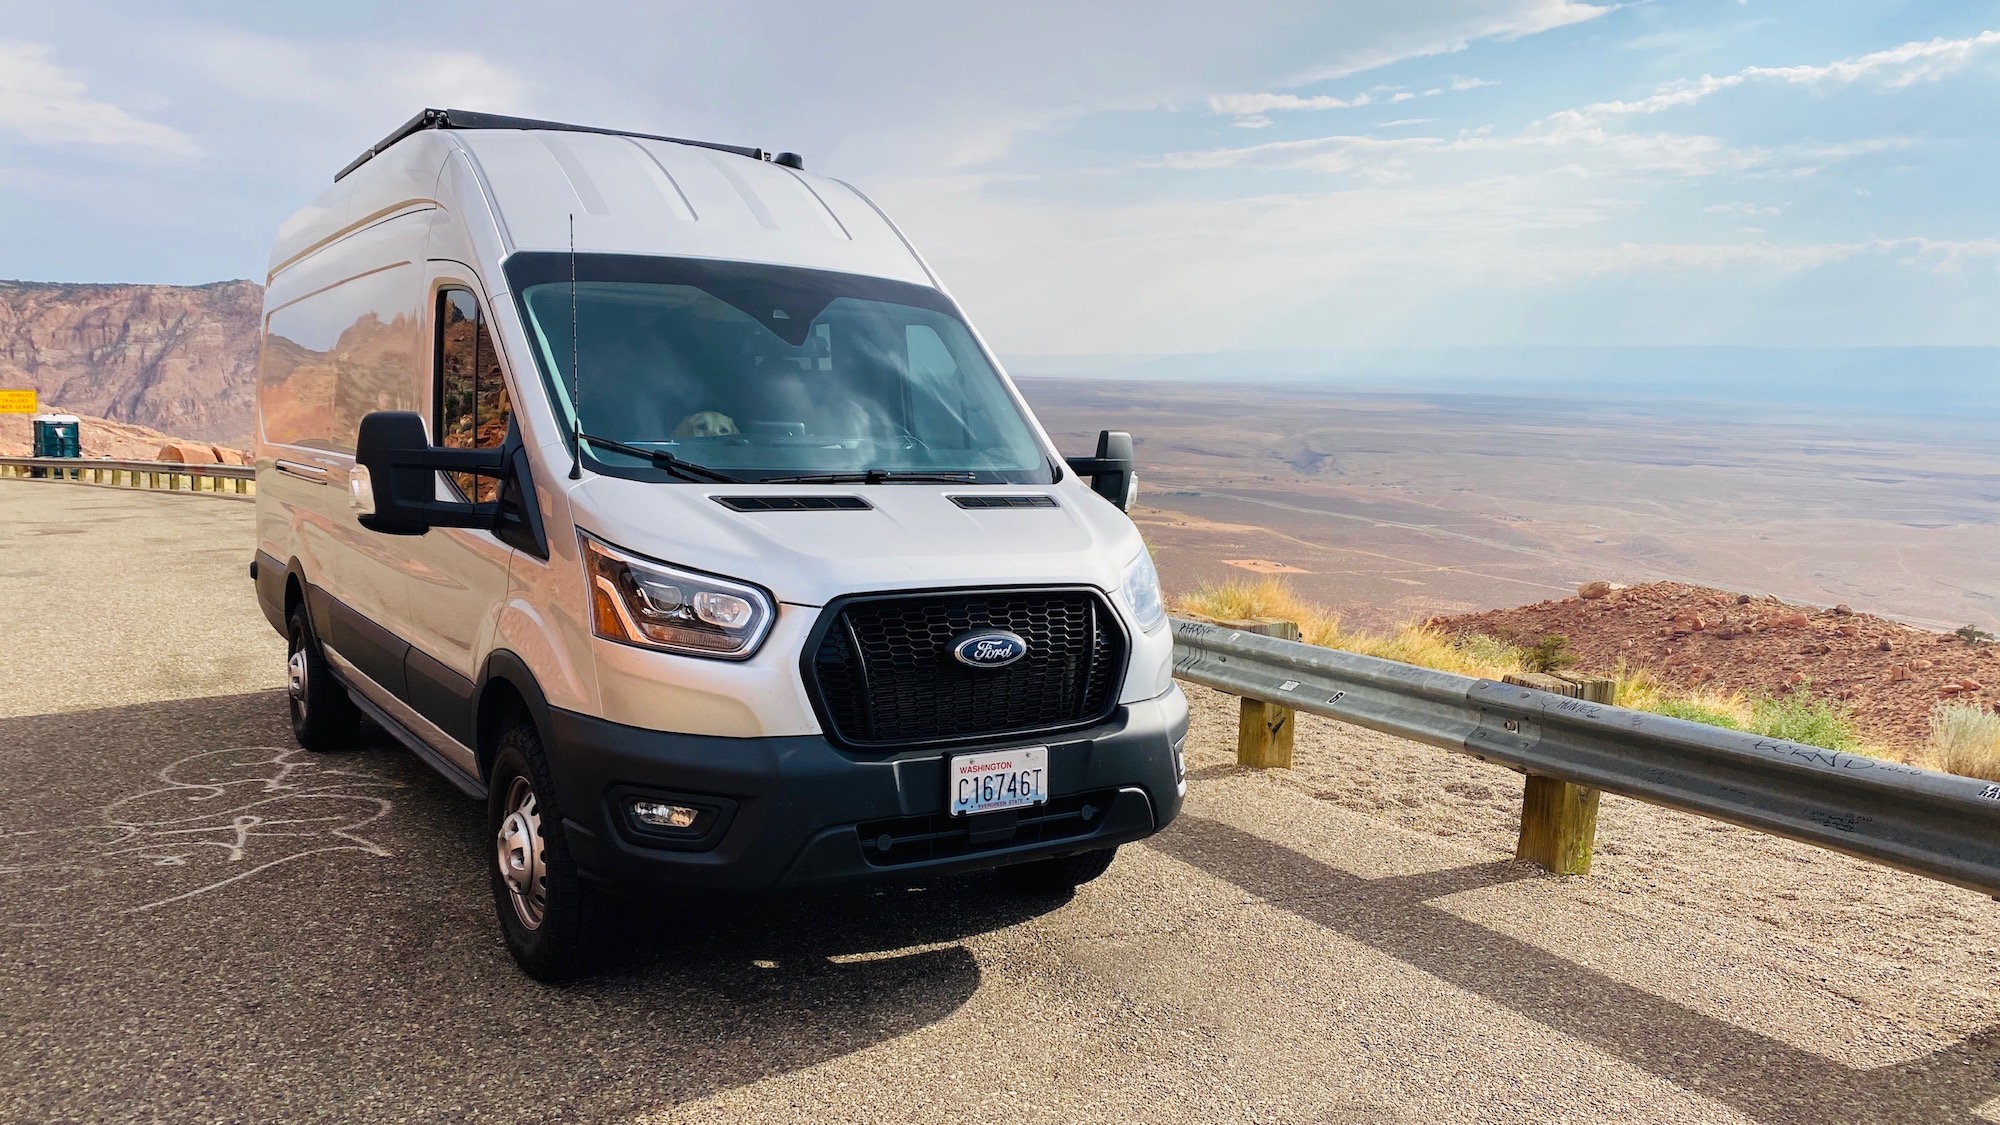
For suspension I wanted a bit of extra clearance and installed a Van Compass Topo 2” Lift. I went with the blue spring option as I haven’t added a ton of extra weight and wanted a factory like ride. I wanted to improve things so I opted for the B6 front struts but that added some extra height which ultimately caused my passenger side CV joint to fail from binding. If you are thinking of lifting an AWD transit I highly recommend you avoid the B6 front struts with the kit. Beyond that i’m happy with the kit now. I did add B6 shocks on the rear myself as well as the Van Compass rear shock relocation kit to add additional ground clearance. On the rear I also added Sumo Springs which helps a TON with sway while on the highway. I would 100% recommend adding some.
Another item I added from Van Compass is their front skid plate. I have seem some wild things end up directly in the intercooler on these vans being so exposed in the front and think this is a worthwhile upgrade even if you don’t plan on doing much off-road.
Wheels and tires I was using stock wheels and 245/70R16 Cooper All Terrain tires which is the perfect size if you don’t plan on doing a lift. They fit with no modification and add some extra height and ability while off road. I put these on on the way home after picking it up new at the dealership. Eventually after the lift and other items I went for some Ultra 003 Wheels which as i’m writing this is the only available option for the AWD Transit and 245/75R16 Falken WildPeak At3W tires. These tires are the best! Quiet and super capable, three-peak mountain snow flake rated so they are great in the snow and ice as well. At stock height this size should fit with just rolling your pinch weld over and no cutting. This is one of the most common tire sizes around too so it’s a good choice for availablity if you ever needed a replacement. Van Compass recommends up to 265/75 but I really didn’t want to push the limits and stuff the wheel wells with tire. That also requires a ton of hacking up of the pinch weld area.
Under the hood I added a catch can as its important with these Ecoboost engines. They can get a lot of build up on the valves being only direct injection. Which could prematurely cause engine problems. This is cheap insurance against that and only requires checking it and draining once in awhile.
A great way to customize a lot of the features on the van is using Forscan which you can get for free over at forscan.org. You just need an adapter to plug in the OBD2 port. You can make adjustments to allow LED signals, make it so the vehicle stays dark and doesn’t have the lights turn on when being unlocked and all kinds of great features.
To keep heat down and add privacy I tinted the side windows with WA state legal high quality ceramic tint. I also tinted the front window with 80% tint which isn’t really noticable but helps quite a bit with heat rejection in direct sun. It’s not a replacement for a shade, but it helps!
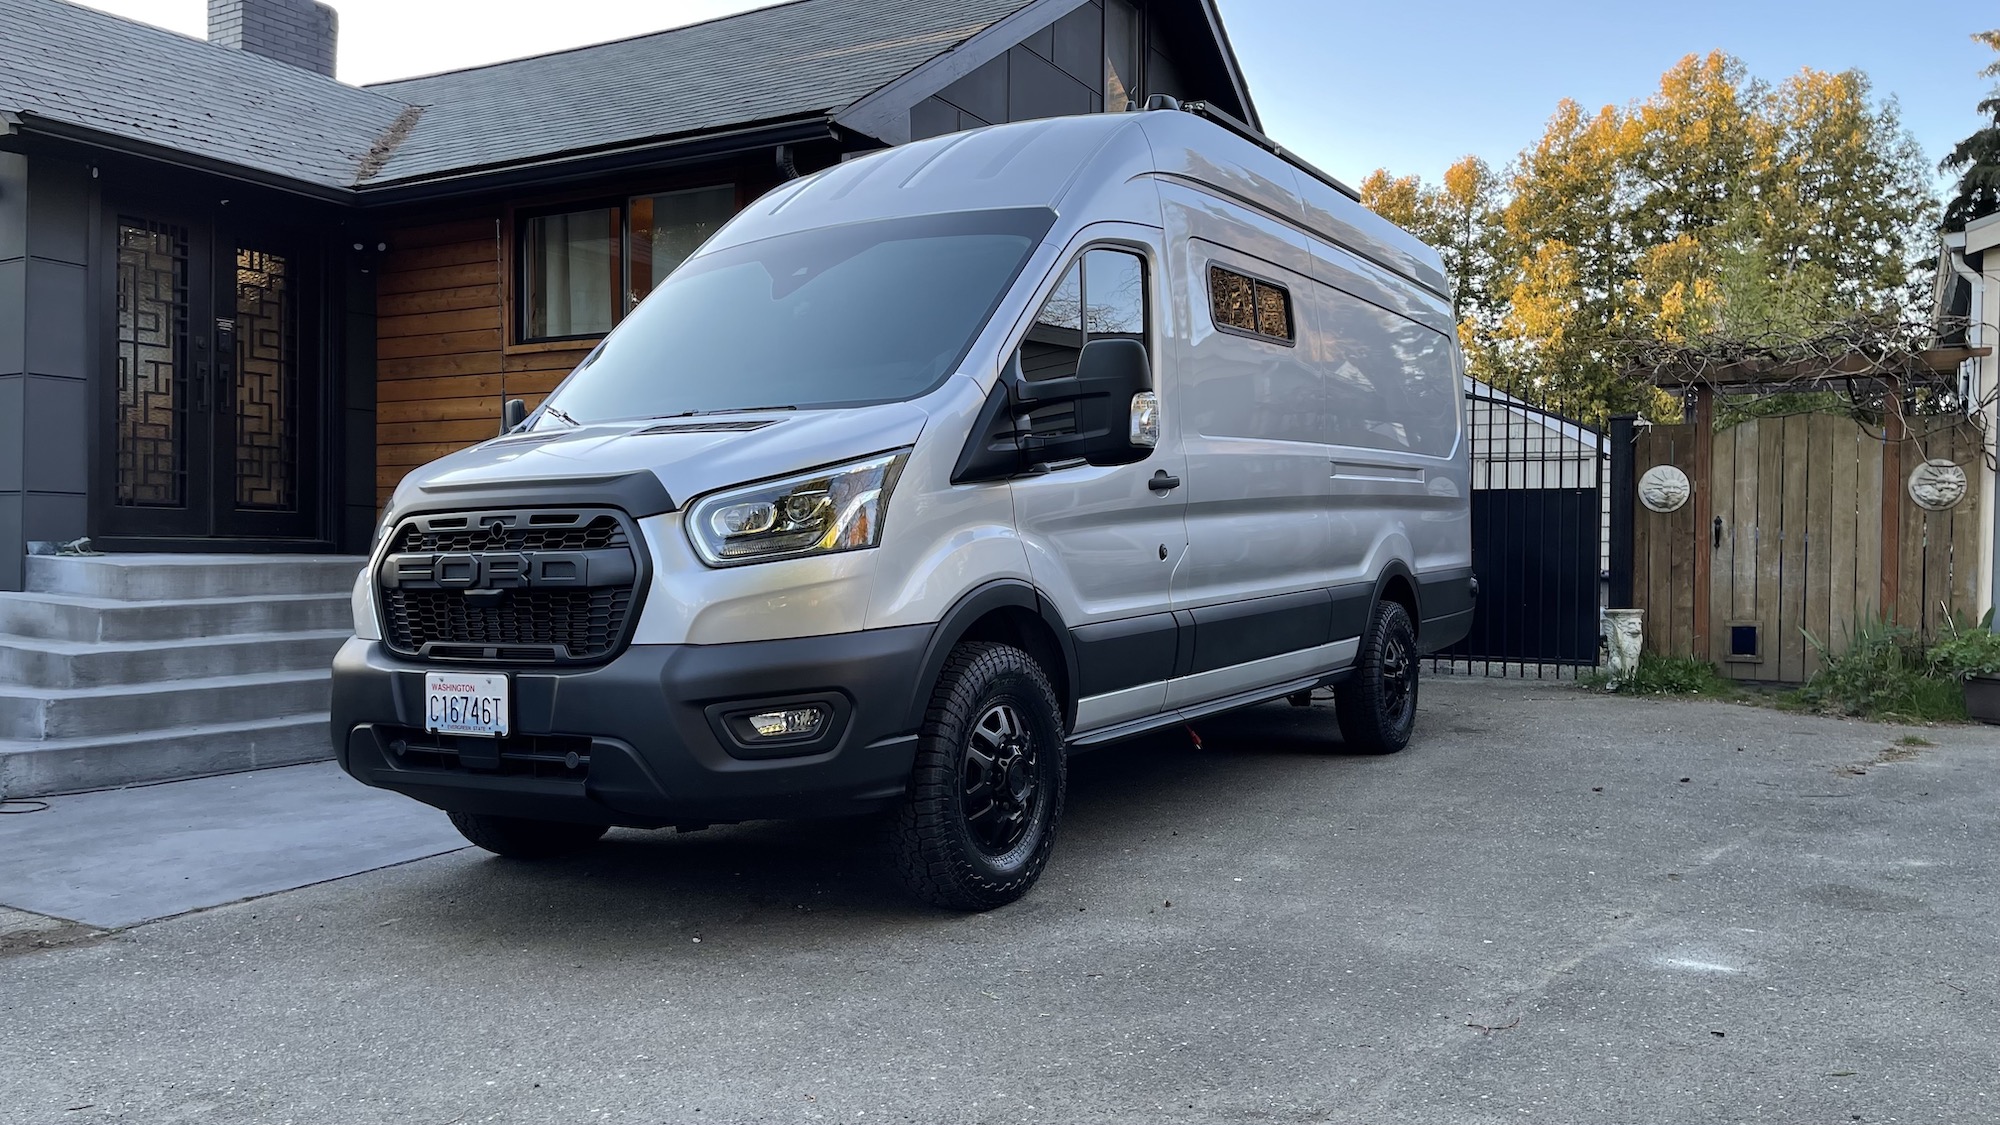
Last upgrade I did was a Ford Transit Trail Euro Spec grill. I ordered it from eBay you’ll just need to find a seller participating in the global shipping program so eBay can forward it to the USA for you. Around the same time I did a Terra Wagen hood spoiler which I thought might help prevent rock chips on the hood and I think it looks pretty cool. At this point I realize i’m no longer stealth at all, but have come to realize it doesn’t really matter that much and unless you go to great lengths to look like your average beat up plumber’s van a person keyed into people sleeping in vans will know someone might be in there when you are trying to stealth park for the night while traveling.
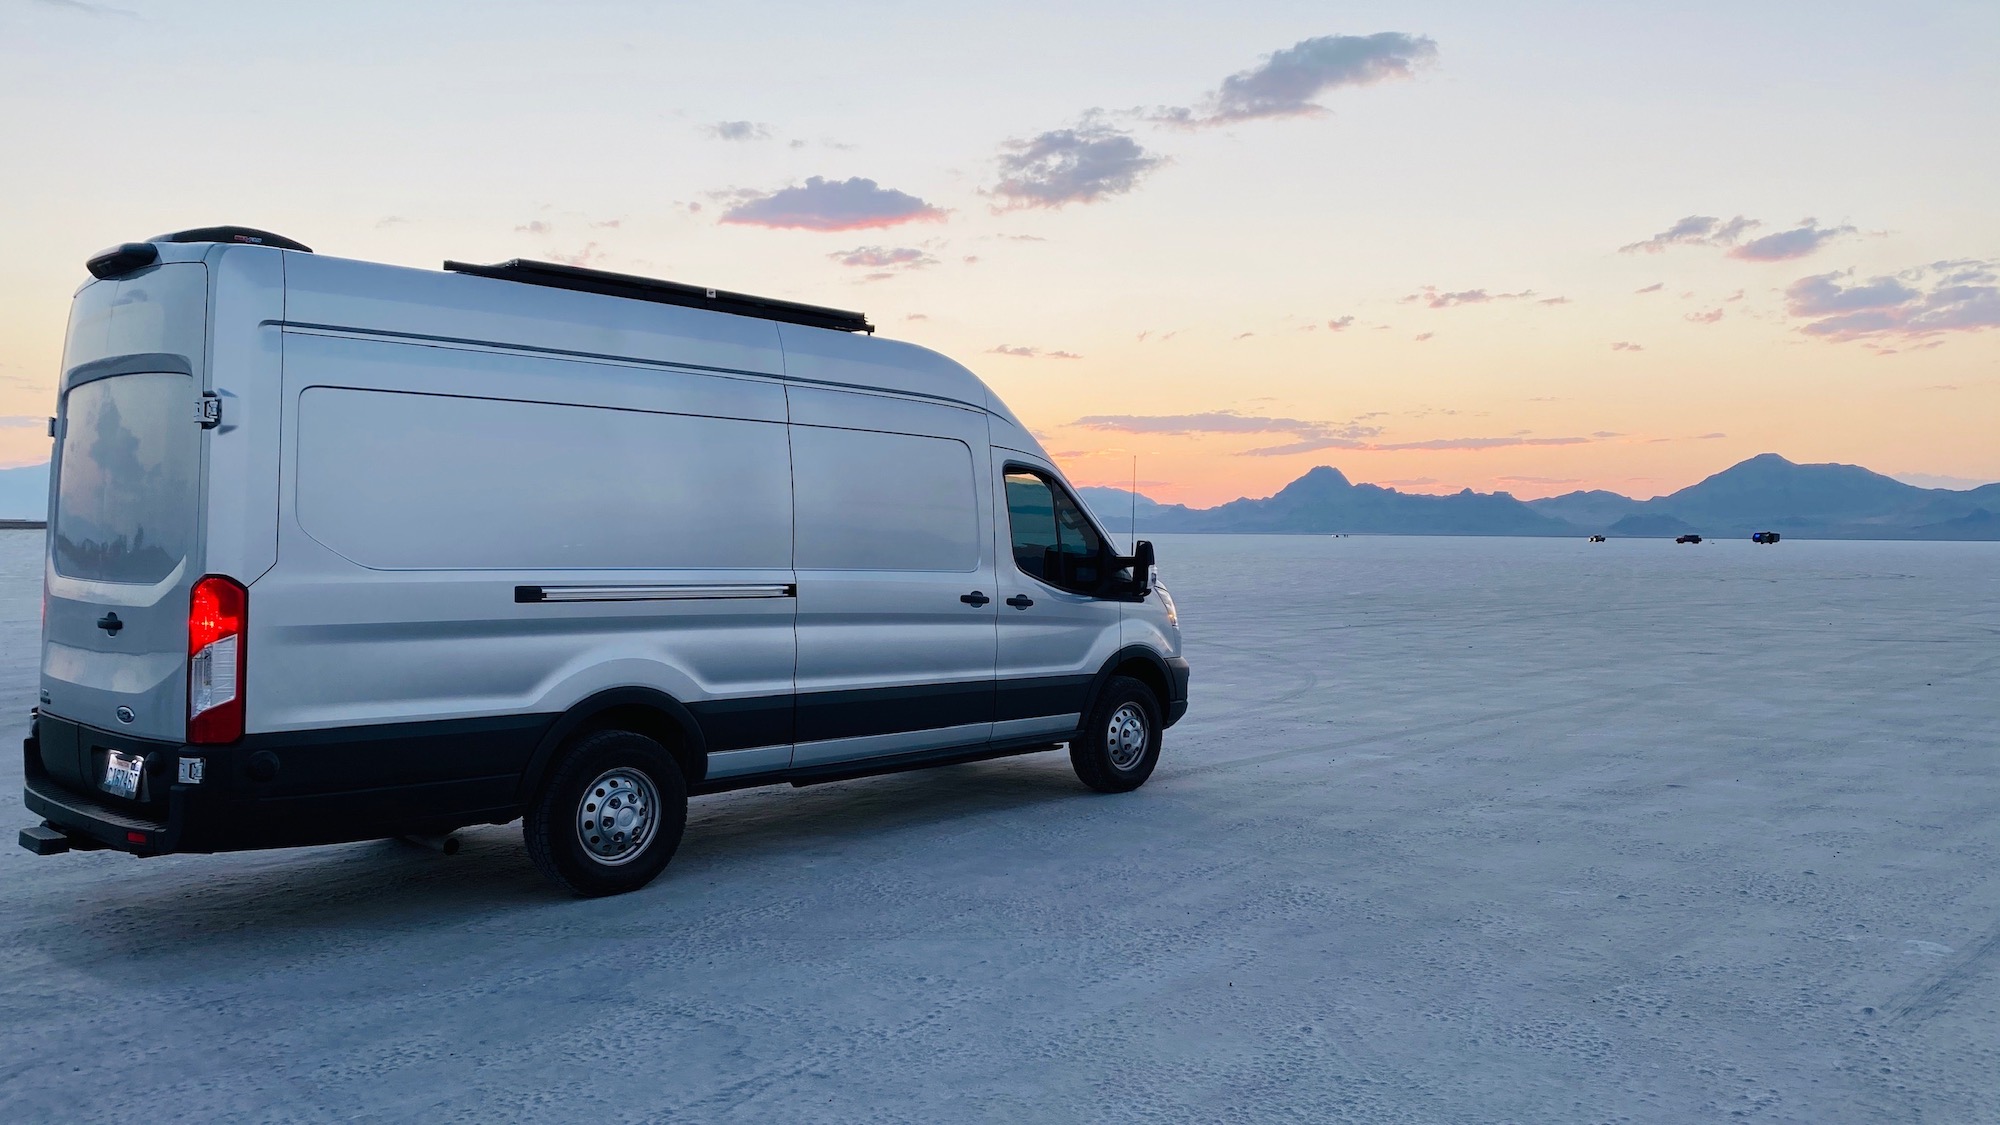


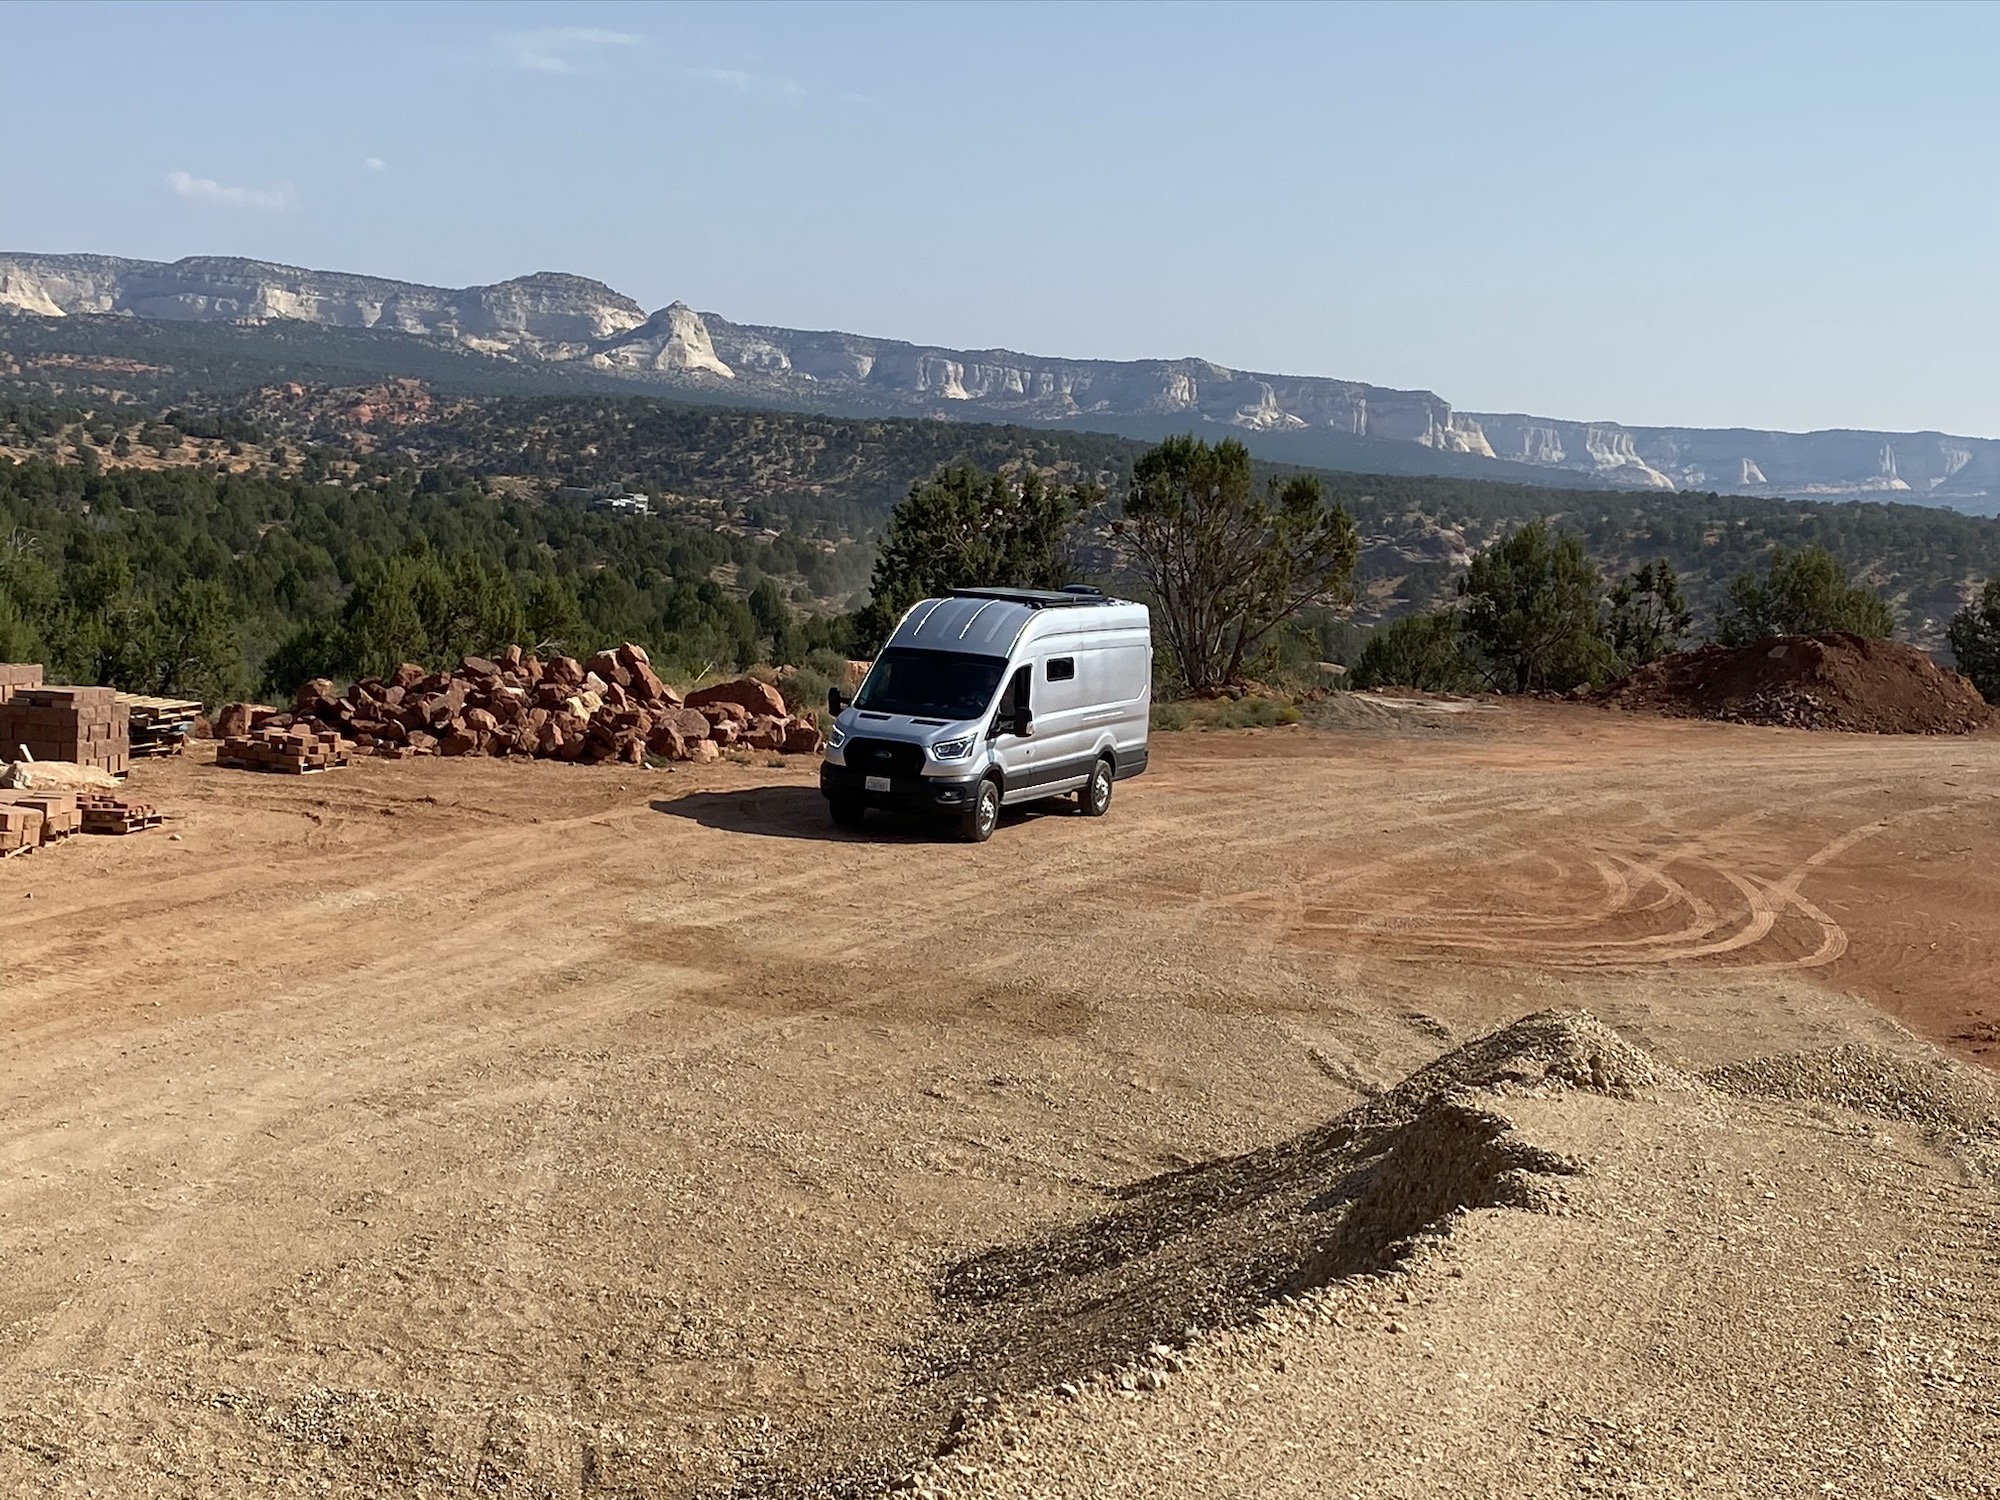
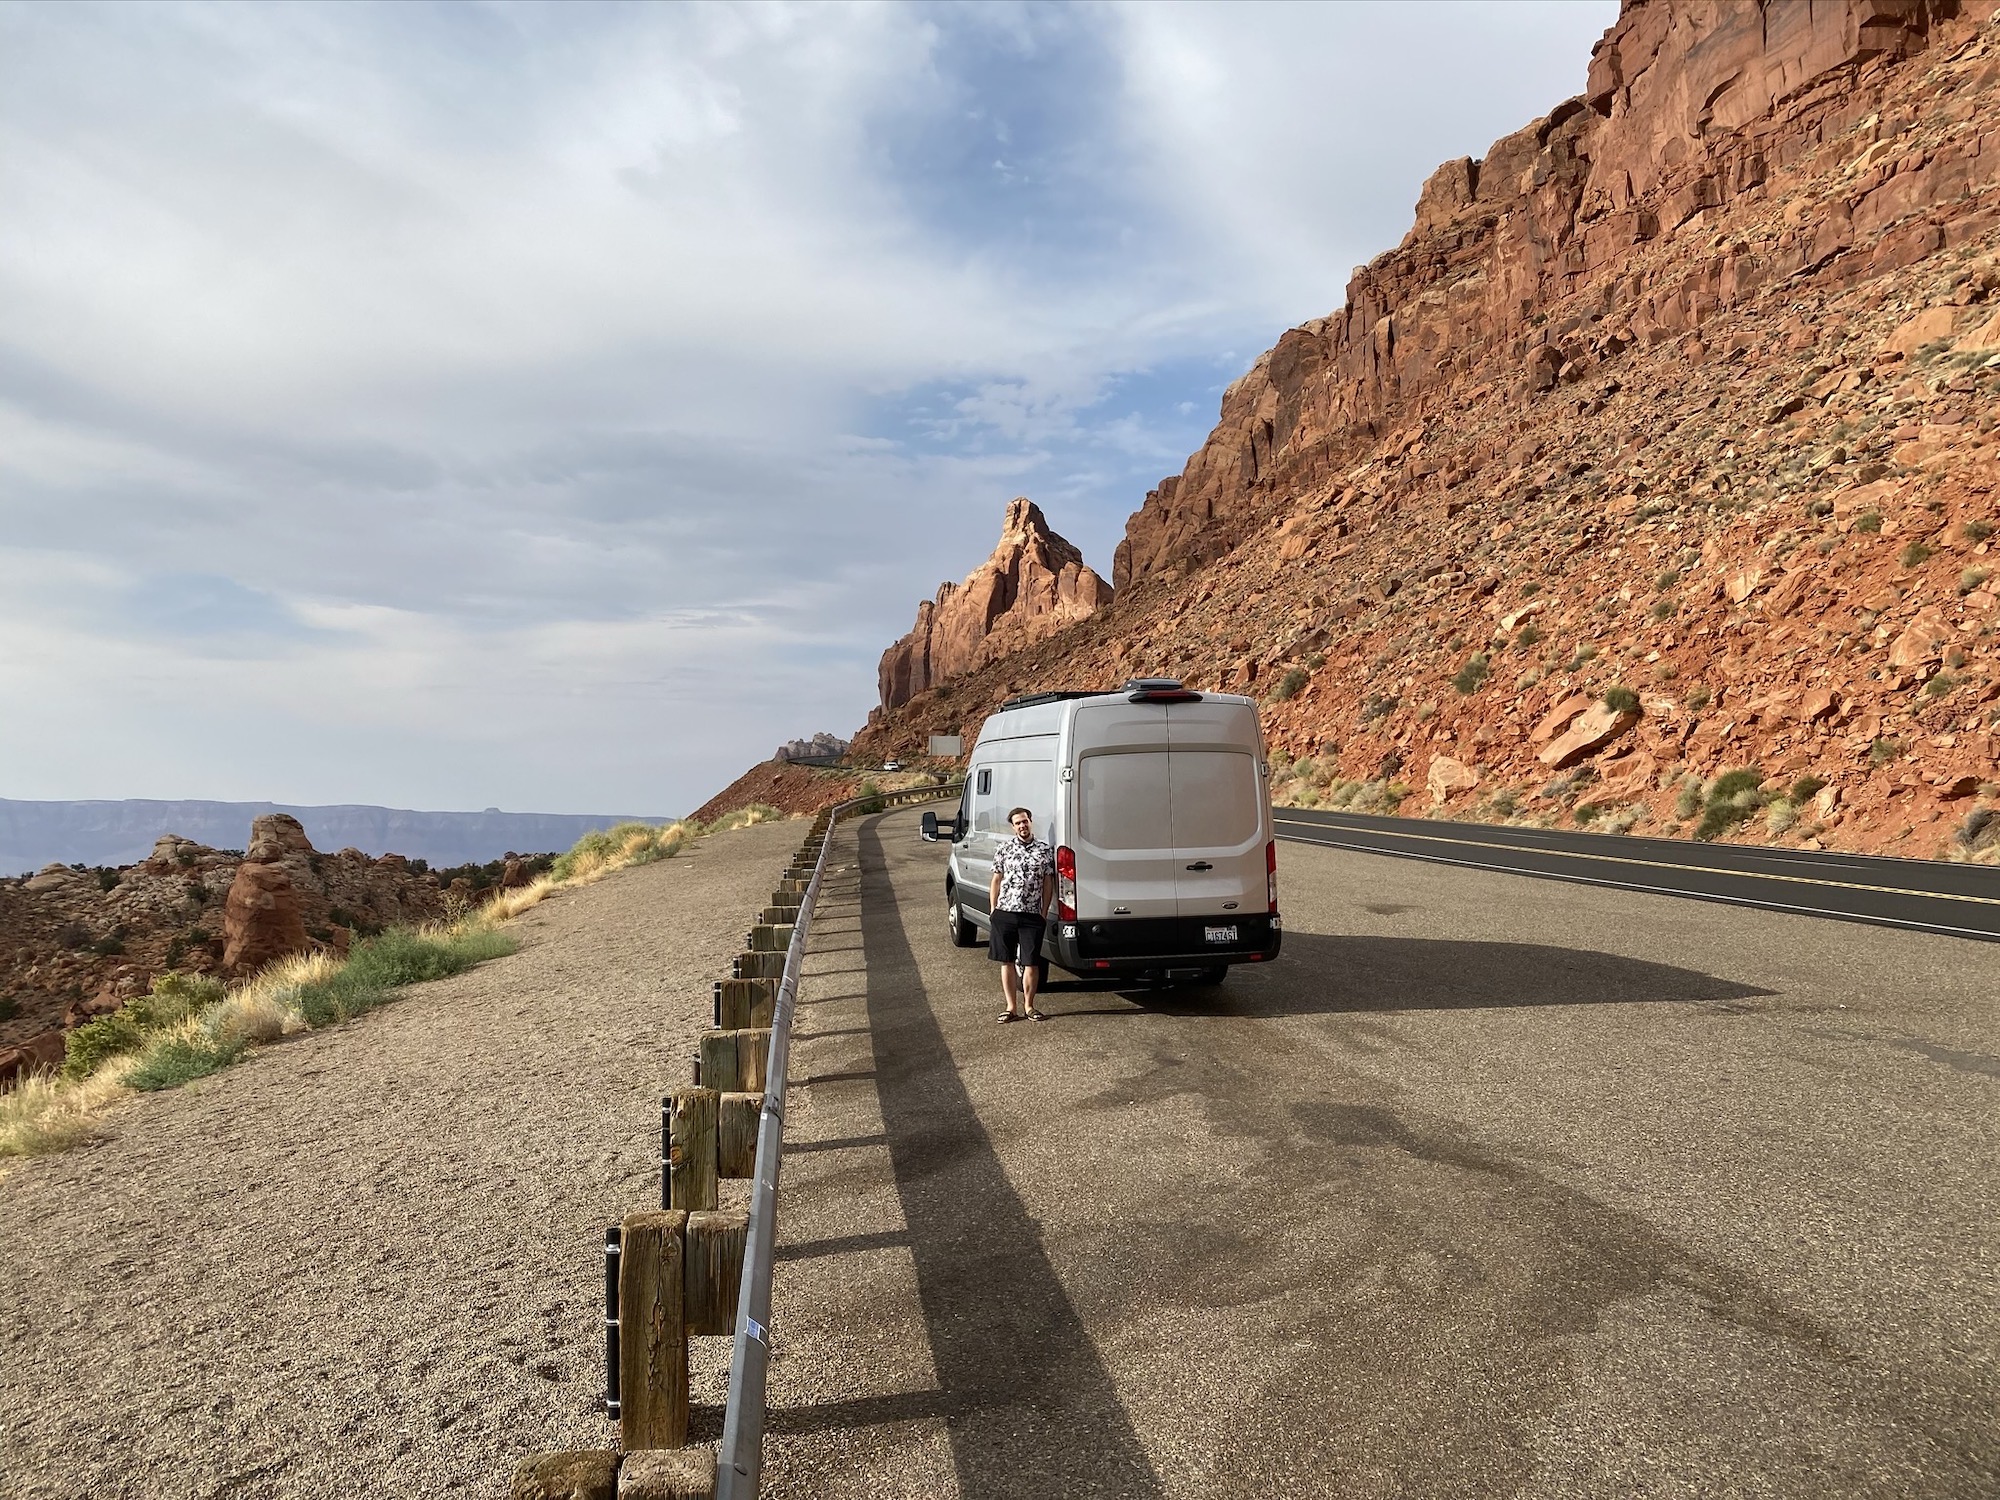
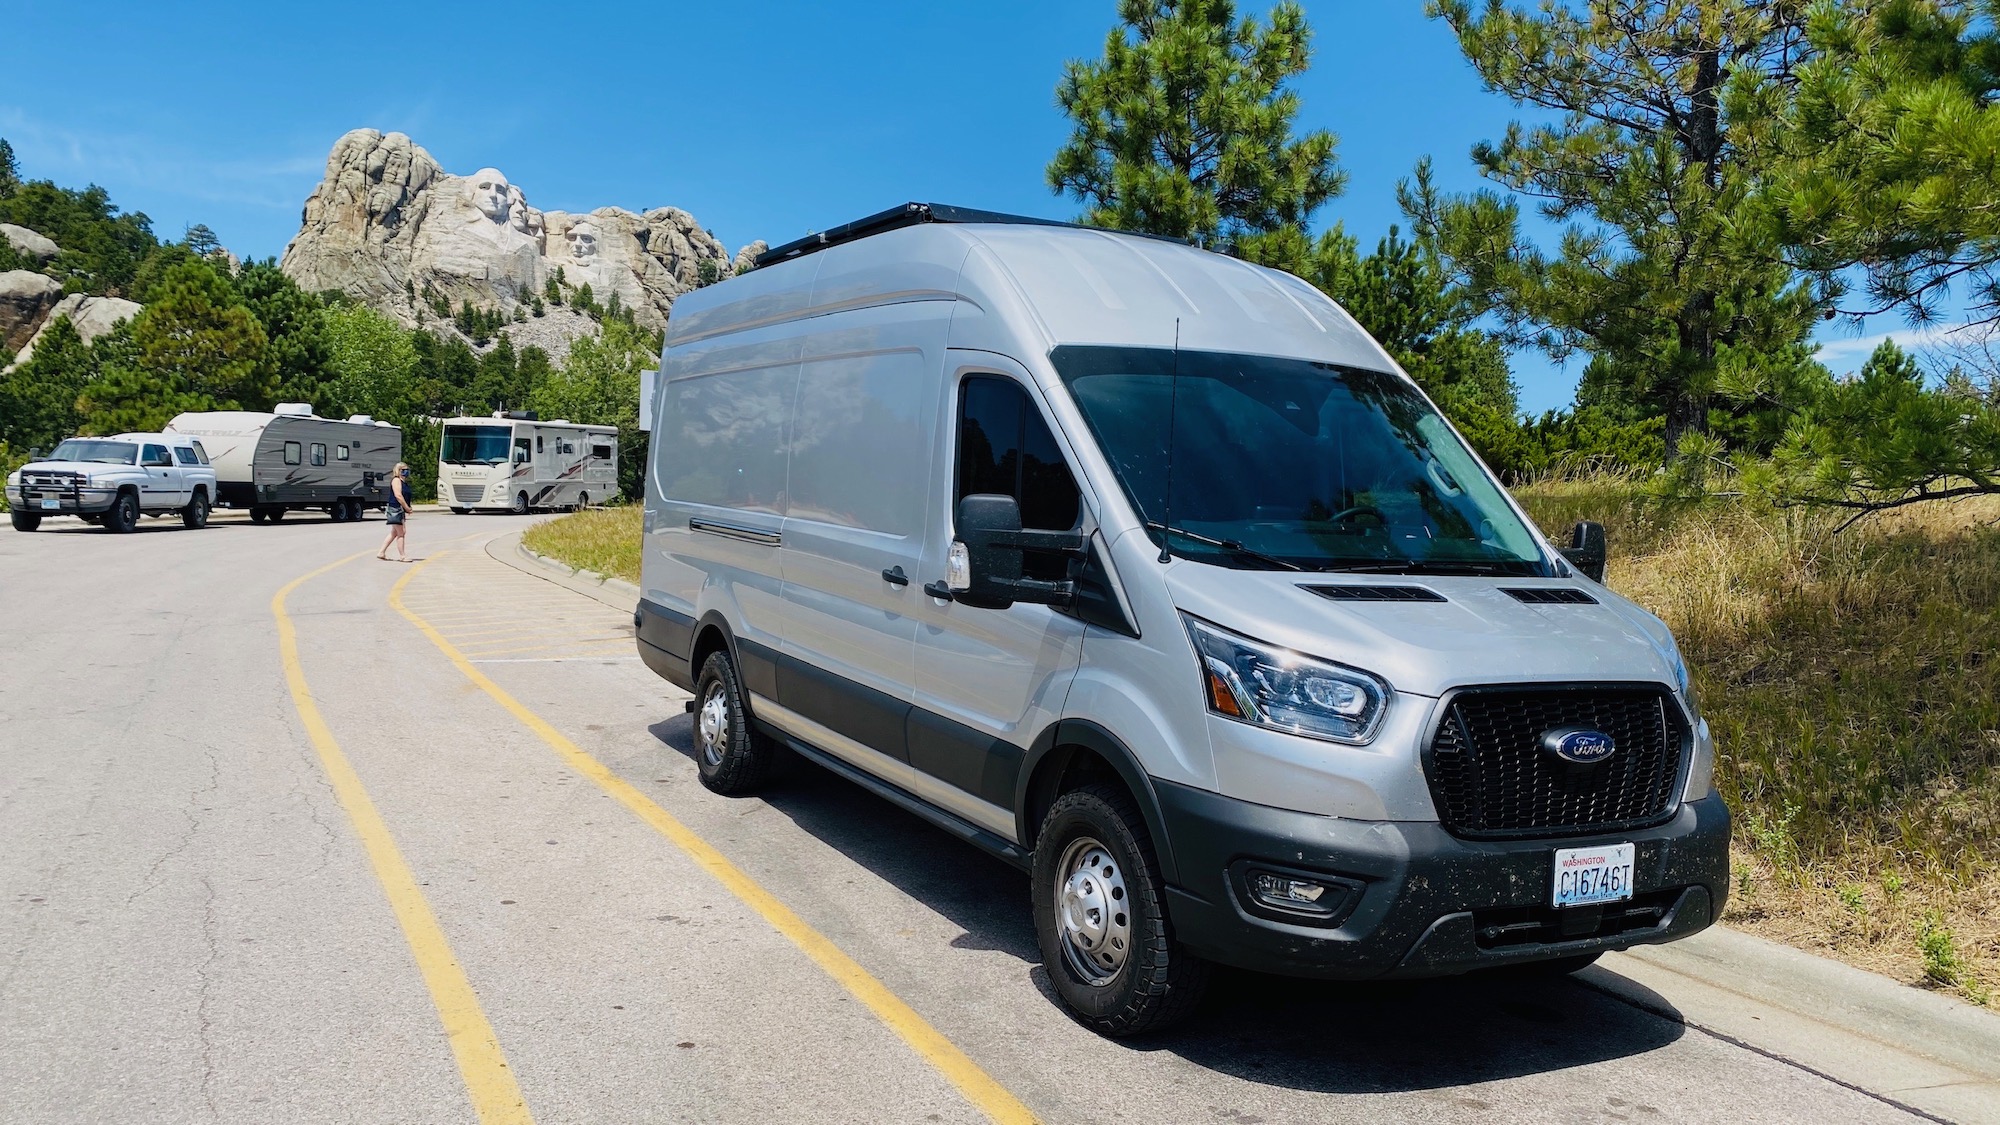
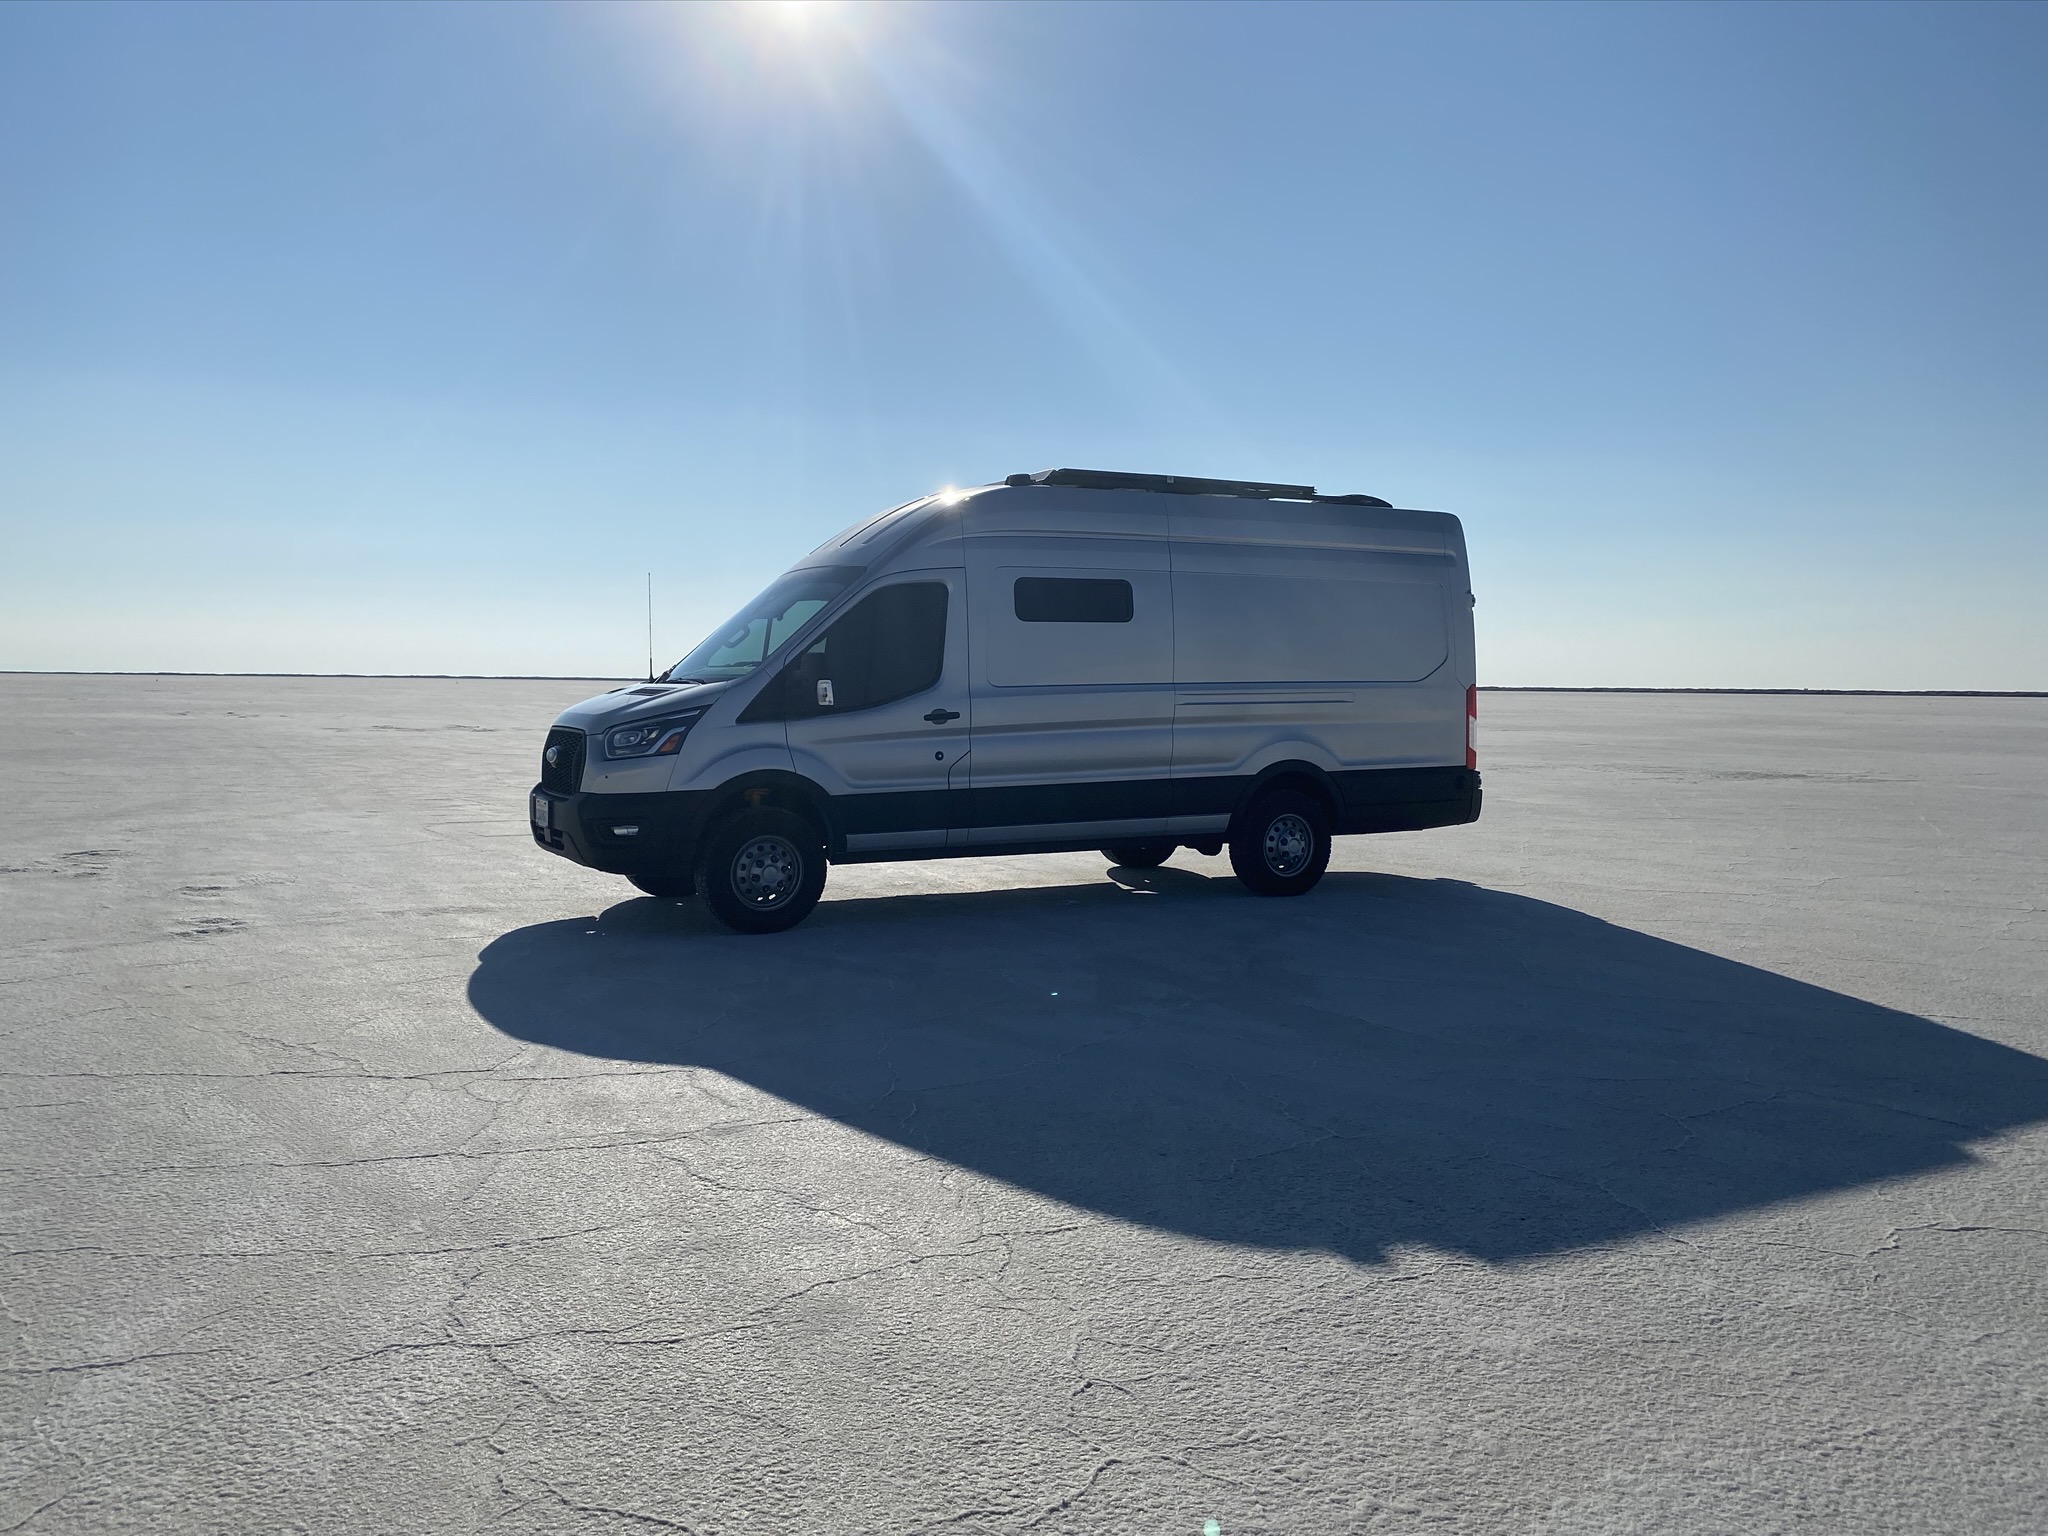
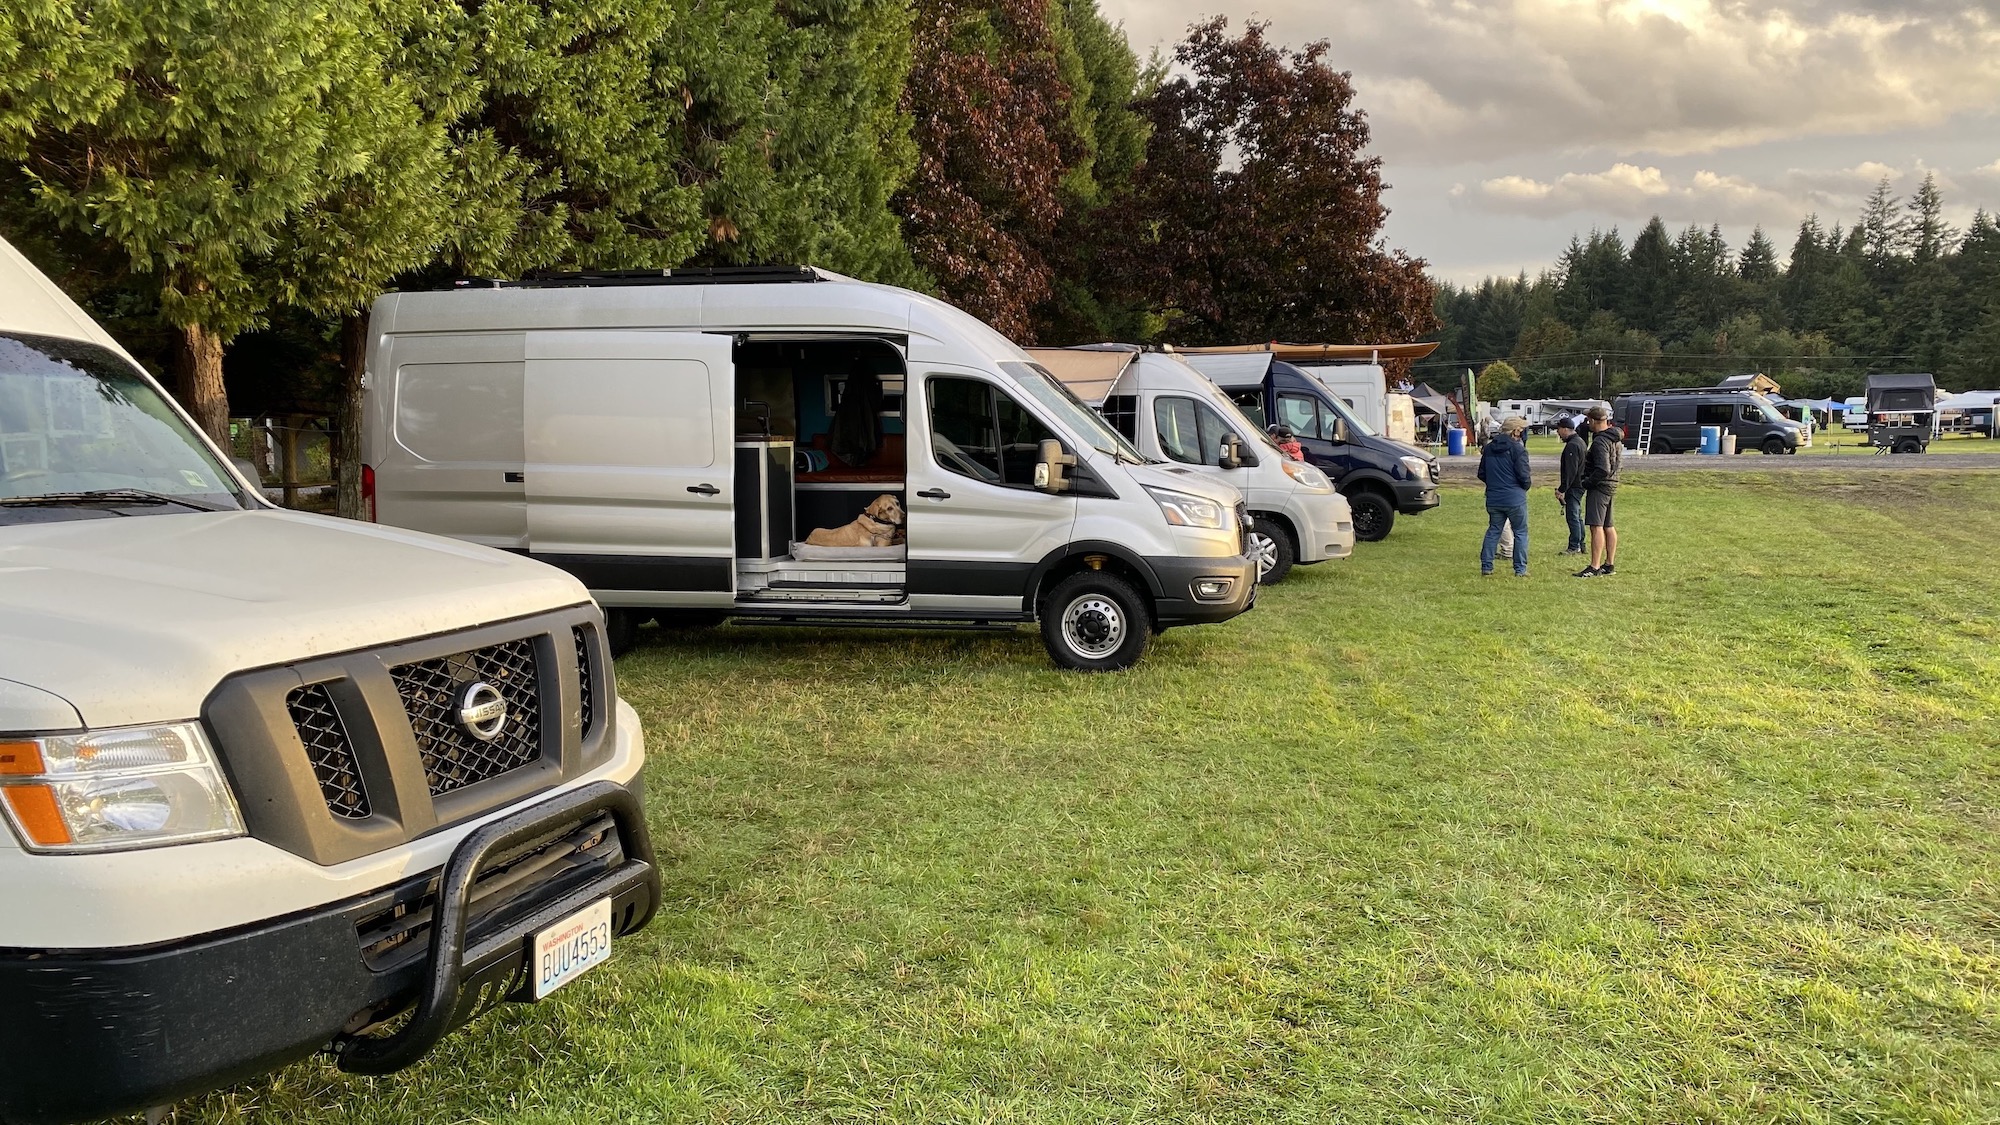
Adventures
I’m super happy with the van all and all, when you are driving it you really forget you are driving something so big and it feels more like a car. All of the extra saftey and driver assistance features aren’t a replacement for good driving habits but they do take the fatigue down when driving long distances. I hope to have a lot more adventures in the future but i’ve got a good start already.
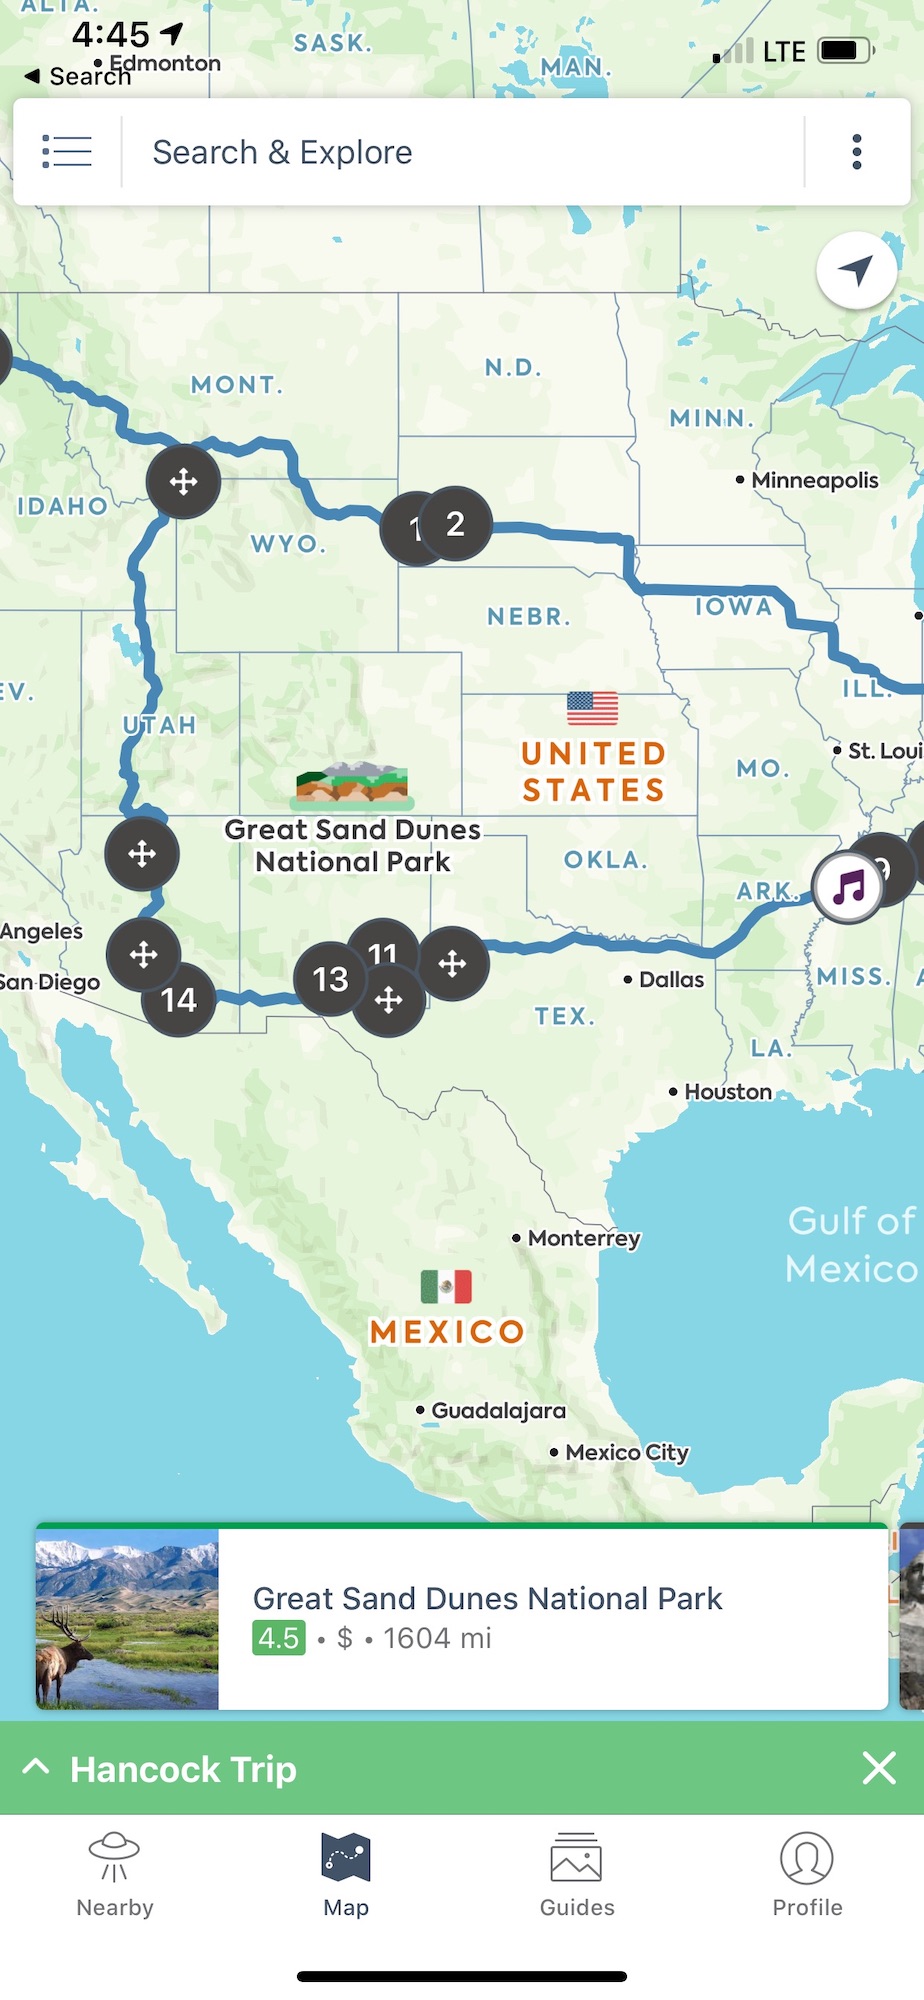
For finding some cool places to go and plan a great road trip I recommend the site/app Roadtrippers. They have a ton of places to discover on the map that I would have missed without using it. The yearly membership is well worth it if you are planning a long trip. Use code BTR5QTP for $5 off.
Another cool app I used in our travels was Hipcamp. One night we struggled to find a place to stay and tried it out. For a small amount of money we booked a spot and got to stay in a spectacular backyard with a treehouse, power and water. It turned out to be one of the coolest places we stayed the entire trip.
Besides that you can get away with staying at a Love’s or other truck stops and they usually have showers if you need one which are really nice. You can also get away with staying in the lots of some Walmart, Cracker Barrel and Cabella’s/Bass Pro Shop locations. The Cabella's and Bass Pro Shop lots were some of the nicest lots we stayed one with a nice pond we were able to park right next to and always quiet. Another good resource is the iOverlander app. These often have feedback from others to help determine details about the location that are helpful.